Upgrading the Hella MicroDE lights

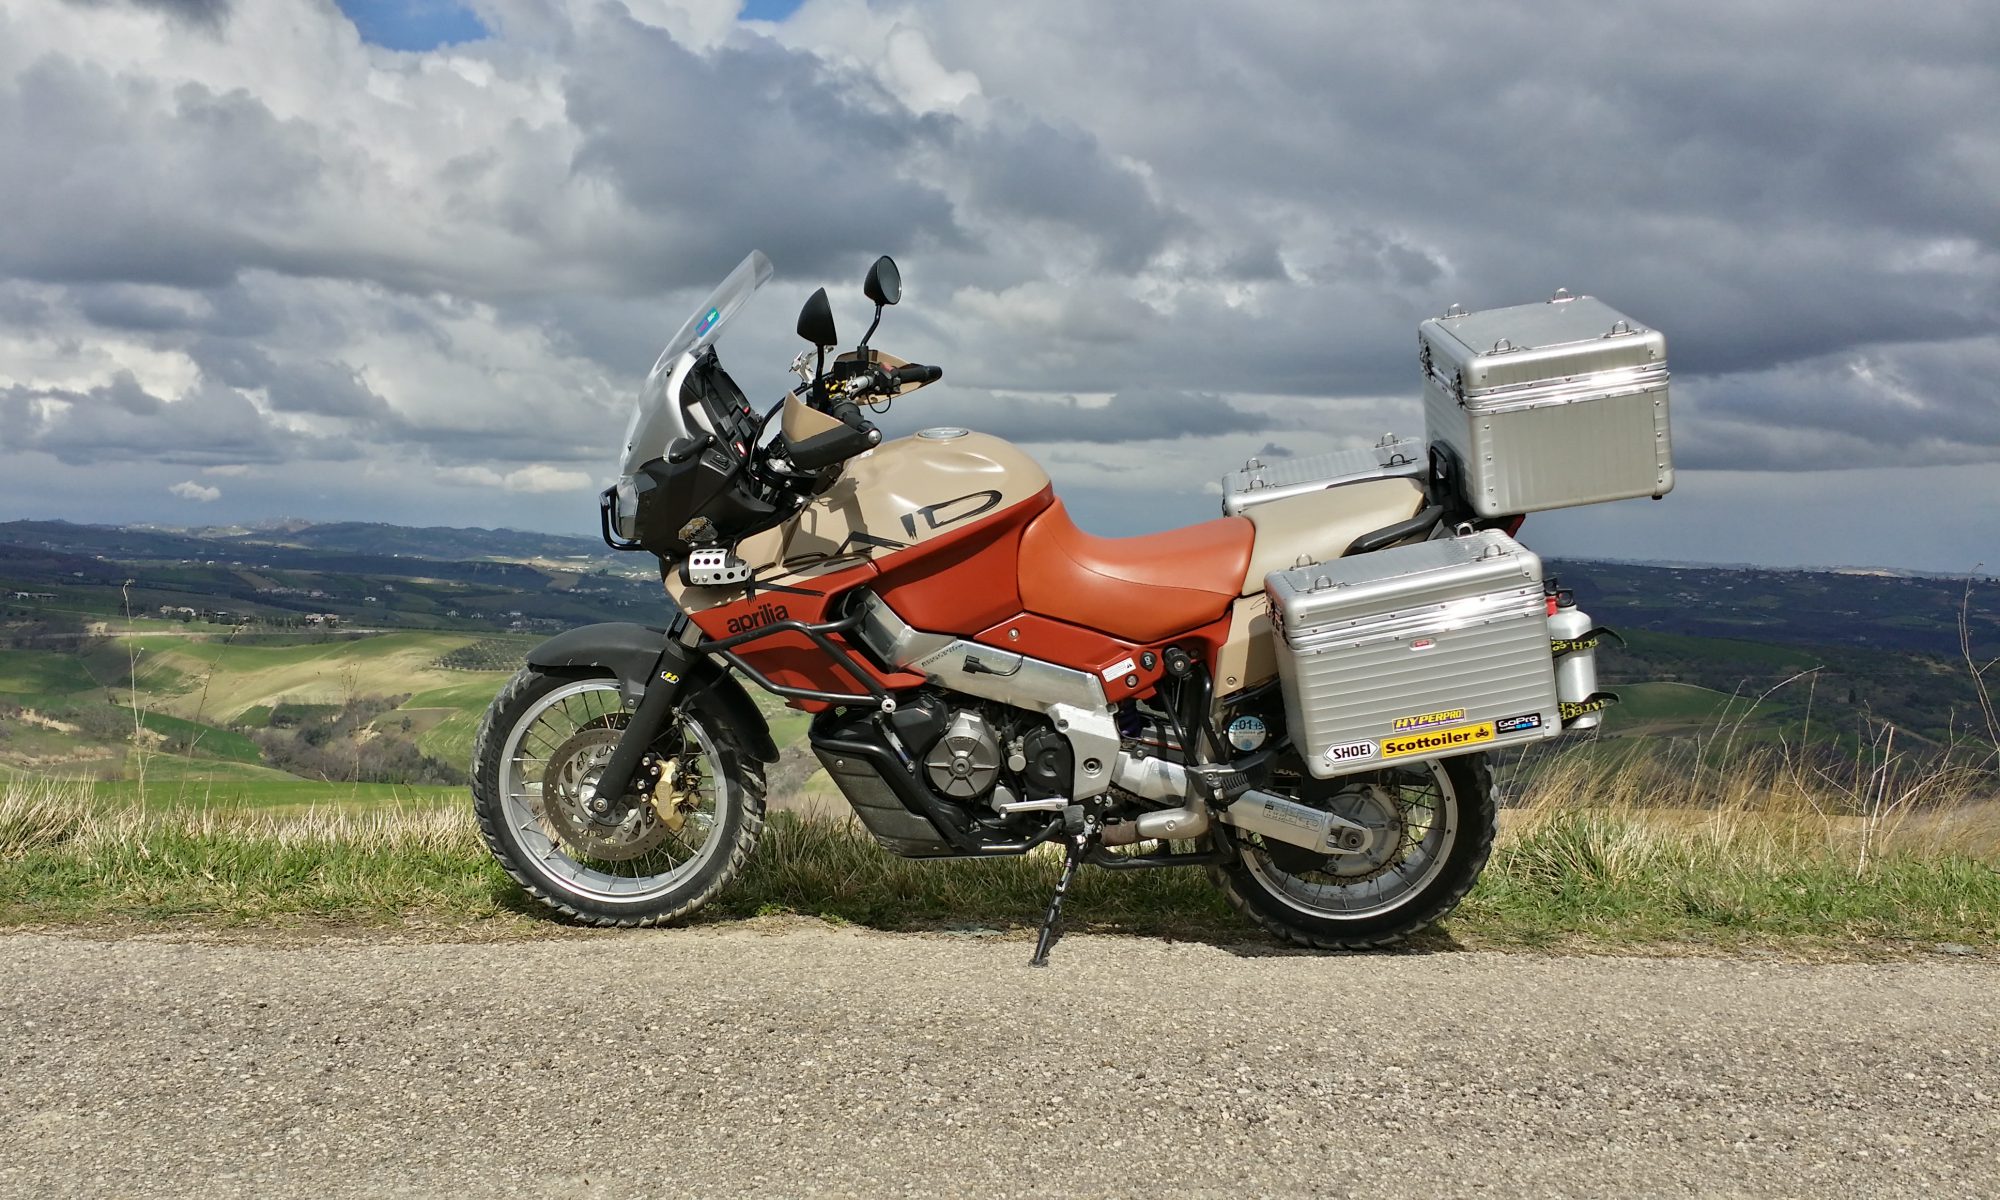
Sometimes an upgrade comes about through necessity rather than looks or performance it seems. I moved out to West Oxfordshire last year and that has not only increased my commute to work, but also reintroduced me to the trials and tribulations of travelling through the countryside – especially at dawn/dusk. This seems to be the time that deer, foxes and badgers are active and at the same time, idiotic commuters are using the 60mph limit as a minimum while thrashing through the dark, damp country lanes. The quantity of dead muntjac deer being testimony to the number of collisions. Of course hitting any of these animals on a bike will probably end with the rider experiencing the unique texture of the road surface at first hand. 

This meant it was a good idea to upgrade the old 55W H3 bulbs in my auxiliary lights to something LED and more economical on power. The Hella MicroDE’s were fitted way back when the Caponord actually had pages in the Touratech catalogue …. about 2010 as I recall. The down side has always been that they use a whopping 110W when lit and the Capo has never really been happy with that extra draw, plus the yellow light looks so dated next to the crisp white light from the LED headlights. Last time I looked the available LED H3 bulbs were pretty thin on the ground and frankly, more decorative than useful. In 2025, that seems to have all changed massively and I soon found a pair of LED bulbs that used GC7535 components at a reasonable price.


Sadly, as soon as I removed the rubber rear cover from the DE’s I knew I had a problem. The rear part of the halogen H3’s is a completely different shape to the LED’s and as such the retaining clip won’t fit. Out with the verniers, pad, pencil and fire up Solidworks and the 3D printer ……. a couple of prototypes and an hour or two later, I had two ASA-CF printed clips holding the LED’s nice and snug.  Power draw is now approx. 2A each which is way less than previously and of course, the bright white light and spread pattern are simply way beyond what I had before.

The next morning I fired up the Capo at 06:00 and off we went into the crisp cold dark morning with (for once) no cars ahead or behind as I hit the Buckland road. Leaving the village, I fired up the lamps and rode at a comfy 50mph in the middle of the road, confident that if anything moved into the road within the amazing spread of light, I would be able to brake and (hopefully) avoid an impact with mother nature. It was also reassuring to see that the Capo was quite happy with the lamps on – voltage remained over 13.8v and the SparkBright battery-monitor lamp stayed green throughout. A win-win in my books!

So on the one hand, the Capo is winter-ready in the lighting department, but in truth will head back into winter storage by the end of November. But what it has done is make me acutely aware of the incoming shift in the type of riding environment and the changes I need to make on the winter bikes. Next up then, new lights for the Kawasaki ZZR1200 – Black Beauty!

TPS (AP8124866) failure and replacement


OK, so a quick post before the one about “Fixing the MCCruise control”. Remember the magical fix-itself TPS problem I mentioned last post? Well it mysteriously un-fixed itself in a rather worse fashion while sat in lane three of the A420/A34 roundabout at 06:30 in the morning! Idling beautifully at 1,250rpm one instant, a little shudder or two to get my attention and then silence …… just as the lights turned green. To be fair she fired straight up again on the button, but now the idle was barely 1,000rpm and the Capo really doesn’t like the idle that low. I got to work, went to kill the ignition and she sat sweet as can be back at 1,250rpm ….. now if there’s one thing I sure hate, it’s an intermittent fault. So rather than the Capo and I falling out, I went into work and stewed on the problem while peering out of the canteen window at the bike and sulking like an irritated school boy. 

Later, I fired it up to head home and all was lovely with the world. To be honest I was more annoyed than if it was broke – broke I can fix. We got home in an uneventful ride, but again the idle was low …. 1,000~1,100rpm but stable. This was now officially a lovers tiff! I’d gone over so many possibilities in my head, but in the end gut feeling was still saying it was a faulty TPS. So that’s what I went with. Next day I dug out one of the spare TPS’s and tested it – 1.2KΩ ±10% pins A-B and 1.2KΩ ±10% thru to 2.4KΩ ±10% pins A-C with the throttle closed to wide open. The following day the swap took no more than 40 minutes going steady – tank raised and perched on top of the airbox, remove two T30H screws and the electrical connector to release the TPS …………. swap sensors and reverse everything to put it all back together, simples. Then of course the magical and most important bit ….. use TuneECU to reset the TPS. Now I noted the TPS voltage as 0.27v throttle closed and 4.08 throttle fully open – this was constant and repeatable every time – perfect. Finally, I took the bike for a nice 20 mile ride and once back secure in the yard, ticking away in the September sunshine as she sat cooling down, I cracked open a cold beer in celebration of a job that appears to be successful.

Things I learned along the way ….. in TuneECU you can see that the TPS position is sampled for 16 distinct columns in the fuel maps. Of those 16 positions, 7 are for throttle positions of <10% while the other 9 positions account for the remaining 90% of the throttle movement! So it’s fair to say it is used mostly by the ECU for small throttle openings …. primarily the 0-6% range and this when measured afterwards was where the TPS was giving erratic readings. Symptoms on the bike – well primarily erratic idle, but also poor running (mostly rich – smell) in the small throttle opening range. Crack the taps and give the old girl the reins and the Capo rode perfectly normally. Fair to say the symptoms are similar but slightly different to an air leak and of course common to both cylinders, so nothing like an ignition issue. It was more random – cold, hot, time etc. it just didn’t feel like it was a leak. Anyway, the job is done now.

After a few days of the Capo behaving itself, I dug out the Dremel  and opened up the sensor to have a look at the tracks inside for a definitive answer, a small Capo autopsy if you will. Once inside, I certainly didn’t expect it to be built the way it is, I expected a simple potentiometer and wiper arm ……… in reality, it uses a plastic strip with several resistors printed onto it and a wiper arm that bridges the two large resistors (left on pic). From the look of it, one of these wipers had lost spring and was no longer making good contact with the resistor it swept over.


TPS sensor resistor strip

As of 26/09/2025 AP8124866 is available from Ultimateparts.net at £224.46 inc. VAT, but only available on back order from Fowlers (Bristol). At that price it makes sourcing one on Ebay most certainly your best option.

Missed it

Aprilia Caponord ETV1000 Rally-Raid 160,000 milesAnd so the moment came and went without fanfare after a year of lockdown, no trips back and forth to home in Italy, no big holiday rides here in the UK. A year where mileage clocked up painfully slowly, the Capo sitting idle way more than doing what it does best – eat miles and promote smiles!

In the end, it was on a big fat roundabout on the outskirts of Oxford that it rolled through its 160,000th mile. No one stopped and applauded, no one  cared. No fanfare, no brass band. Even I was too busy navigating the mindless Wombles I shared the road with to notice the moment. Only as I accelerated away on the dual carriageway did I see the display roll over to 160,002, the aftermath of what should have been a jolly nice photo opportunity. Bugger.

Bath-time 2 – In at the deep end!

A bit of feedback on my first outing with the sparklingly shiny new 6 litre ultrasonic cleaning bath, the highlights and lowdown’s. First off, here’s my simple bullet point list to get things going:

  • Be patient!
  • Fill with pre-heated plain water or whatever your preferred cleaner pre-mix is
  • Be prepared to help the cleaning process along with a soft brush etc
  • Let it do its thing in peace – wear earplugs or get out!

That’s it in a nutshell! YouTube video’s make it look like you’ll clean a 50 year old gunked up prop-shaft in two minutes – wrong! Not in a domestic cleaner you won’t. I used a mix of (so called) ultrasonic bath solution diluted 10:1 as specified. I made the mistake of filling the tank from cold believing the in-built ‘heater’ would do the business … well it does after a fashion, but oh so slowly. It would have taken about 2-3 hours to go from 13ºC to 50ºC – so I boiled the kettle in the end and made up a solution that was almost at the required temperature, so no wasted time waiting around! The old rear caliper was dug out of the parts store and stripped down. It came off the Capo back in January 2013 with about 40K miles on it and had simply been boxed and hidden away, unfortunately since it’s return to the UK it looks like damp had got in and caused some corrosion. Luckily this was confined to where the pads sit and nowhere else, thankfully the pistons and seals came apart beautifully.

So time for a quick pic, then into the bath!

Aprilia Caponord ETV1000 Rally-Raid rear caliper ultrasonic clean

Initially I ran it for five minutes, unsure of how aggressive the solution/ultrasonic cleaning action would be. The solution was noticeably discoloured, but the calipers looked hardly touched. So in they went for another ten minutes. They looked much better this time … so in for another ten minutes. One half was now almost perfect, but the other needed two minutes of  TLC from a rotary brush, then they went back in for a final 10 minutes. Hence, be patient and be prepared to give the process a helping hand!

In the end, as the saying goes, all good things come to those who wait:

Aprilia Caponord ETV1000 Rally-Raid rear caliper ultrasonic clean

Aprilia Caponord ETV1000 Rally-Raid rear caliper ultrasonic clean

It only remains to mention my final bullet point. Initially I sat about 6ft(2m) away from the bath while it was running, the noise is not pleasant but bearable or so I thought. After about five minutes I started to feel a little nauseous. The lid was on and it was operating in a well ventilated area, so I didn’t think it was fumes from the cleaning solution, so figured it was exposure to sound I COULDN’T hear – it is an ultrasonic cleaner after all! In the end I left it to do its thing and sulked at the far end of the workshop and within a few minutes felt better again. The unit doesn’t come with any warnings beyond electrocution (lots of them!) … so be careful folks and don’t stay too close when it’s operating! 

Conclusion – I’m happy with the results bearing in mind that the caliper was well used and had suffered in storage. Now it is resplendent with new seals, a light wipe over with ACF50 and new home in a Zip bag and a better box. I’m really looking forward to using this cleaner on the triple bridge Brembo calipers and that may well be sooner rather than later, as Mr Postman has just this minute delivered the new brake lines and banjos from Venhill, wahoo!!!

Well I never ….

I don’t know if I should be flattered or annoyed … or a little of both, let me explain. I had just had a chat with my wife about a press release from ACEM regarding the dire downturn of European motorcycle sales. As the conversation started, she got confused with ACIM – the Aprilia Caponord International Meeting …. and that sowed a seed at the back of my mind to have a look on the internet to see what ACIM was up to. All well and good.

Later that evening I found them on Facebook and lo and behold, the group banner picture is of my old Caponord on a back road in Abruzzo! In fact it’s a picture of mine lifted from a post I wrote a few years ago (the post). So now I am a tad curious to see if someone from ACIM reads this over here then says something over there ….. 🙄 

Anyway, I’m glad someone liked it enough to use it!

New main menu item added

As I write this, the UK is slowly beginning to come out of lockdown and taking our beloved Caponords out to stretch their legs is finally becoming a reality …. before then I have tyres to fit, wheels to deep-clean and a poachers bag full of other little jobs to do – on the Capo and on the website.

To that end I want to bring to your attention if I may, the addition of a new heading in the main menu – PARTS. Currently a work in progress, it contains two sub directories (O-Rings & Hose Clamps) but this will be expanded hopefully to include bearings, seals and hoses. All items that we may (or not!) still be able to get from Aprilia, but which may have cheaper and more easily sourced alternatives available. The idea is to present them in independent sections using graphics and hotspots so you can quickly locate the item you need and get the alternative information if there’s any available.

I appreciate some of this information and other alternative parts can be found in the likes of the AF1 forum ‘OEM manufacturers/suppliers’ thread, however it’s a random collection regarding all sorts of parts and sometimes searching can be very hit and miss. Here, I hope to make the search for a particular seal, clamp or O-ring nice and easy – enter the subsection, click on the link to the parts location – fuel pump, cooling system etc – find the highlighted item in the graphic and hover your mouse over it. There’s the part number and current UK price, click on it and any alternative and size info is given in the field on the right hand side – simple. I hope!

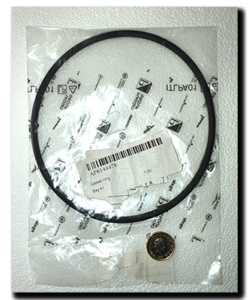
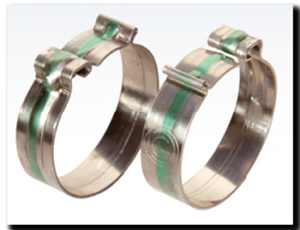
Anyway, to help bring this to fruition, I’ve ordered one of every O-Ring I need to measure where that info isn’t readily available, I’ve also ordered a range of Ezyclick and Zero leak clamps to do the same for particular areas of the Capo oil/cooling system. With any luck all this data will be up on the website in a week or so. After that, bearings, seals and hoses. 

One last thought ………. is there any mileage is selling bags of O-Rings – say a service kit, or engine kit for example ….. maybe oil/coolant clamp kit? Just an idea to throw around, what do you think?

Finally, a huge thank you to folks who have donated toward the website this year. Without your help this little project may well have not happened or been way down the line. Website plugins are usually free, with limited functionality – Pro versions have a price tag but have infinitely more functionality – your kind donations have bought those Pro plugins! Thank you.

E10 ……… no it’s not a boy band!

Did you get around to watching ‘The Last Motorcycle on Earth’? Well this post is about a little of that fiction meeting reality right here, right now.

After much deliberation it looks like E10 fuel got the UK government green-light in February 2020 and will be on a forecourt near you in 2021 … probably/maybe. It’s been on the horizon for almost a decade, but thankfully we’ve not had to deal with the tank bloating, seal destroying gut-rot fuel that’s the scourge of the EU .. but times are a changing as the song says. It looks like the current ‘Premium’ fuel (E5) will become the ‘Super-Unleaded’ and E10 the Premium. Like Europe, it’s  use will be optional unlike some countries where it’s introduction and use are mandatory. One note of concern though …. the proposal only protects E5 supply for up to five years after E10 is rolled out, presumably supply could then disappear from forecourts almost overnight, making refuelling an unmodified Capo awkward to say the least. And five years isn’t a long time!

On occasion I would use it while travelling through Europe, but only one tank at a time, then I’d use E5 fuel to clear it out of the system and always on a journey where I knew I’d burn through it before I arrived at my destination. I never left it stewing in the tank for longer than a couple of hours.  So this looks like it’s  time for one of those other jobs that have sat firmly on the garage shelf for the last 12 months – lining the fuel tank with Caswells Epoxy resin. Even after that’s done, I think I’ll try to steer clear and take the price hike to ‘Super-Unleaded’ on the chin…… while I can anyway.


The Last Motorcycle on Earth

Stuck in lockdown and looking for something biker related to watch? Well here’s a real thought provoking treat for you. I found out about this a few months ago and yesterday it popped up on Amazon Prime UK for £2.49 in HD. It’s part one of a trilogy by the looks of it. If you like bikes and worry about what the politicians  may do to our lifestyle in the coming years as they push ever harder to ban fossil fuels and rush headlong toward electric and autonomous vehicles, then you might just like this film. I loved it …. and maybe the back-story sat all the harder as I work in the autonomous vehicle industry!

Seal of disapproval

Aprilia Caponord ETV1000 Rally-Raid AP8144478 O-ring fuel pump plateFair to say, things have REALLY dragged on this year. The fuel tank overhaul I mentioned in May and planned to do in July is still firmly on the to-do list -why?

I had 90% of the parts on the shelf in June and only had a couple of ‘O’-rings to order. The parts lists don’t give a size for these particular seals, so I needed new ones from Aprilia to measure for future reference – no problem really, they’ll only take a week or so to arrive I thought. Yeah right.

So I put together a list of parts and punched them into the Fowlers online ordering form. All items were available – except one. The dreaded ‘back order’ item. The deal was, wait for the back-order part and we’ll ship them all together, or we’ll send the in-stock items and charge you £3.95 to post the one remaining tiny back-order item. I decided to wait. 

And wait they made me do alright ….. almost two months in fact!

In the end the parts arrived of course, but by then the warm and dry summer weather had given way to almost daily rain and nights drawing in earlier and earlier. But on a positive note, I have now measured the main O-ring I was interested in and can finally post up the size and alternative (UK) that you can have delivered within a day or two, not months! Far quicker and quite a saving on the £30.30 plus delivery for the genuine part.

AP8144478 Equivalent:     142.88mm ID  5.33mm cross section – Viton

£13.91 plus VAT (for two) from Simply Bearings Ltd (October 2019) – Thanks to Beasthonda for measuring for me!


May update

Aprilia Caponord ETV1000 Rally-Raid rear panelsWell it looks like the website is up and all the links work again – hooray! In the end it took about 24hrs of fiddling in the database to sort out, but I got there in the end thankfully.

Meanwhile, the rear panels were removed from the Capo for a trip to the paint shop. The years have been pretty kind to the base coat, but not the lacquer unfortunately, especially where the decals are located. As luck would have it, I already have a set of decals that were kindly given to me by Manuel from Motrag.com a few years ago.

We use chippingnortonbodyshop.co.uk for some parts on our autonomous cars and the results have always been excellent, so it’s fantastic that they are willing to have a look at the Capo panels for me. Plus it’ll be great to finally get a color match given that Aprilia don’t provide paint codes.