Just a quick update on the LCD dashboard – yes it’s still a work in progress! Lockdown here in the UK has freed up time for all sorts of fun and games and the LCD dashboard has hogged more than its fair share over the past few weeks. The board finally went from a desktop/fake-input dummy display to a fully enclosed dashboard with real-world inputs yesterday evening.
Apologies for the rough and ready video, but a long day was coming to an end, so I just grabbed the nearest dashboard case, blew off the dust and slapped the whole thing together to get the video. I appreciate the tacho needle is missing and the clear-lens has some scratches, but hey …. this is a prototype!
Next step … finalise the power on/off circuitry and maybe a nice splash screen for a few seconds at key-off, let’s see. But by far the biggest job is still to get the ECU data to the display in a way I’m happy with. One thing I’ve come across which is proving really useful is a software package called Megunolinks which allows real time graphs of data buzzing around the system – the demo version already helped massively while tweaking the various inputs and how to filter the data …….. next stop, the pro version! That should really help speed things up.
One thing I was always sceptical about, was the displays ability to function properly in bright daylight. I honestly expected this whole thing to be nothing more than a what-if project that would stay on a workbench. But I’m pleased to say that it doesn’t appear to be the case at all …. yesterday, the display was perfectly readable throughout the day with very bright sunlight streaming in through the garage door – square on or at an angle I had no problem reading it. And that alone has boosted the enthusiasm to see this move from workbench to bike … let’s see how the next few weeks pan out.

 As I write this, the UK is slowly beginning to come out of lockdown and taking our beloved Caponords out to stretch their legs is finally becoming a reality …. before then I have tyres to fit, wheels to deep-clean and a poachers bag full of other little jobs to do – on the Capo and on the website.
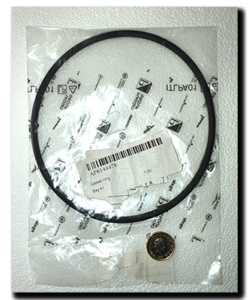
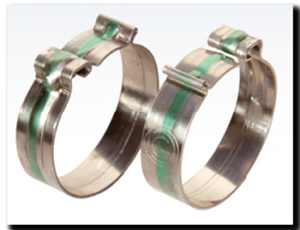 Anyway, to help bring this to fruition, I’ve ordered one of every O-Ring I need to measure where that info isn’t readily available, I’ve also ordered a range of Ezyclick and Zero leak clamps to do the same for particular areas of the Capo oil/cooling system. With any luck all this data will be up on the website in a week or so. After that, bearings, seals and hoses.
  Did you get around to watching


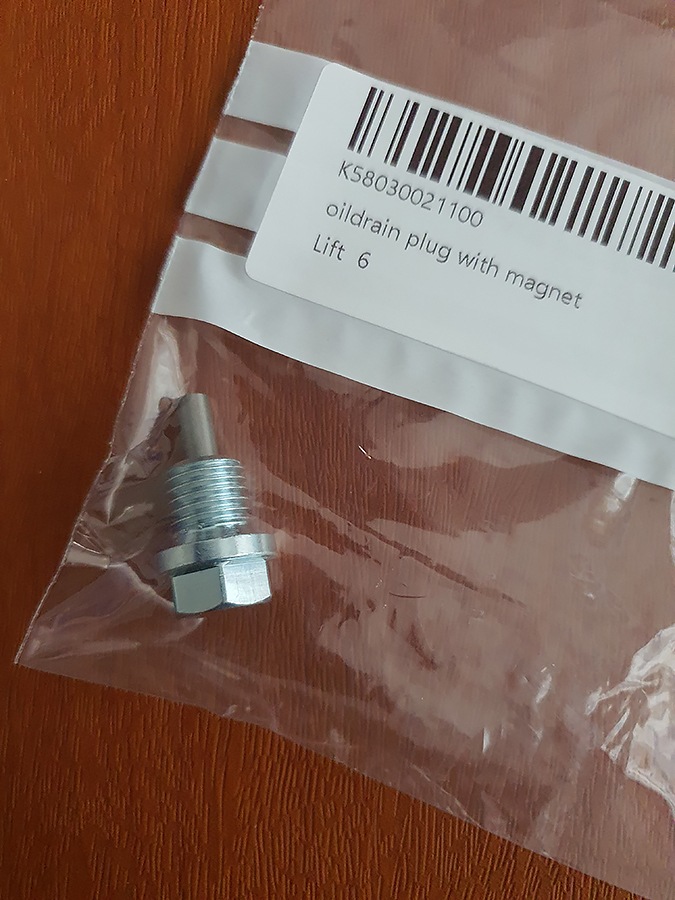
 I think it’s reasonable to say that Aprilia got it right when they chose Rotax and the rock-solid V990 motor for their range of bikes in the late 90’s. Bullet-proof doesn’t quite do it justice, especially in the de-tuned Caponord variant. But even this wonderful piece of Bavarian engineering has it’s weak points, and probably the one most obvious from a service-by-service aspect is that damn annoying magnetic plug in the crankcase.