 It’s been a while since the Capo was serviced and one job has still remained outstanding – in fact it has been ‘outstandingly’ outstanding for the past few services since I lost my old Davida vacuum gauge set! Yes, the perplexing throttle-body synchronisation*. Truth be told, the Capo has been running just fine for ages, but it never hurts to check it once in a blue moon!
I wasn’t about to lay out a fair-sized wad of cash for another (excellent) Davida set or buy a Carbtune II again in a hurry, so I thought it was about time to go the Poundland route and build my own manometer for a few pennies and with a bit of scrap kicking around the barn. The nice thing is that there’s a mountain of info on the internet about how to do this yourself, just pick what suits your needs best and modify for your own bike.
So what do you need? Well just a sturdy board, door or wall on which to mount the kit, a length of 6mmID clear tube, a suitable liquid and a way to connect it to the bike. That’s the nut’s and bolts of it, but a simple addition will make the setup ‘user friendly’ as you’ll see later. Although the tube is straight forward, the liquid is a bit more controversial …. Some say coloured water, some 2 stroke oil, some EP90 gearbox oil …… you get the idea! I chose some good old Scottoil Blue. Why? Because it was on hand, because it is basically ATF and has a fairly low viscosity, because IF it gets ingested by the motor it won’t cause any damage and because it turns out (purely by chance!) to work REALLY well!
*Workshop manual page 4-18-00
Now for a bit of physics ……
 First off, what kind of vacuum are we looking at from the Capo motor? From measurements, it looks to be somewhere in the range of 22-24cmHg (based on an erratic Carbtune II) per cylinder measured against atmospheric pressure …. Now that’s not much for a mercury manometer – barely the length of a sheet of A4 paper. A nice compact manometer then, except that unfortunately mercury is almost impossible to get hold of because it’s deemed way too dangerous for us potato-heads to use safely. So what does this mean in terms of manometer height if we use liquids of a lower density? Well…..
Mercury 22-24cm (Ideal!)
Water 299 – 326cm (free-ish and known density but hard to see at a distance)
Light oil 345 – 376cm (coloured – easy to read, density varies on type of oil)
 So here’s our first problem …… measuring each cylinder individually will require a water manometer at least 3.5m tall and an oil one even taller, clearly not exactly practical or compact! The solution? Well the Capo comes to the rescue …..
Being a twin, the Capo simply needs a differential setup – that is, measure both cylinders against each other, not against atmospheric pressure. In theory they should cancel each other out if perfectly balanced and so the manometer would read zero. Any imbalance will have the liquid slightly higher in one tube and lower in the other …… so by measuring differential pressure we don’t need a manometer anywhere near as tall, but remember, even small differences in pressure will make big changes in liquid level, so the manometer still needs to be quite tall. In the end I built mine on an old wardrobe door – a total height of 155cm, with about 60cc of Scottoil filling about 40% of this. With hindsight, it’s about twice as tall as it needs to be, but hey you live and learn!
Putting it to use …..
 With the Capo nicely warmed up after a little ride, the tank lifted and the manometer plugged into the Capo’s vacuum ports, she was fired up again. The oil level in the tubes drifted apart and settled at approx. 9.5cm (equivalent to approx. 0.6cmHg), a gentle nudge of the screw for the front cylinder on the throttle body saw the level drop to just below 2-2.5cm (approx. 0.15cmHg) – comfortably within the 0.5cmHg accuracy quoted by Synchromate and oodles better than the 2cmHg per division of the Davida gauges. So that’s a £2 rig versus the commercial £70/£170 rigs ……..
….. and one other thing, this was without ANY damping (valve/jet/cotton wool etc.) in the line because the Scottoil works perfectly well as its own damper. It pulses gently by no more than about 2-3mm in the tube but is viscous enough to respond reasonably quickly to changes in vacuum. Oh and that addition I mentioned …… simply two small sealed containers greater than the volume of oil in the manometer, one placed in each line. Now if either vacuum line should come adrift the container on that line acts as a trap to capture the oil before it can get swallowed up by the motor!
 So ultimately it’s cheap, self calibrating with excellent resolution around the balance point ….. but not exactly portable! And so in typical MA fashion, the mind wanders off to thoughts of a compact electronic version. Powered by the bike, self calibrating – kind of like this one!
 After fiddling around with the cam chain tensioners, it was time to refill the coolant system – something Aprilia say to do every 2 years and MotoA has successfully neglected for almost double that! The handbook says to use either Agip Cool or IP Ecoblu. While Ecoblu is still available, the Agip coolant has apparently been superseded by Agip Permanent Plus and Agip Permanent Spezial ….. and wait for it ….. they’re about to be rebranded again as ENI Antifreeze Bike P and ENI Antifreeze Bike S. So which one do we need for the Capo? Well the ENI website says Bike S, while AF1 recommend Permanent Plus (Bike P), so I ordered Permanent Plus before the headache-of-confusion got any worse!
 What’s the difference? One is blue and one is red …….. but it goes a bit deeper than that! I must admit that the heady and scintillating world of antifreeze has past me by for most of my adult life, my knowledge pretty much stopped at – it’s green (mostly) and it stops my engine exploding into an ice block during winter-woolly-wearing time. Oh no, it seems that is most definitely NOT the end of it, our aqueous boffins have been brewing up a positive Smörgåsbord of antifreeze variants and as you can guess only some are suitable for our precious two-wheel companions. If you want to fry your brain with antifreeze techie stuff, have a read here. Otherwise it simply comes down to the difference between the two Agip products – Permanent Plus (Blue) is hybrid technology and good for 2 years while the Permanent Spezial (Red) is OAT (Organic Acid Technology) and good for 5 years – hence the ‘long-life’ tag.
 But in the end, whatever you buy just make sure it’s good down to -40c and nitrate free and pre-mixed or mix it to a 50/50 solution. Remember that over time the corrosion inhibitors will be used up and the solution will slowly become acidic. Consider buying a PH tester for a couple of pounds/dollars to check the PH level in the radiator when doing a service, ideally it should be 8 or higher when new. If the PH is below 7 then the coolant definitely needs replacing before the acidity starts to eat away at the engine.


 Yesterday I spent a lazy morning installing a couple of sensors inside the airbox (more in another post) and with the tank propped back in place, fired the Capo up to check the fuel lines…….
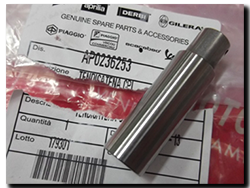 rear. As it was lunch time, I decided to have a look a bit later – and promptly forgot! Well I got back to it in the evening and pulled the cam chain tensioner out. Soggy as a knackered bed spring! 🙁

