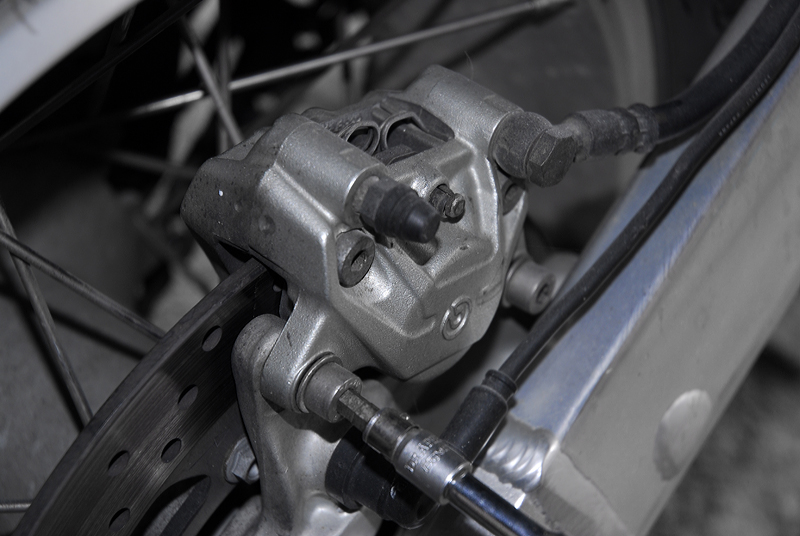
 The standard 01-07 Caponord/Rally-Raid rear brake uses a Brembo P34 caliper – OEM part No: 20695140. An aluminium fixed caliper (not floating) with two opposed pistons, constructed in two halves, bolted together. This particular model is available in various colours, gold, silver and black as well as two piston sizes, 32mm and 34mm diameter. The bleed screw (M10x1.0) and inlet connection are interchangeable. The Caponord uses 34mm pistons, hence the name of the caliper – P34. If you’re in the market for a second-hand unit, be aware of the piston sizes … putting an identical looking 32mm unit on, would no doubt make the brake pedal more sensitive, while reducing braking efficiency.

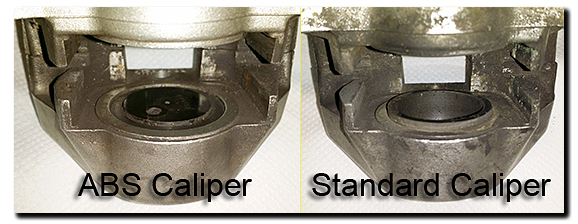
New Dec 2014 The difference between the 01-07 standard Caponord caliper (AP8113810) and the 04-07 ABS version (AP8133748) is in the pistons. The standard piston is hollow with a 34mm Dia. and 26mm internal Dia. giving a contact area of 377mm² while the ABS caliper piston has a central cap that protrudes approx. 1.5mm beyond the piston with a contact area of 531mm² approximately +41% more.
The Rally-Raid (and standard Capo) master cylinder diameter was taken from direct measurement. Also, the piston bore is stamped on the outside of the upper mounting bolt casting – 12mm ….. take out the two bolts holding the master cylinder to the frame and swing the alloy guard away and you should see ‘+12’ stamped in the casting. New Dec 2014 Although the part numbers differ (AP8113939 Standard/Raid 01-07 & AP 8133643 ABS 04-07) I simply cannot find any difference between the one on my Raid and an ABS one. Also don’t forget, if you need a service kit the KTM rebuild kit 503130600 is the one to use.
__________________________________
Brake pad & disk wear
The OME pads in the Rally-Raid lasted 8,700 miles (14,000 Km), while the replacement EBC FA266HH lasted a further 14,000 miles (22,600 Km) and still had approx. 20% usable material left when replaced. In theory, they would have seen another 2-3,000 miles, effectively doubling the life of the original pads. Disk thickness now measures 4.76mm, new is 5mm and the service limit 4.5mm. So the disk is half worn but still performing perfectly ok, while life expectancy can be anticipated somewhere in the region of 40-50,000 miles (65 – 80,000 Km) if it wears at a uniform rate. To date neither organic nor sintered pads have caused noise issues.
__________________________________
Brake pad replacement (non ABS)
Firstly, forget the workshop manual! You do not need to split the caliper to remove the brake pads. Here is the standard procedure (with pics and gallery):
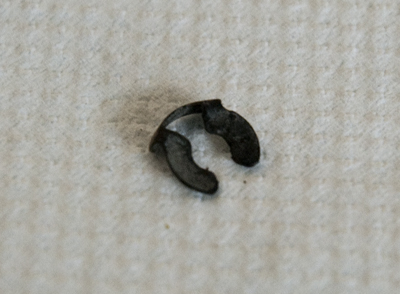
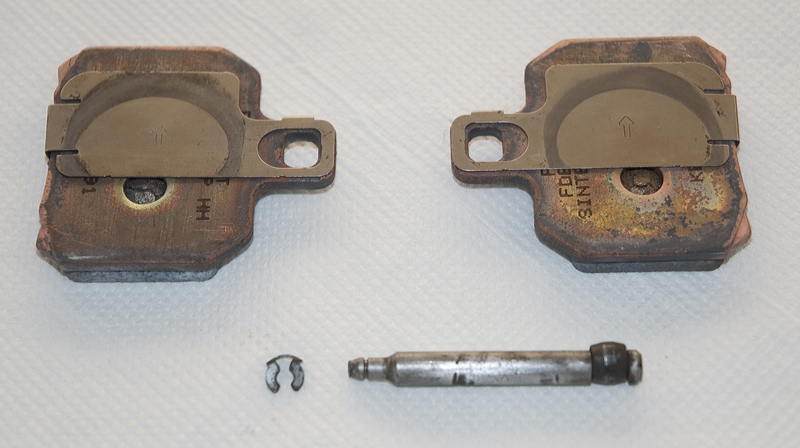
- Carefully remove the ‘C’ clip from the pin –Pic1.
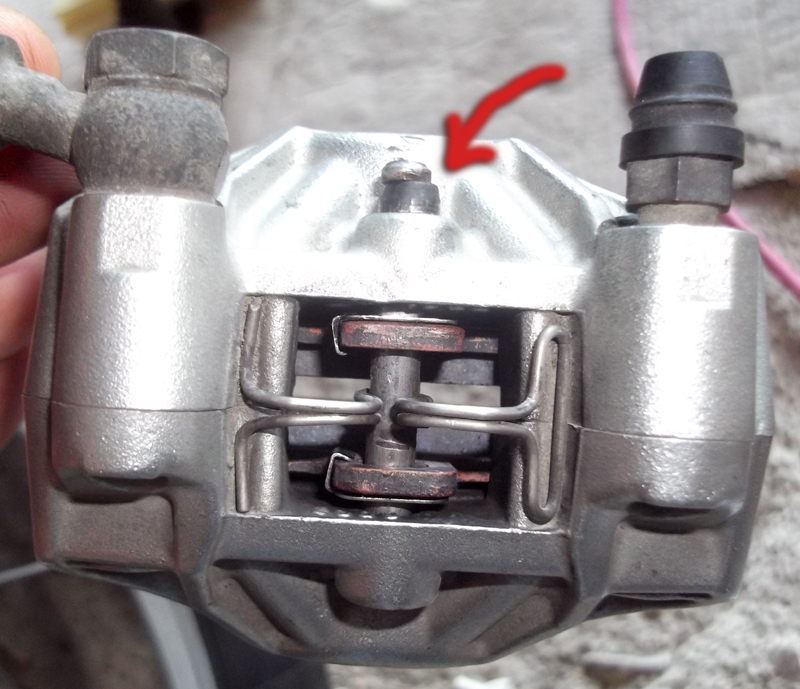
- Using a suitable drift, tap the end of the pin – over the chain guard and through the rear wheel spokes. A suitably long tool is needed to make the job easier. Tapping the pin back through the caliper releases the compression ring on the other side of the pin –Pic2.
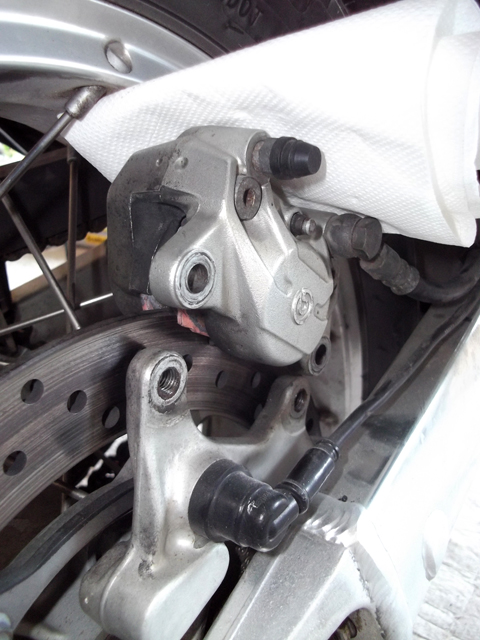
- Remove the two bolts holding the caliper in place on the carrier. Be careful working around the speedo sensor cable – don’t pinch, cut or pull it! Pic3.
- Now place a cloth on top of the caliper and check that the fluid reservoir looks empty enough to take the excess fluid as we push back the caliper pistons. If not, it may need some fluid removing to make room.
- When ready, carefully lift the caliper about half way up the disk towards the wheel rim. Gently twist the caliper from side to side – this helps push the pads/pistons back a little and caliper removal a little easier – Pic4.
- Be careful not to chip the wheel rim finish as you ease the caliper off the disk. Swing the caliper out and while supporting the pads, push down on the spring and gently ease the pin out of the caliper body. Be aware that a pin that has been in place for some time may be stubborn to remove! The pads and anti-squeal shims can now be removed from below.

bolting the caliper")


Assuming that the caliper is in good condition it should only be necessary to remove debris and dirt with brake cleaner and make sure the piston surfaces are clean and undamaged. The pistons can be eased out a little by gently pushing down on the brake pedal by hand, but be careful, push then too far and they can pop out!
Pushing the pistons back all the way into the casting should require no more than a steady, evenly applied pressure by hand to the piston surface. If you don’t apply the pressure evenly, the piston will twist in its bore and not retract. That’s the trick – even pressure! As the piston retracts you need to keep an eye on two things, firstly, pushing one piston in can result in the other one coming out, owners with sufficiently small hands can push both pistons back at the same time! Secondly, the oil is being returned through the line and master cylinder to the reservoir …..did you make sure it has sufficient room for it? Lastly, inspect the pin, spring and clip. The pin appears to suffer wear ridges quite easily.. these can be sanded/buffed out, but if too deep a new pin should be fitted.
So now the caliper is cleaned, the pistons move freely and are now fully retracted, so we can begin fitting the new pads:
- Apply a fine coating of copper grease to the front and back of the anti-squeal shim and fit it to the back of the brake pad. Apply a little more grease to the back of the pad, roughly where the piston will make contact. I cannot stress strongly enough that the copper grease has to be used sparingly and only where the relevant surfaces piston/shim/pad are making contact –Pic5.
- Take note of the direction arrow on the back of the anti-squeal shim … this must point in the direction of travel.
- Slide the pads/shims up into place and refit the spring to the top of the casting (may need to hold it in place). Now slid the pin (lightly greased) into the casting and through the pads/shims and spring until the compression ring on the pin is butted up against the casting.
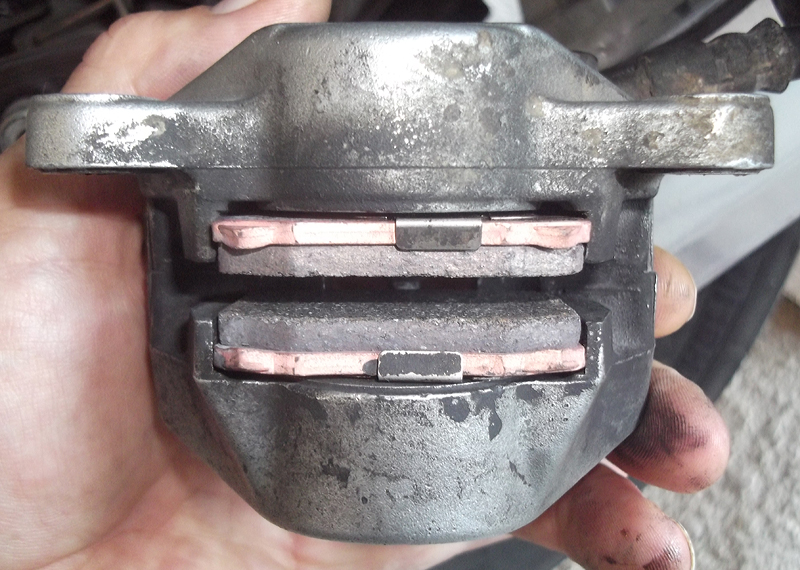
- Make sure the pads are slid back against the pistons. New pads area tight fit, with everything retracted there is approximately a 5.7mm gap – fitting over a 5mm disk. Snug, but at no time should it require any force to reassemble –Pic6.
- Place the cloth back on top of the caliper and gently slide it back into position, refit the bolts and torque them to 25nm.
- Now tap the pin back into the casting forcing the compression ring into place. Refit the ‘C’ ring on the end of the pin.
- Pump the rear brake pedal to seat the pads/shims/pistons …. Rotate the wheel while you do this to ensure the pads bite and release the disk as they should.
- Check the level of fluid in the reservoir and top up if necessary.
__________________________________
Aftermarket Brake pad part numbers
EBC: FA266 (HH) Sint • Brembo: 07BB209A / 2035* & 2065
Ferodo: FBD2074 (ST)= sintered • SBS: 730
Galfer: FD220 • Dunlopad: DP631
Carbon Lorraine: 2827
*2035 are the OEM Carbon/ceramic, all other are sintered
__________________________________
Replacement parts
What if the caliper is in need of a more detailed service? A leaking seal for example. Well a new caliper is available for between £70 and £140 depending who you buy from and what country you’re in! So a rebuild kit would probably be a viable option if it was available. It seems that the 32mm caliper is/was used on many bikes including the Aprilia Mille and the current KTM RC8. KTM list replacement pistons and seal as below.
32mm Caliper rebuild parts:
- KTM part number: 69013083000 Piston kit ( approx.. £19.14 inc. – Dec 2011)
- KTM part number: 69013081000 Seal kit ( approx.. £13.26 inc. – Dec 2011)
Unfortunately, as of December 2011 I still can’t find a proven, reliable source of 34mm pistons/seals. Ebay advertisers appear to offer kits, but when I see the Capo listed alongside known 32mm users, I have to doubt the reliability of the information. Currently the only replacement parts listed by Aprilia are the pin, spring and clip repair kit:
- Aprilia part number: AP8113752 (Item 5: £6.97 inc. – Dec 2011) – KTM want over £20!
__________________________________
P34 Caliper Technical specs
Max operating pressure: 70 bar
Weight: 605g
Brake pad details: Thickness -3mm backing plate, 4.4mm material. Pad material area – 16.1cm² each.
Bleed screw/inlet: M10x1.0mm thread
Anti-squeal shim: 0.4mm mm thick stainless steel
Disc positioning tolerance: ±0.5mm