Bella Italia ….. my old friend!

Giulianova September 2022

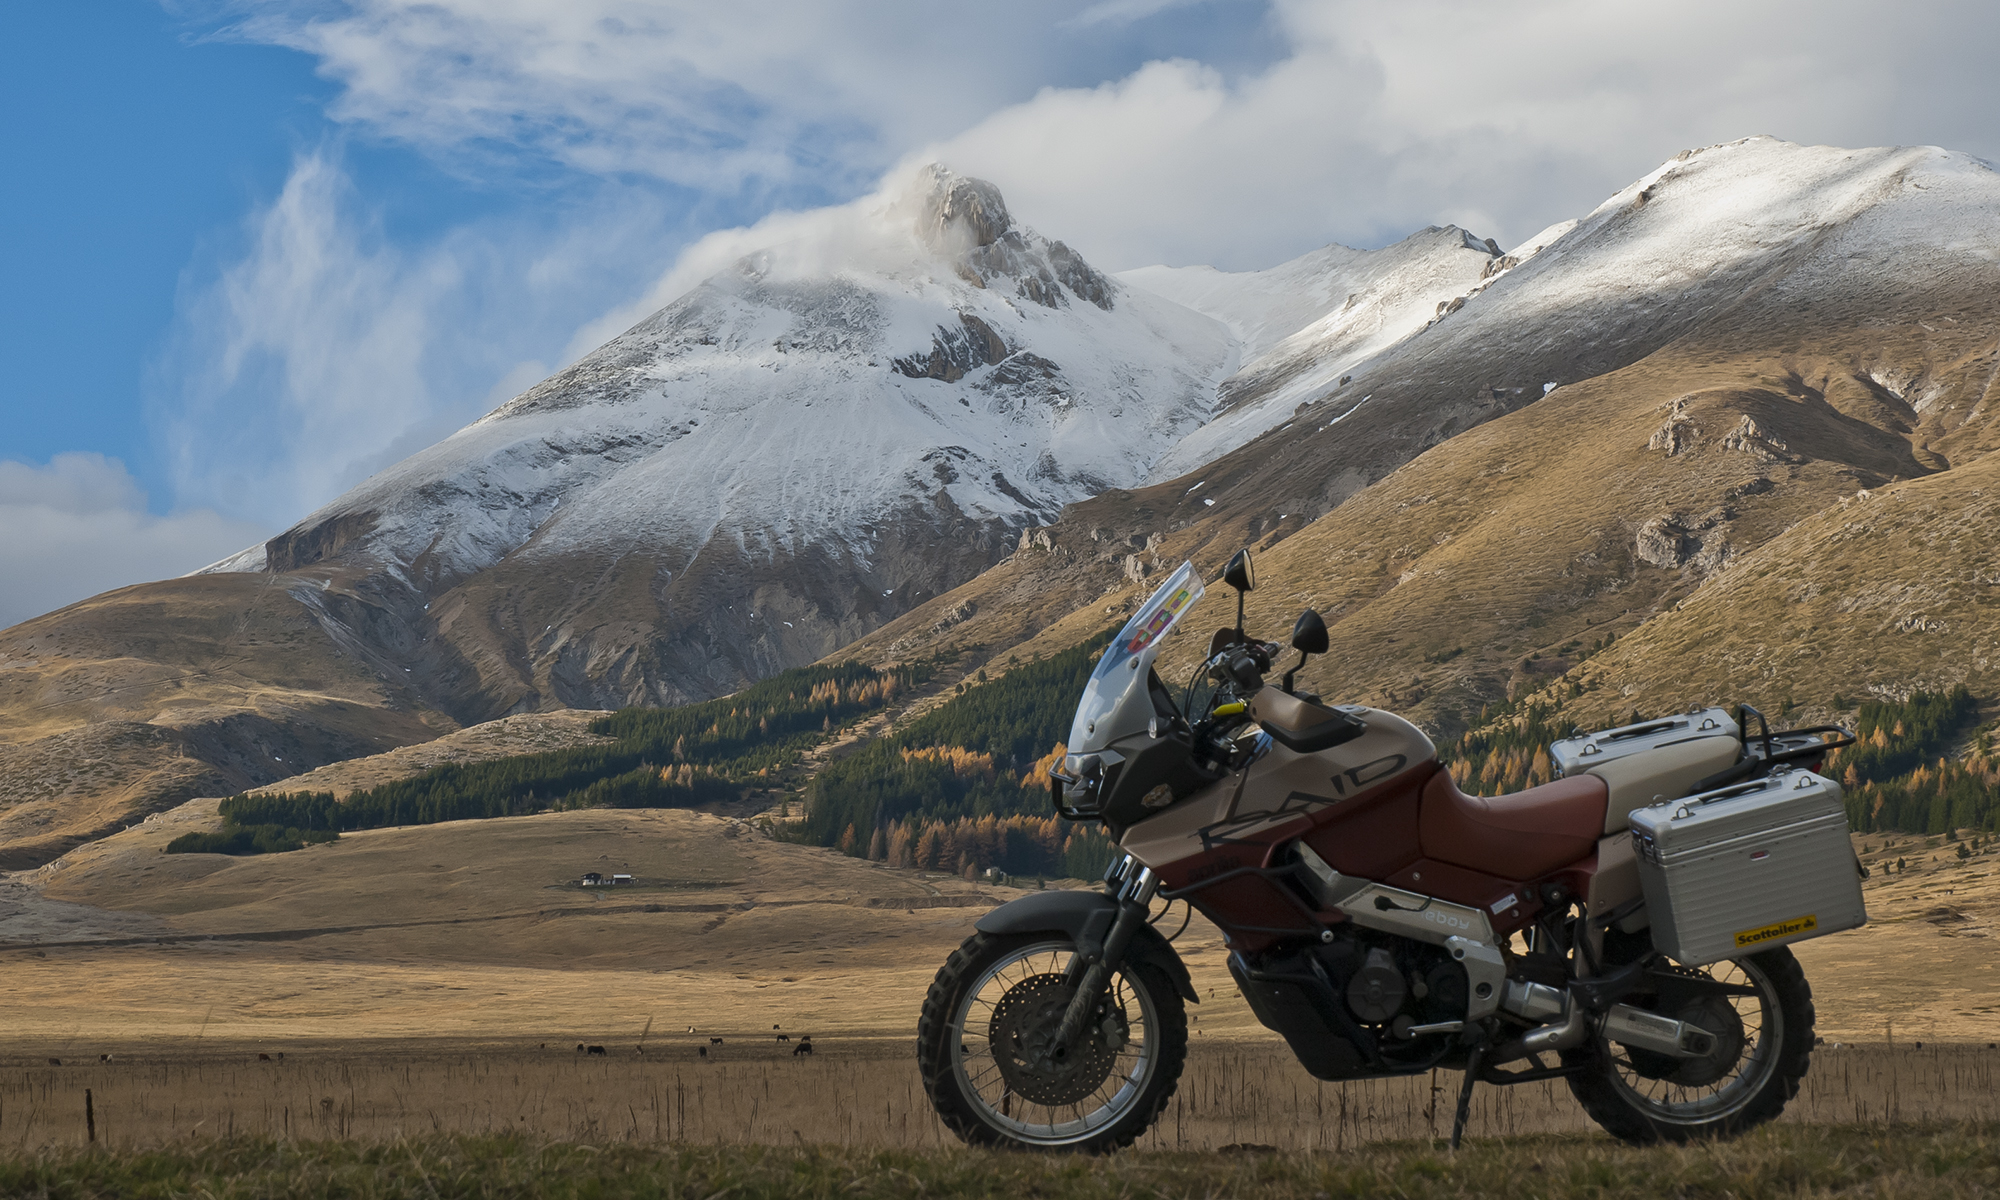
Well it has certainly been a while since I last posted on here, so maybe now is as good a time as any to pick up where I left off. As you can imagine, the last twelve months have seen many changes and a lot of things that needed to be ticked off the list of life …. the most recent being a run back home to Italy after almost four years. 2020’s Covid lockdown didn’t help of course and then after Jan passed away last year I just couldn’t face the trip alone. But eventually the clouds parted and the Caponord got to do what it does best, run faultlessly for almost 4,000 miles over a couple of weeks! This then is a potted summary of what stuff worked and what could be improved for next time.

The fact is, lots has changed since I last travelled over – all my riding gear is different for one. The Capo has had a fair amount of maintenance/refurb during those years and even my cookware of choice had changed! Gear wise, I’m now using Rukka/Daytona and of course the venerable Shoei Neotec 2 with Senna intercom. All performed faultlessly especially in some prolonged and very heavy rain in Northern Italy/Switzerland. Expensive gear yes, but worth every penny in my book. Oh and I can’t leave out the surprise of the trip … EDZ Merino wool socks! Those and the Daytona boots kept my feet comfy warm and dry like never before, absolutely fantastic.

Cookware wise, the old Trangia stayed in the loft and I used the much smaller and neater gas cooker that I got from Manuel over at motrag.com ….. as a one-person unit it worked fine for me. Hot coffee on the go in the smaller mug and and a re-heated pasta dish in the bigger one was just about perfect after a long run. Simple, compact and a doddle to use, it’ll stay the cooker of choice for now. 

One concern on the trip was the Capo’s battery. Throughout, the voltmeter showed charging ranging from 13.9 – 14.2V depending on load, but less than an hour after shut-down the battery standing voltage would fall to 12.4 – 12.6V and that isn’t great. Ultimately it never actually gave me any trouble, but it was waving the imminent flag of failure, so time for replacement. As soon as I was back in Blighty, I ordered a NOCO NLP-14 LiFePO4 battery. I have exactly the same one on a ZZR1200 and Andy (BeastHonda) has one on his Caponord ….. short and simple, they work. For the ZZR, it was a straight swap, but for the Capo, the terminals have to be modified slightly – no biggie and I’ll post more on that later.

NOCO NLP14 battery

Other than the battery, the Capo performed brilliantly, returning an average of 46mpg using the heavily modified Catfish 50429 map/airbox/snorkel and even managed 52mpg through the Swiss alps. I can live with that! The Mitas 07+ tyres worked well and wore predictably, however they were a tad skittish on wet over-banding …. but maybe I’m being picky when the Capo is fully loaded, leaning and doing 80mph at the same time! Throughout the ride I used the cheaper E10 fuel as I wasn’t going to be keeping it in the tank for long, but as the mileage to Calais ticked away, I changed back to E5. Once off the boat at Dover I changed again to Shell Supreme 99+ …. ethanol free. Expensive yes, but so much more friendly to the Capo fuel system.

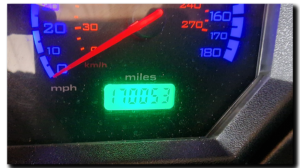
Finally I rolled into a dark and cold Oxford driveway at 1:30 in the morning with the Capo showing 170,053 miles in the dashboard. The arthritis in my knees is playing up and my backside has had enough of today …. but through all that I just feel so immensely proud of the Capo. So what next? A well earned clean and service in the short-term and then a full rebuild and line replacement for the rear brake, just to bring it back up to scratch and looking as fresh as the front brakes. I should also get around to replacing the fuel sender unit .. it stopped reading properly a year or two ago and I have all the parts to hand, but never found the time/enthusiasm. I think the Capo has earned it.  After that? Maybe it’s time to head North for a change, who knows.

LCD Dashboard end of May update

Just a quick update on the LCD dashboard – yes it’s still a work in progress! Lockdown here in the UK has freed up time for all sorts of fun and games and the LCD dashboard has hogged more than its fair share over the past few weeks. The board finally went from a desktop/fake-input dummy display to a fully enclosed dashboard with real-world inputs yesterday evening.

Apologies for the rough and ready video, but a long day was coming to an end, so I just grabbed the nearest dashboard case, blew off the dust and slapped the whole thing together to get the video. I appreciate the tacho needle is missing and the clear-lens has some scratches, but hey …. this is a prototype!

Next step … finalise the power on/off circuitry and maybe a nice splash screen for a few seconds at key-off, let’s see. But by far the biggest job is still to get the ECU data to the display in a way I’m happy with. One thing I’ve come across which is proving really useful is a software package called Megunolinks which allows real time graphs of data buzzing around the system – the demo version already helped massively while tweaking the various inputs and how to filter the data …….. next stop, the pro version! That should really help speed things up.

One thing I was always sceptical about, was the displays ability to function properly in bright daylight. I honestly expected this whole thing to be nothing more than a what-if project that would stay on a workbench. But I’m pleased to say that it doesn’t appear to be the case at all …. yesterday, the display was perfectly readable throughout the day with very bright sunlight streaming in through the garage door – square on or at an angle I had no problem reading it.  And that alone has boosted the enthusiasm to see this move from workbench to bike … let’s see how the next few weeks pan out.

Well I never ….

I don’t know if I should be flattered or annoyed … or a little of both, let me explain. I had just had a chat with my wife about a press release from ACEM regarding the dire downturn of European motorcycle sales. As the conversation started, she got confused with ACIM – the Aprilia Caponord International Meeting …. and that sowed a seed at the back of my mind to have a look on the internet to see what ACIM was up to. All well and good.

Later that evening I found them on Facebook and lo and behold, the group banner picture is of my old Caponord on a back road in Abruzzo! In fact it’s a picture of mine lifted from a post I wrote a few years ago (the post). So now I am a tad curious to see if someone from ACIM reads this over here then says something over there ….. 🙄 

Anyway, I’m glad someone liked it enough to use it!

Quick update ….

Just updated the heated grips and helmet graphics on the display, much nicer I think. 👍 Sorry about the stripes in picture, it’s a camera v display thing!Aprilia Caponord ETV1000 Rally-Raid dashboard improved display graphics

Dashboard – Multi function display screen – 4

First off ….. a bit of code change to the website should mean that all other pages, not just the front page will now display at a greater width than previously. I hope you find the general readability and layout better.

Secondly, I’ve now swapped from an Arduino Uno to an Arduino Mega 2560 to drive the 4DSystems display. This was due to the Uno only having one hardware serial interface, while the 2560 has three. Now I’m driving the display off one and a HC-05 Bluetooth module off another. After a frustrating few evenings playing with the MIT App Inventor, I managed to get a working app on my Note 10 that drives the display. It flicks between screens, resets the two MPG indicators and allows me to change the time of the Real Time Clock.

Dashboard – Multi function display screen – 3

Here we go then …. the plastic inlay carrier was treated to a real good bash around and the display popped into place. Looks nice with the inlay on top, but believe me, there’s plenty to do underneath to make the mount safe for thrashing around on a motorbike!

The good and the bad so far ….. the good – fits (ish) and should be straight forward to finish off, it’s as good as the original in bright light and looks kind of nice as in black as opposed to grey when it’s turned off. The bad … we’ll the eagle eyes among you may have noticed that the plastic pegs for the ‘Mode’ and ‘Set’ buttons are missing. The display is just that bit to long for everything to stay. So I’ve decided to not only move them, but replace them with a 5-way switch that will allow better interaction with the new screen. The old buttons will stay simply to look retro!

Dashboard – Multi function display screen – 2

Burning a couple of hours each morning before work has proved beneficial in the end. The 4D display now has working fuel and engine temperature digits and graphics, plus the ‘clock’ is now actually attached to a real-time clock and showing the correct time. The board also runs a ‘self test’ on startup so that the pie slices cycle up/down along with a nifty ‘Aprilia’ splash screen. The lugs have been removed and an inlay panel is sacrificing itself to the Dremel tool …. all in the name of prototyping!

Dashboard – Multi function display screen

Aprilia Caponord ETV1000 Rally-Raid Arduino 4D Systems SDK-ULED-35D-AR displayMore years ago that I care to remember, fellow Caponord owner (Beasthonda) and I discussed the idea of replacing the dashboard LCD panel with an LCD screen that could be made to display just about anything we wanted. At the time, we looked at 4D Systems and made a few notes on feasibility,  but in the end the idea fizzled out – primarily because at that time the panels were expensive!

Aprilia Caponord ETV1000 Rally-Raid Arduino 4D Systems SDK-ULED-35D-AR displayWell here we are, a toe-dip into 2020 and the idea has been resurrected. This in part is due to the panels being better and cheaper now as well as the Arduino boards being much more powerful and faster than the old generation. So as I write, winging it’s way from Australia is an SK-ULCD-35D-AR kit …. basically a 3.5″ non-touch sensitive screen with all the cables and bits to program and connect it to an Arduino device.

The idea is to emulate the existing panel layout for day-to-day riding. However the device will have alternative screens available. The first will be the real-time display of sensor data from the ECU, the second will be a detailed trip computer, displaying continually updated fuel consumption and fuel tank range among other things. The next will display GPS position using a fusion of on-board GPS and Bluetooth mobile link for map downloads.

The display turned up a few days ago. Early the next morning, while the world shivered outside, I managed to program it with a couple of basic screens and power it up for the first time. The displays need to be scaled to fit the aperture in the dash overlay, but other than that it’s pretty much ready to hook up to some data. Role on the weekend!

Dashboard update

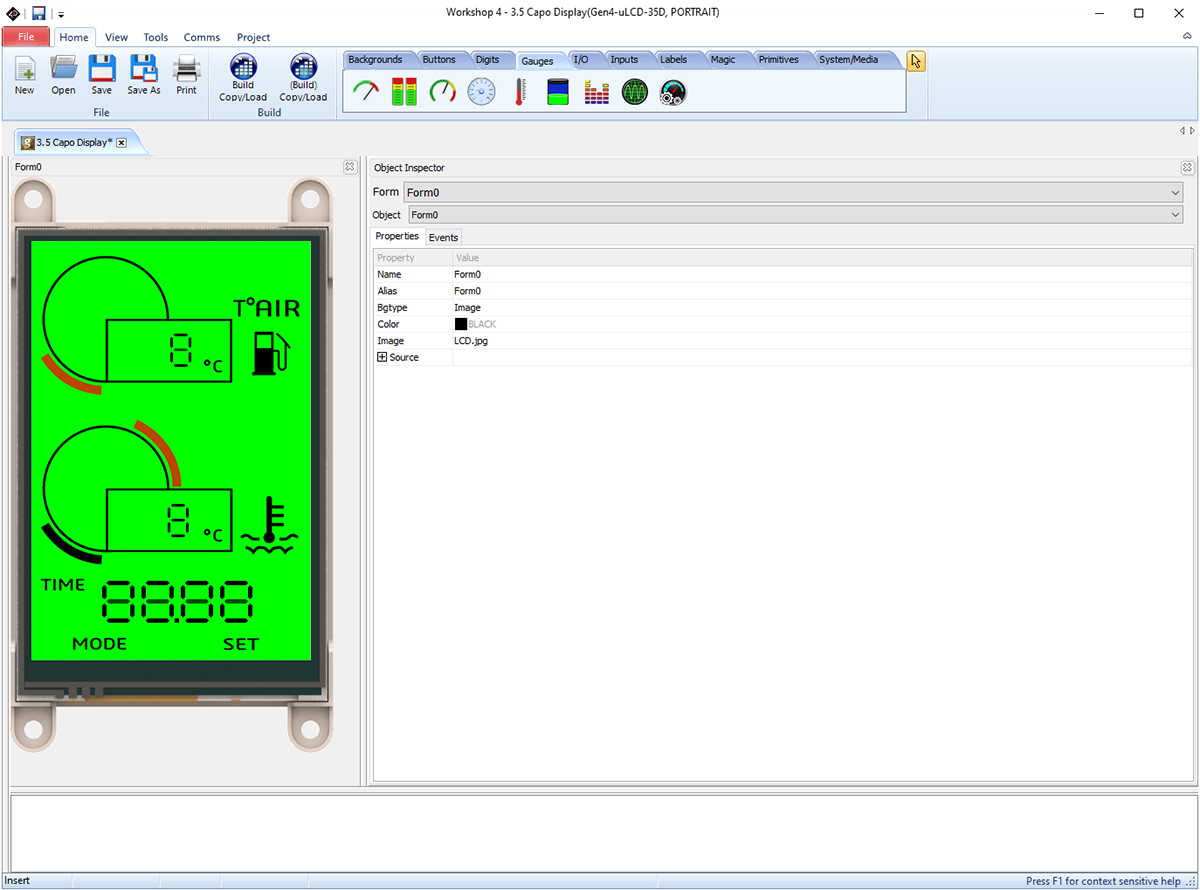
Just a reminder for those that have asked for dashboard repairs and those that are thinking about it …. I’ll be back in the hot-seat, all set up and ready to receive boards after the 8th January. As some of you know, life has been rather hectic with one thing and another over the past weeks, but soon the dust will settle. The bright side of this little waiting game is that the cost of return postage and transit time should be much improved …… especially for those in the UK! 😉

UV and dashboards don’t mix!

Aprilia Caponord ETV1000 Rally-Raid sun damage to dashboard LCDThe youngest Capo dashboards are about 10 years old now, maybe a little older, while the majority including the Futura are knocking on 14 to 16 years old. Every board that I see these days has very poor light output on the Blue LED’s and signs of UV damage to some degree in the lens. Most worrying though is the marked increase in the number now showing UV damage to the large LCD panel.

LED’s of course can be replaced, so can the lens if you can stomach the €60 (Wendel Motorräder) or £52 (Fowlers UK) and have plenty of patience while you wait an eternity for it to magically appear. However the LCD panel is a different matter, you’ll need to find a damaged/unserviceable dashboard you can rob or replace the dashboard in its entirety as these parts are unobtainable and were never sold as spares by Aprilia anyway.

Aprilia Caponord ETV1000 Rally-Raid dashboard instrument panel lens cover protection UVFor quite a while now I’ve taken to slinging an old t-shirt over the dash when parked up in an effort to offer it some respite from the elements. Not perfect I know! So a while back it got me thinking about knocking something up on the 3D printer – and here they are. Three panels, 4mm thick with the underside recessed 1.5mm to keep it well away from the lens. A groove runs around the edge to take the same 3mm diameter neoprene seal material (AP8120615) as used between upper and lower airbox halves, so only a thin strip of soft seal actually makes contact with the lens.

Aprilia Caponord ETV1000 Rally-Raid dashboard instrument panel lens protection covers with neopreneIf these turn out to be half-way useful, I might treat them to a layer of Zircoflex heat shield material and replace the flagging heat shield material on the plastic panels over the silencers at the same time!