It had to be done ……… but

Aprilia Caponord ETV1000 Rally-Raid valve service and cam covers replacedAs I sit looking at the vast expanse of white in the WordPress editor window, fingers poised over the keys and acutely aware of the aches in my fingers and wrists and subtle waft of soap barely masking the hint of worn out engine oil clinging stubbornly to the creases  in my old hands, I think to myself ….. aaagggghhhh why did I bother!

Yes, another Caponord service is over – with a valve check. Don’t get me wrong, everything went well, couldn’t have gone better in fact. Air/Oil filters and engine oil, plugs, hoses, fuel tank drain lines etc … are just perfect … but this time I had to fight my way in to check the valves, last done sometime when Crackerjack was on black and white TV’s – or so it feels.

Don’t get me wrong it’s not a hard job, just a fiddly one, especially the front cam cover bolt beautifully obscured by the coolant thermostat, oh and the buggeroo of a screw at the front of the cam cover, behind the radiator and below the finger shredding plastic mount for the front coils … otherwise, all good.

It’s none of that that bothers me in reality. It’s the fact that when you get in and measure the valves after what seems like way too many miles since the last visit, they’re all bloody fine! Couldn’t just one be out, just one require a shim change just to make the whole visit worthwhile – please! Oh well, I guess I had to console myself with fitting the powder coated cam covers and savouring the moment in the golden hour at the end of a beautifully warm day. 

Take the strain out of the drain

Aprilia Caponord Rally-Raid ETV1000 magnetic plug AP0241782 KTM 8030021100I think it’s reasonable to say that Aprilia got it right when they chose Rotax and the rock-solid V990 motor for their range of bikes in the late 90’s. Bullet-proof doesn’t quite do it justice, especially in the de-tuned Caponord variant. But even this wonderful piece of Bavarian engineering has it’s weak points, and probably the one most obvious from a service-by-service aspect is that damn annoying magnetic plug in the crankcase.

Yes, little old AP0241782 can be easy to install, but a stress-breeding mega-monster when it comes to it’s removal. Stubborn is just too understated for how this little sucker can behave! Even with a brand new, high quality hex-key you feel the fear rise in your throat as you apply more and more torque – until finally with a loud ‘crack’ it gives way while your knuckles accelerate toward the floor at light speed. Or as has happened on the odd occasion, the head sheers off!

Over the years I’ve tried removing it with the engine hot, cold and in-between …. with prayer, witchcraft by a full moon and plain old cursing. In the end the best remedy I stumbled upon was a bag full of the little suckers donated by a friend. Spoiled as I was, I could afford to be decadent and change the plug for a new one every three services. By that time the fit between the screw and hex-key was getting a little stretched. But then one day,  the bag ran dry …. oh my!

Aprilia Caponord Rally-Raid ETV1000 magnetic plug AP0241782 KTM 8030021100A little online digging threw up a bit more info regarding Aprilia numbers and options. It turns out that the magnetic plug AP0241782 has now been superseded by 2R000498 AND there is an optional washer offered if you want to use one. The 07-09 RSVR and 07-10 Tuono used the same plug AND also had the crush washer AP0250640 fitted. This washer is now sold listed as a usable option on all engines that use this plug. Does it make a difference? I’ve no idea as I’ve not tried one, but I guess it moves the mating surfaces from the taper to the screw head/crankcase and washer. In the end I went a different route used by many others over the years.

Following the recent footsteps of my old mate Beasthonda, I dipped into my pocket and purchased a KTM mag plug – 58030021100 for the princely sum of  just under £9 compared with the Aprilia part retailing at £32. This saving alone is worth moving away from the Aprilia part! Now the eagle-eyed among you may have noted that the magnet on the KTM plug is longer than on the Aprilia one and be concerned that this could cause a possible oil restriction – fear not. The 10mm magnet (versus 8mm) fits into a cavern …… the space inside the crankcase behind the magnet goes back at least 50mm, so there’s tons of room around for oil to flow by. So, job done ….time to move on with the rest of the lockdown service.


Airbox breather update – (almost) a year on

Aprilia Caponord ETV1000 Rally-Raid airbox breather drainJust gave the Capo motor a service. No drama, everything went according to plan. I just thought I’d share a couple of pics of the inside of the airbox – with the modified breather – straight after the air-filter assembly was lifted. No cleaning, no Photoshop ….. just as it looks after 5,354 miles. The throttle butterflies, velocity stacks and idle air control valve (IACV) are all perfectly clean.

The extended drain tube from the airbox (down below the oil filter casing) held about a spoon full of oil when drained and what can be seen in the photo was only a light coating in the bottom of the airbox. One sheet of kitchen towel had that as clean as a whistle in a few seconds. Since doing this breather modification I’ve ALWAYS run the oil level to the HIGH mark on the tank. So without the tedious job of removing and cleaning out the complete airbox, it was a pleasure to simply replace the Athena air filter and button everything back together.

Aprilia Caponord ETV1000 Rally-Raid airbox breather drain

Oil in the Airbox …..fixed!

You may (or may not!) have read the post a couple of months ago – Fixing a few Capo niggles. That was where between Continental trips, the original air-box molded connection for the crank-case vent was drilled out and a new 90° bulkhead coupling and Aprilia Caponord ETV1000 Rally-Raid extended airbox drain tube
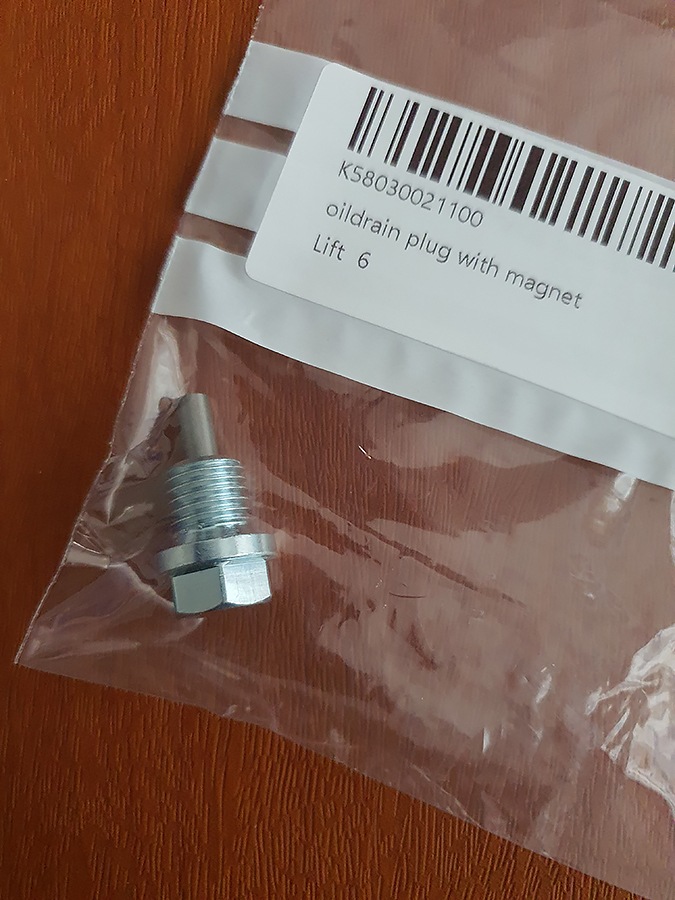
pipe fitted to drain any oil into the front of the airbox, well away from the throttle body and IACV (Idle Air Control Valve).

Now with the Caponord seriously (+1,000 miles) overdue a service, I got stuck in and removed the tank ready for plugs/air filter. I admit to being really pleased to see no oil what so ever in the upper part of the airbox and only a tell-tale smear in the front section. A syringe sucked what oil there was from the drain tube – approx. 5cc @ 3,000 miles WITH the oil tank filled to the HIGH mark.

Previously it didn’t seem to matter where the oil tank level was, oil kept getting thrown into the airbox and sucked down into the throttle body. Look closely at the design of the airbox and you see the ‘fenced’ in area (red) around the velocity stacks – and of course, the two slots in the stacks (arrows) for excess oil to drain through.

Aprilia Caponord ETV1000 Rally-Raid new crankcase drain inside the airbox

It’s pretty obvious then that Aprilia/Rotax EXPECTED regurgitated oil – and tried to ensure it was fed back to the engine and burnt. Unfortunately that isn’t always the case and when some bikes are left on the side-stand oil manages to get over the ‘fence’ and muck up places it shouldn’t!

Of course a little hot oil can spread a long way and look far worse than it really is ….. I guess it just niggled the hell out of me each time I lifted the airbox lid. In hindsight it’s one of those quick jobs I wish I’d done years ago.

Fixing a couple of Capo niggles

Aprilia Caponord ETV1000 Rally-Raid airbox / crankcase vent modificationOne niggle that has wound me up more than anything about the Capo over the years, is its unerring ability to regurgitate oil into the airbox – apparently no matter how much or little I fill the oil tank. In the end, enough is enough, time to do something about it.

So this is it, remove the molded spigot/structure into the airbox and replace with a new low-profile 90° coupling and pipe to dump regurgitated oil into the front section of the airbox, from where it can be drained off via the extended drain-line down by the oil filter. Hopefully no more lumpy idle and intermittent ‘cough’ coming off idle after extended (12Hrs+) runs at motorway speeds from the vented oil draining down into the throttle bodies. A better fix of course would be to build a trap before the airbox that would allow oil to drain back the way it came while still passing vapour into the airbox. That’ll wait until winter, for now I’m hoping this will work good enough.

Aprilia Caponord ETV1000 Rally-Raid clutch oil jetsSecondly, and I don’t mind admitting when a change to the Capo doesn’t work – I’ve gone back to the #60 clutch oil jet from the #40. Why? Simply because the benefits were outweighed by the losses …… yes the #40 jet made the initial 1st gear selection go from ‘CLONK’ to ‘clonk’ but it also buggered up all subsequent gear changes, gone was the silky smooth shift that I’d had with the #60 jet. In the end I would say that if your Capo shifts gears smoothly and doesn’t have an issue selecting Neutral, then leave well alone. I’m sure for those with no jet, a blocked jet or a nasty gear shift this may well be a worthwhile modification, for me I’m glad to have the old slick-shift gearbox back again.

Cam chain tensioner – part 2

Aprilia Caponord ETV1000 Rally Raid cam chain tensioner AP0236252Sorting the rear tensioner yesterday took all of 20 minutes, but I knew that the front was going to be a different kettle of fish altogether because of the coolant pipes. No worries, I thought – a good excuse to change out the coolant as well.

So in I went and oh what fun it was! Off with the crash bars, side panels and sump guard, move the coolant bottle and release the radiator bottom hose and drain the system – so far, so good. Remove the airbox and release the clamps holding the throttle bodies in the inlet rubbers ….. hmmmm – looks like they’ve got a few deep cracks I’m thinking.

Aprilia Caponord ETV1000 Rally Raid inlet manifold rubber AP0267150Take off the rest of the hoses, cables and electrical connectors, now a gentle pull and twist to release the throttle bodies and ……………… oops! I think the cracks in that rubber were a tad deeper than first thought and a touch beyond repairing with a splash of rubberised goo. Luckily I’ve a spare pair to hand from the l’Aquila stash. However, this momentry inconvenience isn’t the task of the day ….. so onward once more. Hoses, cables anything and everything moved so I could at last get to the two clamps holding the ‘Y’ hose in place  – then finally the goal was in sight, the pot at the end of the rainbow …. the front cam chain tensioner!

Aprilia Capononrd ETV1000 Rally Raid inlet manifold rubber AP0267150With a heave, a grunt and too many fingers trying to get into too small a space I managed to retrieve the tensioner from its hide-away, gave it a squeeze and ……… it was fine, solid as a rock! Never mind, a flush to clean out any debris and a refill with clean oil never hurt.

Then it was rebuild time. The tensioner’s in place and the cap torqued down to 30Nm with a swanky new copper washer. The super-shiny inlet rubbers torque down at 19Nm and the rest of course is then a reversal of strip-down – with the intention of NOT ending up with any washers, screws or clips left over! And so with the sun ready to slip behind the mountains it was test-time. Glad to say she fired up first hit of the button and sounded so much smoother, funny how you get used to little noises and ‘character’ over time – now she’s idling smooth as can be, a tweak on the throttle body sync screw had the manometer within a couple of mills AND it stayed that way when the motor was reved, something it didn’t do last week. So I’m guessing the cracked inlet rubbers were an issue after all! 😳 So that’s it for today, other than updating the Capo’s history spreadsheet ….. the Capo has now done a pinch over 74,400 miles and other than a couple of valve shims and plugs, it’s the only work the motor has ever needed.

Next stop – tyres, chain and sprockets. 😯

Cam chain tensioner – part 1

Aprilia Caponord ETV1000 Rally Raid airbox
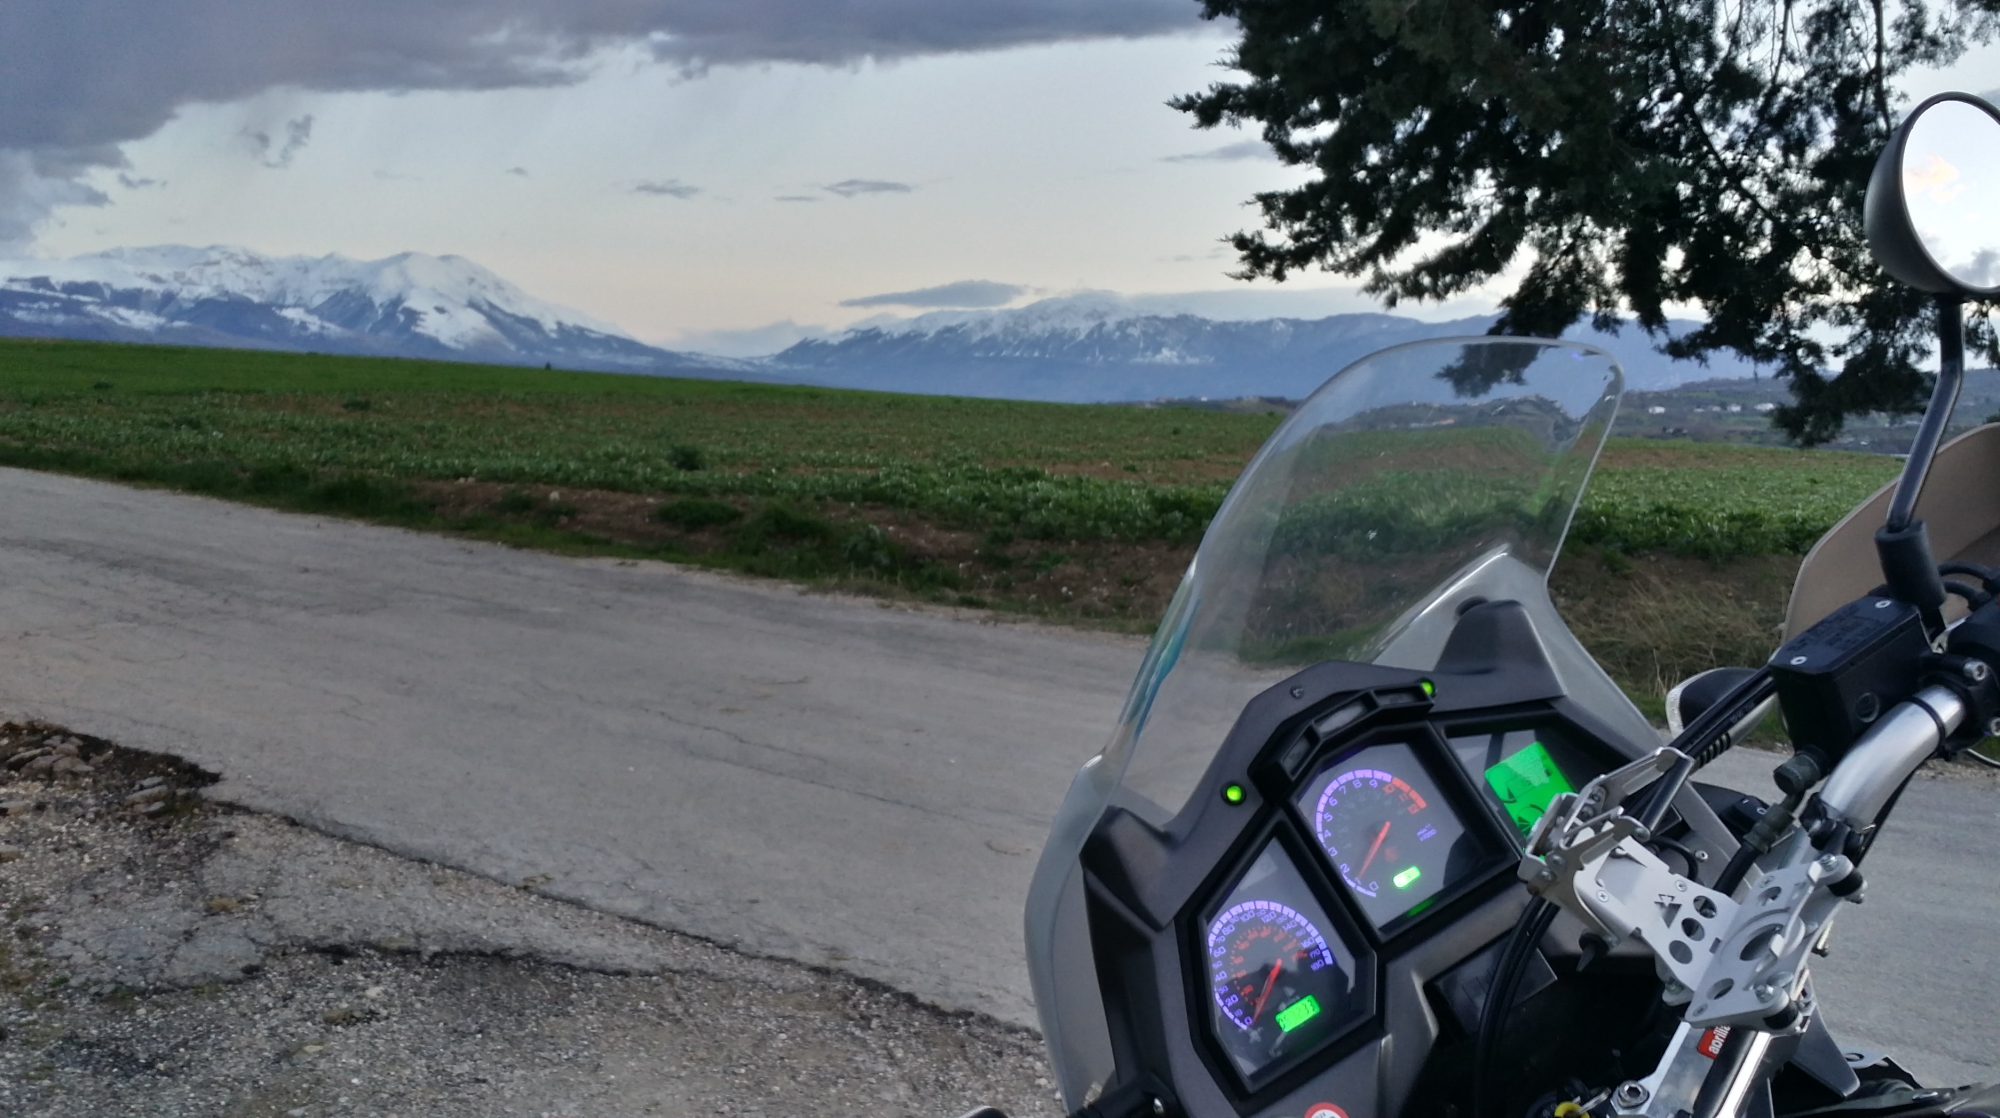
Yesterday I spent a lazy morning installing a couple of sensors inside the airbox (more in another post) and with the tank propped back in place, fired the Capo up to check the fuel lines…….

…… and just for a second or so after she fired up there was a distinct rattle from the rear cylinder and frankly it didn’t sound too special as the bike warmed up. To be honest, I’d heard it before on a couple of occasions but couldn’t pin down which cylinder it was. With the tank lifted and stood in just the right position, it was obviously the Aprilia Caponord ETV1000 Rally Raid cam chain tensioner AP0236253rear. As it was lunch time, I decided to have a look a bit later – and promptly forgot! Well I got back to it in the evening and pulled the cam chain tensioner out. Soggy as a knackered bed spring! 🙁

So it had a thorough flush out and re-charge with fresh 15/50w oil and firmed up nicely (phew!) …. it looked as though contamination had built up in/around the ball that seals the oil in, in this case letting it out just as easy. Buttoned it all back together, fired the motor into life and revelled in a quiet(ish) Capo motor – just in time for a cold beer and MotoGP on the box, bliss! As I sat watching the race I kept having a niggling thought … what if the front one is the same?

Tomorrow feels like a let’s-check-the-front-one day ……….. 😕 

Front fork service …… better late than never!

Aprilia Caponord ETV1000 Rally-Raid fork cap ....... and yes, I've used this picture before!The dodgy wrist and Dog awful weather here in Italy at the moment have both contrived to keep the Capo tucked up in the barn, a hairs breadth from the magic 100,000Km. So while the rain poured its heart out, I decided to have a look through the Excel spreadsheet of service/repairs/upgrades for the Capo ……… and realised that the front Motul fork oilforks hadn’t had an oil change for over two years!

Well I must admit to being pleasantly surprised. The oil that came out was pretty clear and a flush with a dash of 5w oil soon removed the small amount of sludgy dregs from the bottom of the legs. A refill with blended Motul 8.5w oil and a reduced air-gap of 115mm (Std 130mm) works well, so I see no reason to fiddle with settings that suit my riding style. Overall the job took about an hour a leg taking it slowly, sipping tea and watching the clouds drift down the valley!

At this point, a gentle reminder for RR owners. Please remember that the Rally-Raid supplement is WRONG regarding oil volume! The forks take approx. 580cc each for the standard 130mm±2mm air-gap – NOT 680cc as specified ….. Unless you want a mess on the garage floor when it pours over the top of the tube!

Aprilia Caponord ETV1000 Rally-Raid Marzocchi front fork spacersAnd another point that it may well be worth mentioning ….. the fork recall that Aprilia issued in 2004 – has yours been done and what exactly IS done? As far as I can gather, it was simply a new spacer below the spring as the original was the wrong size and could, under harsh riding conditions, collapse and lock the forks solid. Not my idea of a bucket load of giggles that’s for sure. Aprilia say that mine was done in 2006 (thanks Tom at Moto Forza Italia – Silverstone, UK for helping) and Marzocchi say that the current Aprilia part number AP8163475 IS the upgraded part.

The spacer in mine looks fine although definitely showing signs of compression where it sits on top of the cartridge. This time I’ve flipped them over to even out the wear, maybe next time I’ll look into adding aluminium caps to the spacers to spread the load more evenly.

Anyway, that’s all done and dusted for now …… next stop, some new brake pads I think. The fronts look like the remaining material has about the same thickness of a well sucked After Eight mint! 😳

Oil pressure switch

Aprilia Caponord ETV1000 Rally-Raid AP0956169 Oil Pressure SwitchOver the past few months I’ve noticed the oil pressure LED getting dimmer after the initial dashboard power-on-self-test has finished. Then a couple of weeks ago, no oil light at all. If I pulled the electrical connector off the switch and shorted it to the crankcase, the lamp worked fine, so the oil pressure switch was u/s, fubar, stuffed ……….

I bought a new one from Ultimate Parts in the UK that came in a plain zip bag, not an Aprilia one and isn’t the same as the original – requiring a 24mm socket instead of the Aprilia Caponord ETV1000 Rally-Raid 0.3-0.6bar M10x1 thread oil pressure switchoriginal 21mm. As such I have a sneaking feeling this is an aftermarket part and not genuine – but sold at a genuine price! Either way, both new and old are marked as 0.3-0.6bar (4.35-8.7psi).

Swapping it out on the Rally-Raid was a simple 5 minute job – remove the aluminium sump plate, disconnect the electrical connector and use a deep 21mm socket on a short extension to clear the sump guard frame and unscrew the old unit. You’ll lose a couple of tea-spoons of oil but that’s all. Simply swap to the 24mm socket to fit the new one, reattach the connector and refit the sump plate – job done. The job’s made all the easier if you do it on the side-stand rather that the main stand as the switch is mounted on the right hand side of the engine!

Service time over

Empty tank makes for light work!Service time is over for another 6,000miles. I decided a couple of years ago to extend it from the original 4,650 miles due in part to the well documented stability of the valve clearances and because I’m using the long oil filter and a decent branded oil. Whether I’m being realistic or foolhardy for extending the interval only time will tell.  😕

Valve clearances were all in spec but on the tight-side, so no need just yet to use the new Hotcams shim kit, but next time I’ll change all the shims by ±0.025mm to shift the 0.13mm ...... getting close to the limitgap back into its mid-range. That should see the valves good-to-go for at least another 50k miles. Everything else was absolutely fine, with just a slight tweak of the CO to lean out the idle.

The rest of the bike was given a thorough check over and happily all bearings and seals are fine, a squirt of grease in the rear suspension linkage keeping that nice and smooth. The drive chain and sprockets were cleaned and checked and after 33,333 miles (yes, that’s a genuine number!) they’re still good ….. This is the highest mileage I’ve EVER had from a drive chain. DID ZVM2 chain rocks!