 Yesterday the new Karoo 3’s were fitted by a nice chap down at Vulcarapid in Pescara and by 3pm the wheels were snugly back in place. That just leaves a sneaky little test ride!
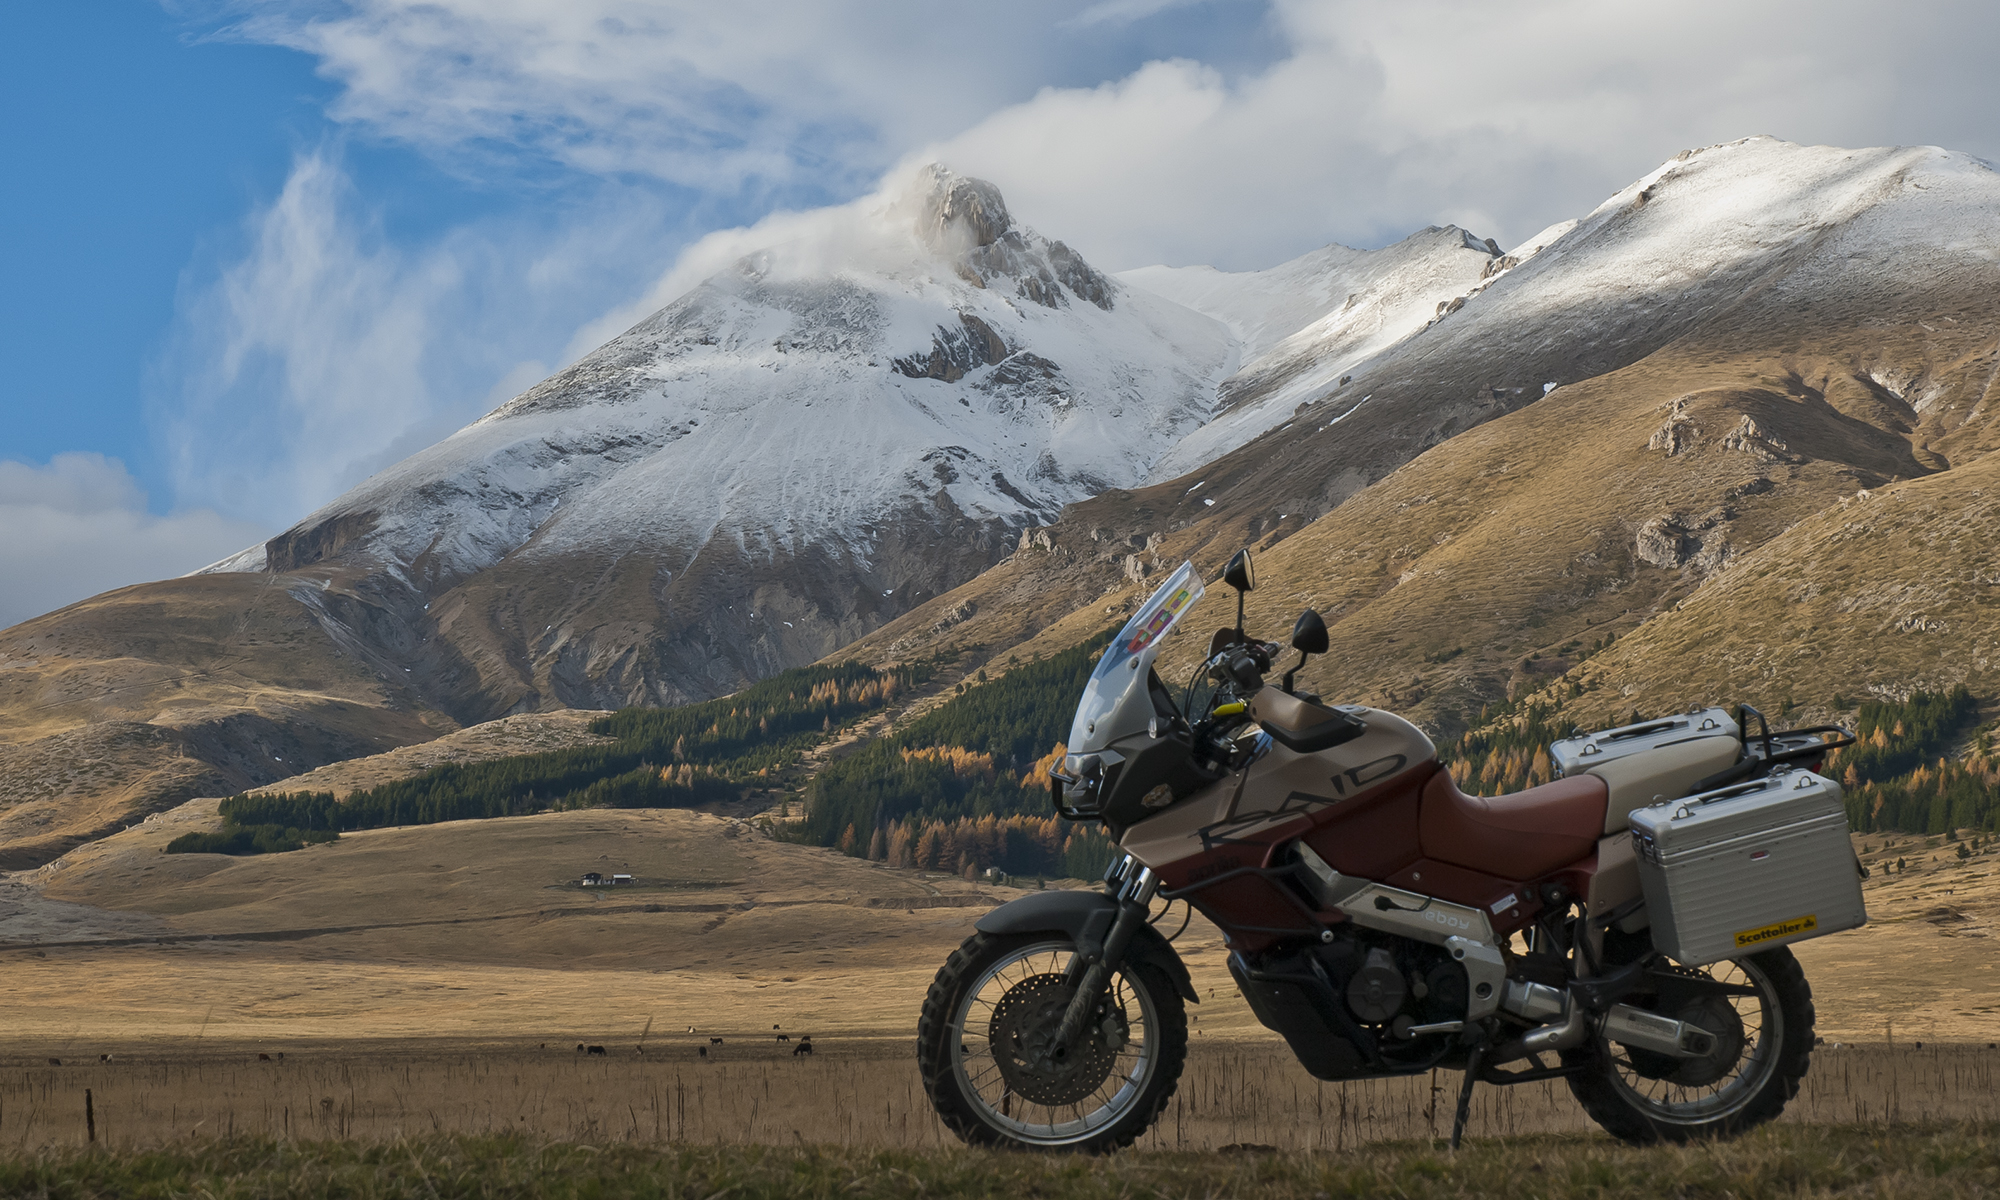
So the next morning with the thermometer nudging 27°c and not a cloud anywhere in sight, I loaded the camera and a couple of sandwiches in the cases and set off. So the question now has to be, what are the first impressions of the Karoo 3’s?
Before saying anything though, I want to ask a question ……. would you deliberately choose to ride your Capo (or any bike!) on black-ice …. or marbles? My guess is no.
Well, sadly that’s exactly what zero mileage Karoo 3’s handle like and it’s not a pleasant experience at all. As I turned right onto the black-top from our gravel road the steering felt vague and the bike felt as though it was going onto its side. Under gentle acceleration in a straight line the tyres squirmed left and right, exaggerating dips and undulations in the road surface. After about 3 miles I’d all but had enough, the bike just felt awful and I was ready to swing back home ….. but in hindsight I’m glad I didn’t.
 I continued on to Castel del Monte and mile after mile the tyres began to settle down, lean angles slowly increased while acceleration and braking stability began to sort their act out. The mileage slowly climbed as did my progress up the mountain, by the time I stopped for a bite to eat, the trip meter said 52 miles and my confidence levels were a magnitude improved.
Now I quite understand if you’re thinking along the lines of tyre pressures, or tyres fitted the wrong way around, or that maybe I’ve screwed up the wheel installation. Fact is, everything was checked and checked again. The instability could only be the new tyres.
And here is where I hop off this particular pony ……. I’m not getting drawn into a ‘fresh tyre grip argument’ or the myth of ‘mould release agents‘. Knock yourself out on the internet or slug it out with your mates down the pub. I just know what I experienced and can only compare it to 34 years of riding both professionally and socially and having ridden out of a fair number of dealerships, tyre bays and workshops on all shapes and sizes of new tires …….. and never before experiencing this dramatic a start with any of them.
But back to the last bit of the journey …..
 Well the remaining 50+ miles of the day took me back down the East side of the mountains where dense forest smothers the road down to 800m or so, where it begrudgingly gives way to agricultural land. The trees keep most of the road in dense shadow, dappled by undulating patches of bright light that pierced the canopy above. This camouflages the road surface so you can’t read it until it’s almost under your wheels. The problem is, the road is BAD ……. potholes, gravel, tree debris and water to name a few. I guess the constant dark and micro-climate helps nature do it’s worst to the road surface all year round.
Now though, the Karoo’s were starting to work for me, stable and unfazed by the constant variety of surface they needed to work with. Hair-pin bend after hair-pin bend had the Capo tracking like a mountain goat on steroids, each inspiring more confidence. Eventually I left the tree line behind and headed down to the SS80, familiar roads and onward home. The last few miles I road exactly as I would have done on the Anakee 2’s.
The days conclusions ….
 Disastrous to start, but at least they continually improved throughout the day, a roller-coaster of a day in more ways than one! But I have to ask myself a couple of questions:
- If I’d known how the Karoo 3’s would start off, would I have fitted the more expensive TKC80’s again? Yes probably.
- At this moment in time, with only a measly 100 miles + on which to base an opinion, would I fit them again? The little voice, the one way back in your subconscious answered first …. errr no.
So not exactly a glowing start and one from which the Karoo’s may well struggle to recover, only time will tell. Winter is just around the corner and their performance on our gravel/dirt road over the coming months will no doubt make or break them.
 It took the best part of three weeks for the valve shim kit to arrive from the USA ….. and I think that’s rather good, considering the surge of Christmas post whizzing around the world, not to mention the holidays themselves getting in the way.
 The V990 engine uses shim sizes from 2.3-3.0mm in 0.025mm increments, so quite a few of the Hotcams kit are redundant, not only that, the kit only contains shims in xx.000mm or xx.050mm sizes, not the xx.025mm and xx.075mm that may be needed. Now this may appear to make the kit a rather poor choice, but look again at what you do get for your money when compared to the shims an Aprilia dealership/stockist will sell you.
 Hotcams Shim Kit – delivered to Italy was $82.35 / £49.94 / €59.73 including customs duty & taxes. That’s 15 usable shim sizes (x 3 each) and works out at approximately $1.83 / £1.11 /€1.33 per shim. Now compare that with genuine shims from AF1 in the USA – $14.99 each*, or Ultimate Parts in the UK – £9.15-£12.85 each all of course with package and posting on top. I think it’s fair to say that if 50% of the shims are on hand for around 10% of the Aprilia list price …. well I can live with that!


 As well as getting the inlay reprinted with the added voltmeter graphic, I’ve also decided on a little re-arrangement of the existing graphics and functions. For example, why oh why is a ‘side-stand’ light prime-center of the display when it already has a safety circuit to stop you riding away with the stand down? ….. Magneti Marelli over-egging the pudding I think.


 You can also see the ‘M+S’ text on the sidewall of the tyres. As far as I’m aware this means diddly-squate ….. nothing except that grooves at the edge extend into the centre of the tread and that 25% of the tread is open. There are no tests or criteria with regards to real-word operation of the tyres in mud or snowy conditions. Tyres that are tested as truly ‘winter’ tyres will have the snowflake symbol on them …. and I don’t know of any m/cycle tyres that have it. If you do, drop me a line.

