Dashboard motors – an update

Aprilia Caponord ETV1000 Rally-Raid dashboard speedometer tachometer stepper motorAn old (ironic) joke in England states that you will stand around for an eternity waiting for a bus – only for three to come along at the same time! In the same way, dashboard faults sometimes do a similar thing. Recently I had three boards arrive; all had defective speedo/tacho motors. All six motors were physically broken and two electrically dead.

The motors mount to the circuit board by four soldered pins and two push-fit pegs. The arms on the motor case that grip the pegs break off and that leaves the motor pivoting Aprilia Caponord ETV1000 Rally-Raid dashboard speedometer and tachometer stepper motor stress analysison the four soldered pins. With time and vibration, the armature wires that are soldered to the pins flex and break – one dead motor.

Replacements are available from flea-bay for between £30 and £45 –not exactly a cheap part, especially when the old one may still be working fine. Now it seems a cheaper solution is available in the form of a replacement front cover (part with arms) for a fraction of the price of the full motor. On close inspection it doesn’t look like a 1-for-1 copy of the original (the arms are slightly different) but it’s well worth a punt at that price to see if it works.

So why are they failing? Well my guess is, it’s a combination of age, vibration and heat/cold cycling that causes the arms to fracture. Once that support has gone, the motor is left suspended on the four soldered arms – and they in turn are press-fitted into flimsy Aprilia Caponord ETV1000 Rally-Raid dashboard speedometer and tachometer stepper motor armature wireplastic spacers. The armature wire (very thin!) is soldered onto these pins, with very little slack ……. So any flex between motor and pins will inevitably stress the wires and cause them to break. They can be repaired of course, you just need good equipment, a magnifier and VERY steady hands!

Unfortunately, spotting a broken motor is difficult without striping the dashboard, but here’s a little something to look out for …… have a good close look at the needle, where it passes through the inlay. If the speedo needle looks like it’s drooping downwards or the tacho needle looks like it’s leaning to the left – suspect a broken motor. Remove the dashboard and give it a gentle shake – hear something rattling inside? That’ll be the broken arms floating around – tick-tock, tick-tock – it’s only a matter of time now before the armature wires give way!

Aprilia Caponord ETV1000 Rally-Raid speedometer and tachometer stepper motor disassembled

F4240 Hex …….. or 10^6 in old money if you prefer

While some of you may find the following post trivial or questionable and others may think it as anal as colour grading belly button fluff ………. I sincerely and unreservedly, don’t give a flying duck. KarlB March 2016

“Neither the mouse nor the boy was the least bit surprised that each could understand the other. Two creatures who shared a love for motorcycles naturally spoke the same language.”
Beverly Cleary, The Mouse and the Motorcycle

Honda SS50I seem to recall it was back in 2007 that I read a piece in a UK bike magazine, in which the journo waxed lyrical about documenting a riding time-line ….. Laying out your bikes, accidents, countries visited, mileage etc. since you first threw a leg over a bike to the present day.

I admit the idea was intriguing. Our bookshelves held all manner of manuals*, dockets, documents and diaries from every bike I’d owned and company/despatch bike I’d worked. It took about 12 months on and off to go through everything and assemble it onto a spreadsheet. The end result was quite surprising, the only missing information seemed to be loan/courtesy bikes and training school instructor/student bikes I’d ridden when not using my own. So it’s fair to say the number twinkling on the screen was several thousand miles short, this counteracted very nicely with the fact that bike odometers are woefully inaccurate and over-read. Bottom line – I felt the overall mileage displayed reasonably reflected my riding to that date.

Each following year the spreadsheet was updated with the Capo’s mileage and each year it never really looked like it changed much – until this year. In late January I realised I only had a few miles to go, so a reminder was stuck on the Capo dashboard – When the odometer hits 90,898 – you’ve done it fella.

Aprilia Caponord ETV1000 Rally-Raid rider reaches 1,000,000 miles

Aprilia Caponord ETV1000 Rally-Raid rider hits 1,000,000 miles
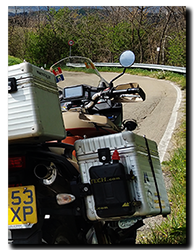
That day has finally arrived. On a nondescript little back road the Capo rolled to a halt, I switched off, fumbled for the camera and took a moment to look around and reflect on the years, roads and miles that led me to this point ……………. all 1,000,000 of them.

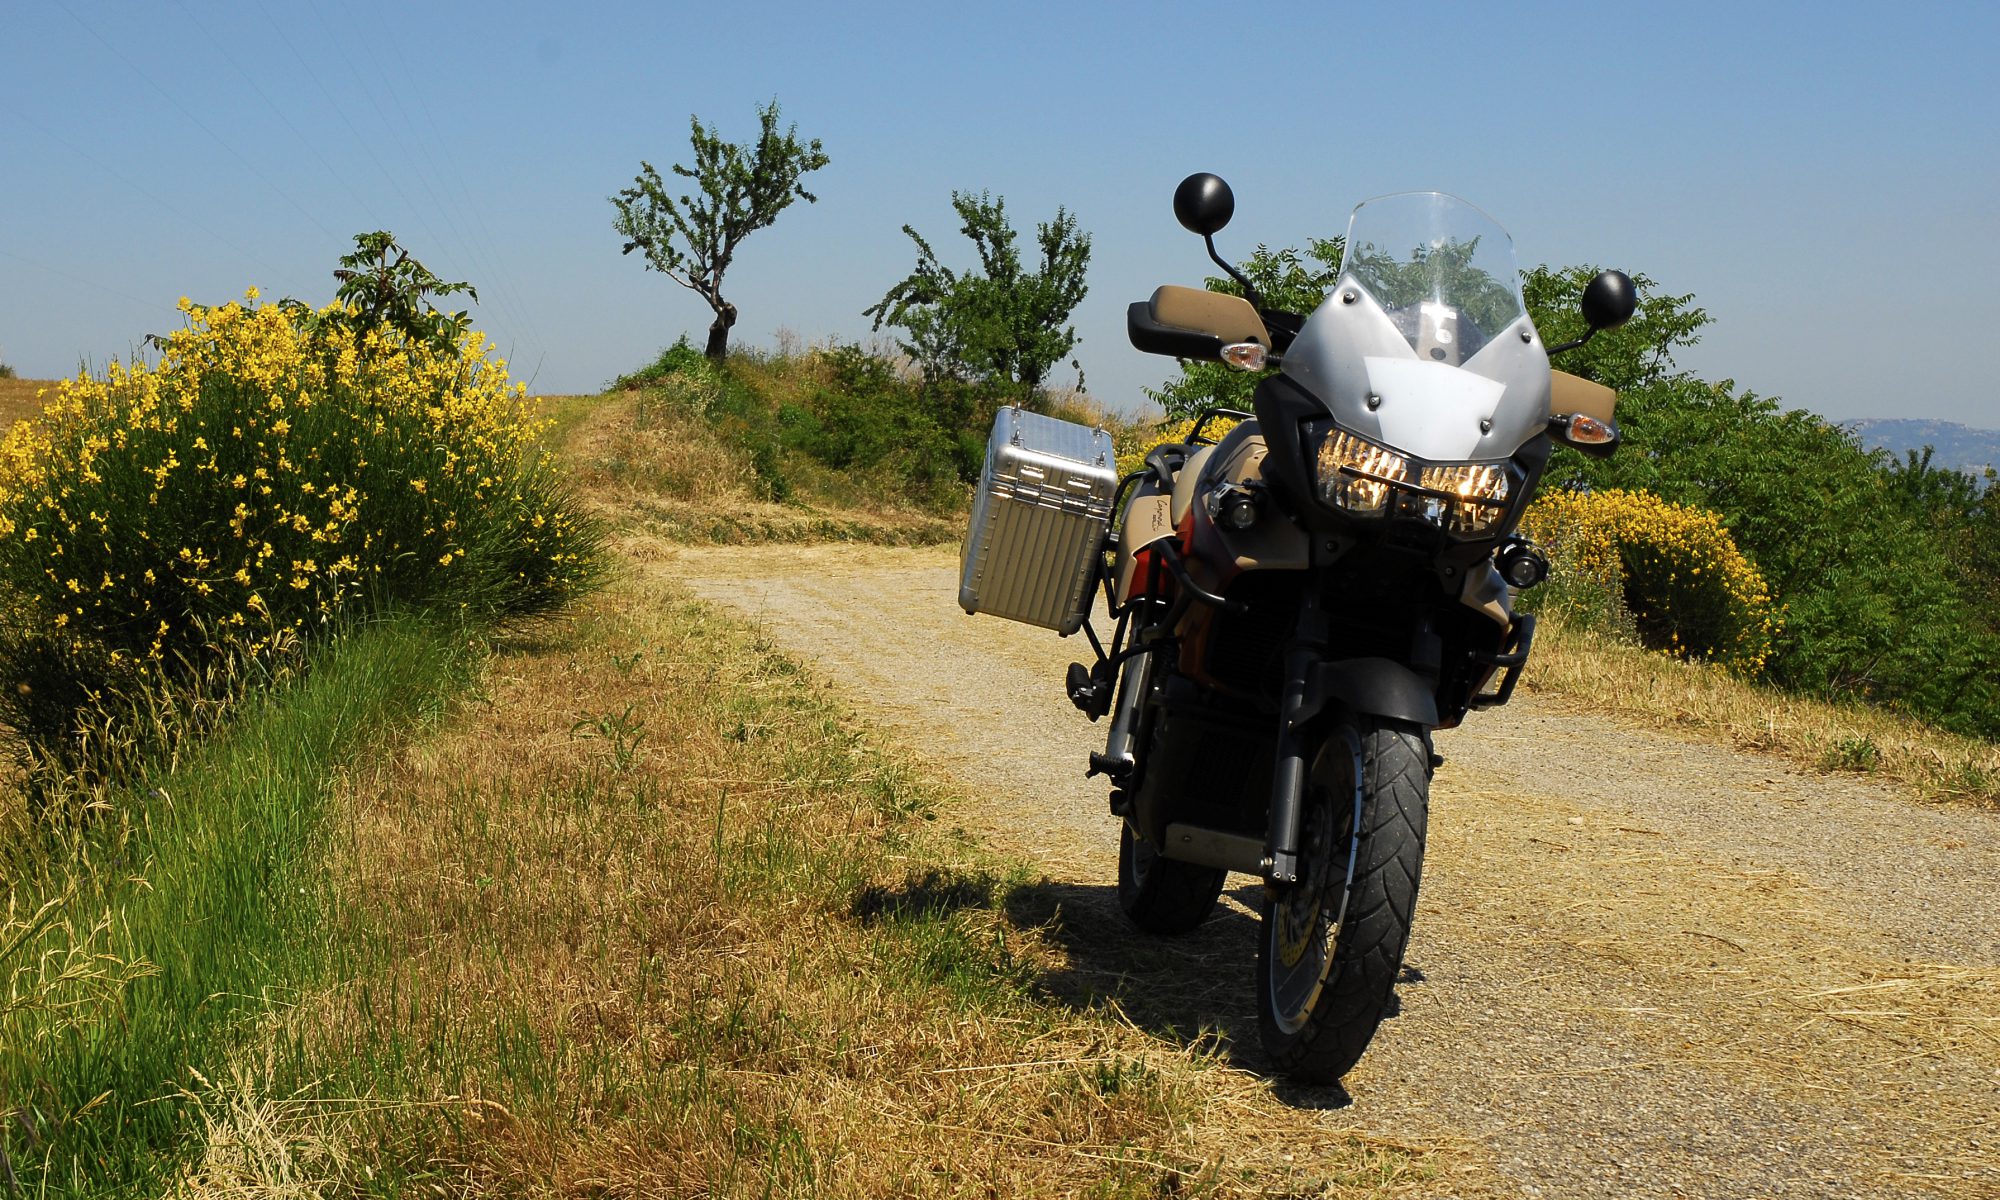
*Each bike since my first Honda SS50 has had a Haynes, Clymer or genuine workshop manual from day one – not one of them has ever been dealer serviced. Each has the mileage on purchase, mileage at upgrade or repair and final mileage when sold added in the fly-sheet. The Capo is the first bike to be totally digital – manual, parts lists the whole nine yards.
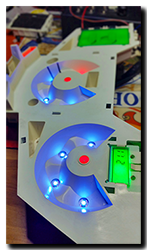
g this is fun!

Aprilia Caponord ETV1000 Rally-Raid Dynamic Brake Light SystemI’m not really enthusiastic about the constant onslaught of technology on motorcycles …. the cynic in me sees mostly a revenue-earning exercise whereby the benefits to you and me are far outweighed by the locked-out, take-it-to-the-dealer and be fleeced mentality of the manufacturers.

But occasionally I do spot something that tweaks the nose of my flagging interest …. this time it’s been the BMW Dynamic Brake Light system. Trying to get the myopic, half-asleep nit-wit to notice the difference between my normal braking and HARD BRAKING is sometimes a real issue. There’s nothing worse than gliding to a halt only to hear some plank with full ABS active about to kiss my back wheel! Hmmm so how hard can it be to make a box of tricks to do the same as the BMW system and fit it on the Capo …..

Well a tad more difficult than I first thought that’s for sure! The BMW system seems to work as follows:

  • At speeds over 50Kmh(31mph) when braking HARD the brake light pulses at 5Hz*
  • When the speed drops below 14Kmh(9mph) while still braking hard, the hazard lights are activated.
  • When the speed rises back above 20Kmh(12mph) the hazards are turned off.
  • At all other times the brake light functions as normal.

*EU rules quote a rate of 4Hz (±1Hz) for LED’s and 4Hz (-1Hz) for incandescent bulbs.

Aprilia Caponord ETV1000 Rally-Raid accelerometer dataSo how to replicate this on the Capo? Enter one test-box to get things started …… a microcontroller that measures acceleration in three axis and has inputs/outputs to the brake light, hazard lights and speedometer. The box of tricks is designed to allow normal brake/hazard light function in case of power or hardware failure … all in the name of safety don’t ya know.

Getting usable data from the accelerometer was harder than I thought ….. the thing is VERY sensitive and has needed a lot of filtering and data-smoothing to get usable info from it. But after a couple of days and quit a few emergency stops (all good practice!) the data is starting to look good.

Aprilia Caponord ETV1000 Rally Raid Dynamic Brake Light SystemNext up, I need to input the Capo’s speed to the microcontroller. For this I’ll use the speed output pin directly from the dashboard – I knew it would come in handy one day! All the inputs are buffered with opto-isolators to make sure the system is as well protected from the noisy fluctuating voltage in the Capo’s loom as is possible. Now with the prototype well under way, it just remains to find answers to some other  questions ….. such as what about braking on wet, loose, icy surfaces where deceleration will be significantly less, but the dynamic brake light might still be useful. My guess is the BMW system has some integration with the ABS system to shift the triggering point, but I don’t have ABS! This one I’ll have to ponder on a while longer.

One things for sure …. you learn a lot about braking forces, motorcycle dynamics and breaking code doing this malarkey! Oh and I’ve found out that a warm front tyre breaks grip at about 1.1g …… 😳


Clutching at straws …..

Aprilia Caponord ETV1000 Rally-Raid DOT5.1 clutch & brake fluidClutch slave cylinders/seals and brake fluid can be almost as emotive as good old engine oil, everyone has an opinion. Well I’ve just changed brake/clutch fluid after about 15 months, usually I’d do it every 6 months or so, but somehow I’ve ended up getting a bit lax and let it slide. So for what it’s worth, here’s how things have worked out on my own Capo over the years.

Aprilia Caponord ETV1000 Rally-Raid clutch master cylinder DOT5.1 fluidI think everyone will agree that it’s the clutch fluid that takes the most punishment, followed by the rear brake. So here’s a couple of photographs of the inside of the master cylinder straight after opening it and a comparison of the fluid drawn off, with straw colour of new fresh oil from a sealed container. No black residue in the master cylinder and only a slight colour change in the oil with almost no cloudiness. The fluid drained from both front and rear brakes was almost like new, but it’s nice to keep the fluid fresh anyway.

Aprilia Caponord ETV1000 Rally-Raid DOT5.1 brake & clutch fluid In comparison the oil I used to drain at 6-12 month intervals from the clutch was cloudy with black residue in the master cylinder and the rear brake was frequently amber in colour, only the front brakes seemed to show little degradation – all this was while using DOT4!

Todays oil is DOT 5.1 and has done 27,143 miles over 15 months

I’ve been using DOT5.1 now for the past five years and the first (10 year 44K miles) clutch slave seal was replaced in late 2013, not because it failed, but because it seemed to be letting a little air back into the system after long (24Hr+) runs – enough to give an extra 4-5mm or so of free play at the ball end of the lever otherwise it seemed fine in normal day-to-day use. Seal replacement was purely precautionary. The replacement seal has been used with DOT5.1 its entire life (2½ years 45K miles) and is showing no sign of leakage or air ingress. So to date it’s cost me one seal (€17) versus going out and buying a €90 aftermarket cylinder … I know which mast I’m nailing my colours to!

Aprilia Caponord ETV1000 Rally-Raid clutch master cylinder window bubbleAnd finally ….. always ALWAYS make sure the level of fluid in the reservoir is right. It is so damn easy to overfill this one. My prefered method is to drain off most of the reservoir fluid once the system is bled (don’t expose the ports) then refit the rubber bellows and use a syringe to inject fluid back in while watching the bubble. Leave quite a big bubble showing, because when you screw down the cap the volume (and bubble) shrink a little.

Eighty-eight thousand, eight hundred and eighty-eight!

Disposable_camera
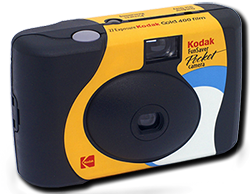
Many years back I started to carry one of these disposable cameras on the bike. Usually ratting around in the top-box with all manner of junk, it was their just in case of …… Well I’m sure you get the idea. Instead it ended up being used to take a picture of the speedo whenever it passed through an ‘interesting’ odometer reading – 12345, 22222, 33333. Sad I know, but it became a habit.

Aprilia Caponord ETV1000 Rally-Raid hits 88,888 milesTaking a photo of these mileages has stayed with me and where possible I still take a snap of the dashboard if it’s convenient/safe to do it and of course, if I remember! This time around it was a biggie, the one that would use up all but one segment of the entire odometer – 88,888 – I wasn’t going to miss this one.

And so on a beautifully warm day with January knocking on February’s door the capo rolled to a halt just south of Penne and the picture was taken. The Capo’s running wonderfully and I’m (slowly) losing a bit of weight and feeling better for it – I have a feeling this year might just be the year we crack that 6th digit!

Aprilia Caponord ETV1000 Rally-Raid Abruzzo Gran Sasso

Trippin’ all the way!

Aprilia Caponord ETV1000 Rally-Raid dashboardSometimes a particular feature of a piece of technology can drive you nuts – that itch you can’t scratch! Here’s my particular niggle with the Capo dashboard ……

Just imagine, it’s a nice day and you’re all suited-and-booted, ready to tear up the countryside on the Capo. You’ve pushed the ‘Set’ button on the dashboard to display the trip meter and all is fine and dandy in the world, later you pull over for a break and when you restart the bike – the dashboard has switched back to odometer! I know it’s not exactly the end of the world, but it is annoying. Why couldn’t Aprilia just code the damn thing to display on start-up what it showed at shut-down, many other bikes seem to do it.

So as part of the long running Mk2 dashboard project, the feature has now been incorporated!

With a little bit more code and a couple of extra wires, the dashboard now knows what was displayed (odometer or trip) at key-off. Then it simply electronically replaces a winter-gloved podgy finger and prods the ‘Set’ line to the old microcontroller a second after the board finishes its POST (power-on-self-test) routine. It also now reads the voltage from the fuel level sensor in the fuel tank, so that if the trip meter is displayed at key-off AND the fuel level changes from less than 15% to greater than 90% (approx. <5l to >20l refuel) at the next key-on, the trip meter will be reset automatically. If you don’t want the reset to go ahead, you simply make sure the dashboard is displaying the odometer before switching the bike off, now the reset is ignored.

Of course all this is well and good on the workbench, but in real day-to-day use – will it scratch that itch? Hmm, time and a few miles under the Capo’s belt will determine that answer……. maybe I’ll just end up with a nasty little rash! 😕

Muddy Chef Challenge 2016

20140508_143707_Richtone(HDR)As some of you may know, I’m not really one for driving our four-wheeled cousins … I didn’t even get a licence for them until quite late, then I tried a variety of styles and performance and came to the conclusion that they just didn’t do it for me – all except the Land Rover / Range Rover. I had so much fun in a slow old clunky Series 3 hand-me-down that I ended up buying the P38 Range Rover primarily for off-road work when here in Italy. Best buy I ever made, smooth and comfortable on the highway and 95% as capable as any standard Defender when off-road ……. and don’t believe all the press bullshit about reliability either! 😉

So when Eric, founder and event director of muddychef.com got in contact regarding a Caponord matter, I was immediately curious about what Muddy Chef is …. well in short, it’s a marriage between Land Rovers and cooking!

(quote) “off-roading and a vehicle based gourmet cooking challenge (think Top Gear meets Top Chef).”

muddychef

Unfortunately I’m no cook. I can cook, but I just don’t seem to enjoy it – even the BBC’s Hairy Bikers only got 10 minutes of airtime before I changed channel! But I can appreciate good food, especially the time, dedication and skill required to prepare it from the back of a vehicle in the woodlands! I think this meeting of two different interests is fantastic and truly hope the muddychef challenge goes from strength to strength over the coming years. So if you haven’t already clicked the Muddy Chef link to get away from my drivel – do it now!


Slowly, slowly ……

Aprilia Caponord ETV1000 Rally-Raid frame / chassis in Solidworks 3DWith the weather hitting an unseasonaly warm 20c (but high winds!) it’s been a fine opportunity for running around on the Capo, but when she’s all tucked up nice and cosy in the barn, it’s been time to work on the stable-mate, NK03 …… or more specifically the chassis! Slowly but surely it’s being measured and drawn up in CAD and some other parts drawn up last year added into the mix. One day a complete digital Capo will exist! 😀

Refering back to the weather …….. here’s a couple of pics taken on the mobile at the end of the day when walking the dog. As the sun sets behind the Gran Sasso mountains it seems to save the best lighting until last.

Gran Sasso sunset January 2016Gran Sasso sunset January 2016


Accuracy is everything …..

Aprilia Caponord ETV1000 Rally-Raid calibrated voltmeterWay back when I started playing with the idea of using the dashboard tachometer as a voltmeter, I was aware I had one stumbling block …. I didn’t have a decent workbench power supply to calibrate the software/voltmeter against. In the end just using a battery and resistors the ball-park calibration wasn’t too bad, reading within a needles width of the correct voltage from 13 – 14v but it drifted terribly above and below this range.

Aprilia Caponord ETV1000 Rally-Raid Thurlby 30v-2A dual power supplyThen in summer along came a gift from ABSL via Andy (Beasthonda) …. A very nice Thurlby 30V-2A dual power supply, which unfortunately had to languish in Oxford as it was too heavy to transport back by Capo! But patience is rewarded and it finally sits on the workbench, performing brilliantly and its first job has just been to calibrate the dashboard voltmeter once and for all. In the end it required a little code revision to get it just so, but it was worth it – now the voltmeter is accurate to a needles width over the full range of 9 – 16V. Happy Days! One more job to tick off the must-finish list. 😀

I really can’t say how much I appreciate Andy for thinking of me and ABSL for letting this power supply go to a complete stranger, I look forward to putting it to good use and hope that some of the tinkering on the workbench can make its way into other Caponords.

Busy, busy and busier still!

Calais docks ...... a bit quiter than the war-zone approach roads!3,000 miles, six days, one exam and enough fog to last a lifetime ….. Yes, the last run of 2015 to the UK and back is over! The return bought with it oodles of goodies and an unwanted guest, the dreaded UK winter cold that then turns into bronchitis, oh what fun.
After getting back and between snuffling, shivering and coughing up gunk thick enough to glue shelves up with I managed to give the new Capo Rally-Raid frame a damn good de-grease and inspection. It all looks good and other than the usual wear and tear befitting a 12 year old part (in UK weather!) it’ll be a fine starting point for the bikes rebuild. It also gave me the opportunity to look at the differences between the standard and Rally-Raid frames. Does it really justify a new part number just because of a fresh run of serial numbers? Or is the difference more involved?

In fact it turns out the Raid frame is quite different. All the modifications are around the swing-arm pivot points and cross brace/suspension mount. Five reinforcement plates in all …. Making the difference in frame prices work out at roughly £50 per modification! Mind you, that’s chicken feed when compared to the list price – £3,193 (Std) / £3,440 (R-Raid)! 😯
Advanced! The RSGB Full Licence Manual

Oh and the exam ….. Well I took the Advanced (full) Amateur Radio Licence – the last of the three levels in the UK. Thankfully the head-cold wasn’t an issue, it would be a further 12hrs before that little puppy made itself known. So six months of preparation and study boiled down to two hours of pen-pushing on a Monday evening. FACT – did you know tummy-rumbling is catching, just like yawning … I know, I was there!  😳 Anyway, did I do all that studying  justice? Is it an early Christmas present or a can of Gold Label and a cry behind the bike sheds ……..

…….. well say helloooo to the new full licence callsign:

M0ZRX

Unfortunately ‘ETV’ had gone, but to stick with the bike theme I chose my old Kawasaki ZRX1200 Eddie Lawson rep instead! Next stop – let’s see if the Italians will give me a reciprocal licence as well, it would be very kind of them! 😀