INNOVV Power Hub 1 arrives

A huge thank-you to those that have donated toward the upkeep of this website, it is much appreciated!

Aprilia Caponord ETV1000 Rally-Raid INNOVV K1 camera cable support

A couple of parts finally arrived yesterday, having had an extended holiday in Milan courtesy of customs. These have been kindly provided for review by Rock Liu at INNOVV. The first is the Power Hub 1 and the second is a bracket to help support the four cables that go into the K1 camera system.  The delivery is well-timed actually ….. we’re about to get a good old dose of crap weather, so it’ll be an ideal time to fit the hub and write a review of it and the K1 camera system.

Aprilia Caponord ETV1000 Rally-Raid INNOVV Power Hub 1

Meanwhile I’m off to the 51° FIERA DEL RADIOAMATORE DI PESCARA (Amateur Radio 2 day event) sporting my nice new Italian callsign – IU6HXL – lets hope I can bag a bargain or two!

Coils, cruise, camera – action!

Aprilia Caponord ETV1000 Rally-Raid Renault V6 HASS ignition coil - 413745171
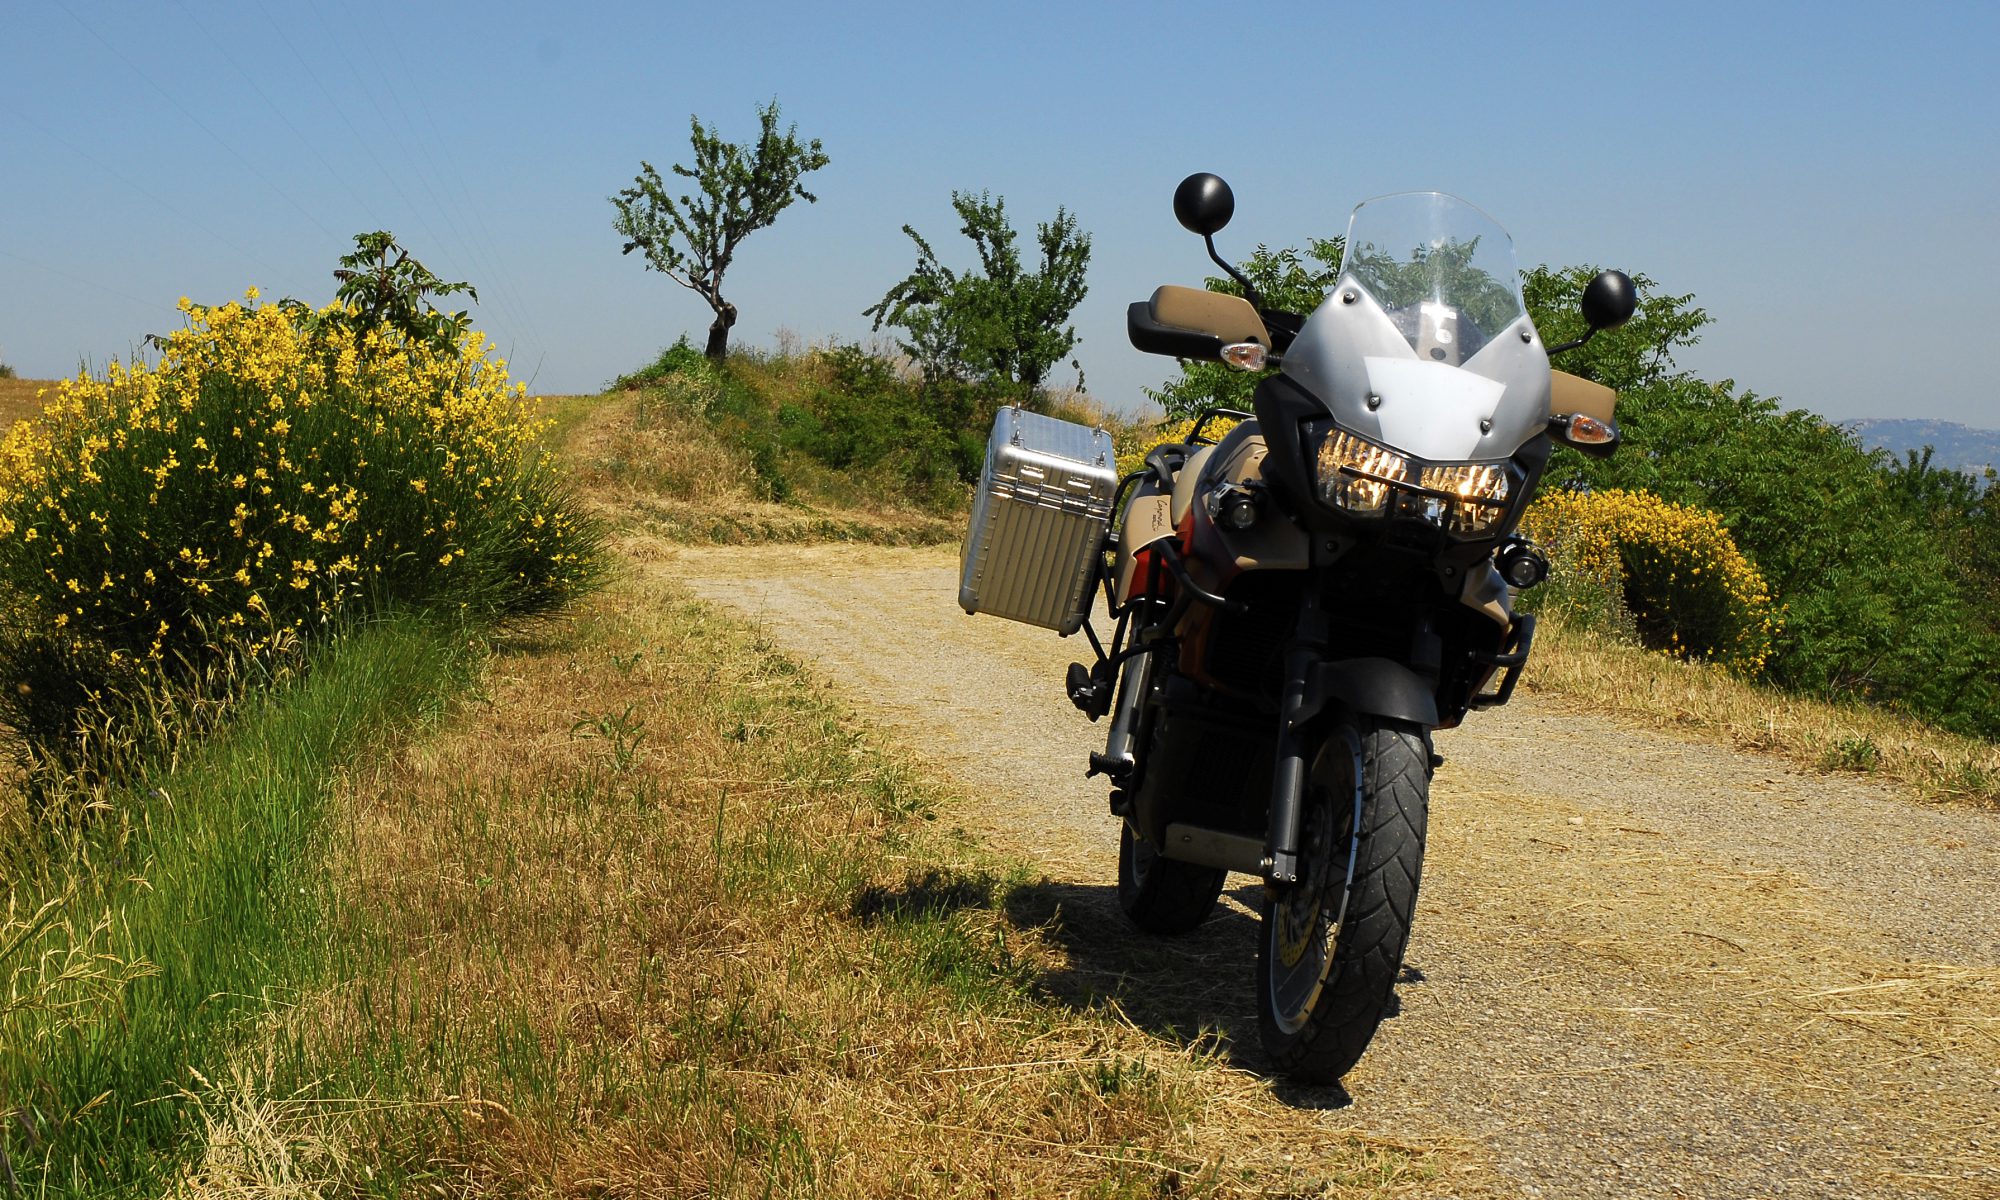
After waiting a week for the delivery from carparts4less, the Capo is happily running on four coils again! 😀 I bought the Renault V6 coil (413745171) made by HAAS. While plug’n play at the LT connector, it does need some excess plastic removing and the HT end requires a modification. I’ve seen this coil modified in a couple of ways – one simple and one requiring a bit of soldering skill. I chose the latter because I think it gives a more positive connection. New page here.

Aprilia Caponord ETV1000 Rally-Raid INNOVV K1 rear HD camera 1920x1080With the bike buttoned up, I ran the INNOVV K1 cameras again – no sign of RF issues anymore, so that’s a step in the right direction. It was about 6pm and dark inside as well as outside the barn as I stood tweeking the throttle and glancing at the INNOVV DV recorder while it captured the rear K1 camera. I watched the vapour from the exhausts to the left and right of the camera as it swirled in the red glow of the tail light. Then it all went blank and the INNOVV rebooted again – WTF!!! 👿 

However …… in that moment I saw something that was a revelation. A real game changer as they say. The fact is, I started to suffer an intermittent fault a few months ago and as any engineer knows, you’ll go bald fast if you waste time chasing an intermittent fault – wait for it to come to you. I think of these sorts of faults a little like the TV serial killers on any number of cop shows – they always want to get caught. At some point an intermittent fault will give itself away, that one clue that unlocks the puzzle. In this case, when the INNOVV rebooted, I saw a momentary flicker of the red glow from the tail light out of the corner of my eye. If I hadn’t been doing this in the dark I would never have spotted it!

This fault goes back quite a while, back to a hot summer, a long day on French motorways and a cruise control that would occasionally stop working. Sometimes it would engage for the whole 1½-2hr ride, the next it would drop out after a few minutes or maybe after a ½hr – it was completely random. However …… I did find that by turning the headlights off, the cruise could be re-engaged and would work just fine! At that point I was suspecting a fault with the headlight loom, the 6-way connector is known to burn if the Aprilia Caponord ETV1000 Rally-Raid light switchEarth (Ground) connection is bad. Unfortunately all tests and checks came up with nothing. So I sat back and waited for the fault to give me the one clue I needed to bring the bugger to justice!

In that momentary tail light flicker, all the parts came crashing together. It was the light switch all along! You see the switch isn’t just one switch but two-in-one. One for the headlight and one for the sidelight …… and this is the circuit that the MCCruise control AND the INNOV are powered from! The switch was stripped, the hard dirt-filled goo that had once been grease that was stopping the springs working was cleaned out and the contacts treated to a splash of contact cleaner and fresh lubricant. Now it looks better, works smoother and above all, delivers a constant voltage to where it’s required. 😀 Aprilia Caponord ETV1000 Rally-Raid Innovv K1 camera screenshot

And afterwards? Well a couple of days eating up the miles and clocking up the hours have been rewarding (and fun!) to say the least. Both cruise and cameras have worked perfectly and the Capo is pulling like a little train again thanks to its refreshed ignition!

Murphy’s law working as well as ever!

Aprilia Caponord ETV1000 Rally-Raid and RST Futura Sagem or JCI Ignition coilsYes I put my hand up …… it was all my own fault! I just had to go and mention the Sagem coils in the last post. A real tweak on the nose of Murphy’s Law if ever there was one!

The other day I had to pop along to the shops and being a lovely warm sunny day it was definitely a job for the Capo, besides I had the Innovv K1 camera system fitted and this would be an ideal time to try it out. The first sign that something was amiss with the Capo was a slight hesitation, a stumble just off idle. That and a slight misfire occasionally – more a sensation through the seat than anything else.

arc
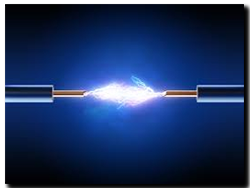
Once back in the barn I had a look at the Innovv DV recorder – No stored video, nothing! What the hell? Then the penny dropped ….. The Innovv worked fine with the engine off, but fire it up and it had a complete meltdown and either turned off or froze. It looks like some serious interference at work. With the seats off, I realised there was a faint intermittent ‘tick, tick, tick’ to be heard over the exhausts from the battery/coil area but I couldn’t see anything. So I waited until dusk and tried again – bingo! – A nice intermittent flash of HT from a rear coil to the subframe. That’ll most certainly mess things up quite nicely.

With one Sagem definitely now duff I decided to retire both remaining ones. After all, 111,000 miles isn’t too shabby! To keep all coils the same I thought I’d order three TechAutos – two as replacements to match the two already installed and one as a spare, just in case. So back indoors, fire up Flea-Bay and almost fall off my chair when I see what TechAutos are up to! Here’s a screenshot of their latest pricing for 3x coils. Hmmm……

techauto-1

…… So I fired off an email asking about availability and real-world prices – and after four days, never heard back from them. I decided that with outstanding customers service such as that, I would go elsewhere and buy Renault V6 coils! In fact for the last realistic price I recall seeing for three TechAutos coils I can buy six Renault coils. Now the old girl will get a nice new full set of coils and HT leads plus a new set of Iridium plugs ….. hopefully that’ll keep her happy for a few thousand miles!

The Artful Bodger

Aprilia Caponord ETV1000 Rally-Raid AMP TE Connectivity Superseal connectotsOK I’ll come clean. I’m a bit of a closet bodger – there I’ve said it. Let’s be fair though, the art of bodging is a skill in itself. A well carried out bodge, with novel and outlandish use of alternative materials to affect a successful repair or upgrade is a beauty to behold. But then again a bad bodge will bite you on the arse quicker than a rabid badger having a rather bad-badger day.

So what did I bodge? Well the LED’s in the Capo’s binnacle might be nice and bright but the wiring behind them certainly wasn’t! Of course a lifetime of working with electric/electronics gives one a certain feel for the bodge to be enacted – why use a decent connector when twisting the wires together and slapping on a bit of insulating tape works just as well …… right?

Aprilia Caponord ETV1000 Rally-Raid AS7, Sparkbright and dashboard autodimming LED's

To be fair it was a temporary solution until I’d got hold of some connectors, except I kept forgetting and one thing led to another … And in the blink of an eye, a couple of years had gone by! Last week however, good old Motrag came to the rescue (again!) with a box full of 2 and 3 way Superseal connectors. I really do like these – 14A rated and waterproof (IP67) compared to the Molex items dotted around the Capo that are 5A and most certainly open to the elements. The only downside is that they are Aprilia Caponord ETV1000 Rally-Raid Motrag Superseal crimp toolmore bulky than the Molex so you can’t cram as many into a tight space!

Of course a cunning and artful bodger could fit these without the correct tool to crimp the connectors, but I yielded to common sense – besides Manuel had put a nifty set of crimping pliers in the box as well! Now all the panels are removable with a mere flick of a locking-tab, no longer do I wish for an extra appendage to assist in separating wires/tape while juggling with the panel. Sheer bliss! Here is a copy of the Superseal installation manual.

On a roll ……

With the rear indicators looking wayyyy better than before, it was inevitable that I’d end up casting an eye over the fronts. As mentioned previously, the Mana indicator stalks are too short to fit at the front …… but with a spare pair of standard stalks to hand, I could at least see if it’s feasible to cut them down.

This is the end result and I like to think it has been a success and complements the rears, so here’s how I did it. Hopefully it’ll be of some use to you if you decide to shorten your own.

Aprilia Caponord ETV1000 modified front indicators

I used a Dremel to cut the stalk at the two points shown in the picture below, then carefully flatten both surfaces as these are going to be bonded back together – so flat and square to each other is the order of the day! This removes approx. 24-25mm of the stalk.

Then I used a piece of aluminium tube (8mm OD x 6mm ID x 50mm) that I pinched in the vice to make it very slightly oval – not too much mind. This was then press fit approx. 35mm into the main section leaving 15mm exposed. The short section was then bonded onto the exposed tube. Using a syringe I also ran adhesive down the gaps between tube and stalk, this ensures that both sections are well and truly bonded and the aluminium tube also provides some extra strength to the whole assembly.

Caponord ETV1000 Rally-Raid cut down front indicator stemAprilia Caponord ETV1000 Rally-Raid shortened front indicators

To the Mana born

Aprilia Caponord ETV1000 Rally-Raid with Mana indicatorsDeep in the bowels of the Motrag box of goodies are a pair of indicators for an Aprilia Mana – identical body, lens and bulb as used on the Rally-Raid and standard capo 04-onward, but with a greatly reduced stalk length.

Aprilia Caponord ETV1000 Rally-Raid - Mana indicators & Hepco Becker pannier latchWith only very minor modification, these can replace the existing long-stalk indicators on the rear of the Capo, unfortunately they are too short to replace the fronts as well. The mod is so subtle the old indicators can be refitted no problem. When fitted the indicators have much greater clearance from the pannier latches, which makes removal/refitting the pannier easier and they are now well within the width of the pannier rail –  so dropping the bike (not a recommended pastime!) should greatly reduce the chance of a broken rear indicator.

Simply pop off the lens (one screw), prise out the reflector/bulb assembly and disconnect the two wires. Now remove the screw/nut/washer holding the stalk to the mudguard and ease it away while wiggling the wires out. Now the first of two minor modifications are required.

The indicators are held in place by the screw/nut/washer AND a tab that hooks behind the mudguard itself, except on the Mana stalk the tab is too narrow. A quick bit of work with a Dremel soon has that sorted (open gap to approx. 4.5mm). Now the second modification is to extend the slot in the mudguard ( extra 5mm) where the screw passes through. This mod does NOT affect refitting the original indicator as the footprint of the stalk is identical in both cases, so the slot extension is covered by the base of the indicator irrespective of which one is fitted.

Aprilia Caponord ETV1000 Rally-Raid with Mana indicatorsOnce sorted, simply reverse the removal stages – slot in the new stalk and fasten up the screw, nut and washer. Re-thread the two wires back down the stalk and attach to the connectors on the reflector, then screw the lens back in place. Now repeat on the other side, then bask in the warm glow of a job well done, in fact a cold beer goes down a treat about now ….. Ahhhh Mana from Heaven! 😀

NOTE: The indicator bodies are LEFT and RIGHT handed, look at the recess between body and lens – this is the drain and needs to be on the lower edge. I’m not saying I put them on the wrong way round or anything so numpty, perish the thought! 😳

Aprilia Caponord ETV1000 Rally-Raid fitted with Mana indicators


CGI dashboard – 2

Saturdays lovely sunny weather gave way to thick fog and a definite chill in the air – time then to hunker down on the PC and finish the CGI dashboard and add a couple of extra bits to make it a touch more interesting on the eye.

CGI dashboard – 1

Aprilia Caponord ETV1000 Rally-Raid dashboard, instrument panelSlowly getting more parts of the Capo into CAD/3D …. finishing the dashboard motor off (after almost 2 years!) gave me the nudge to get the circuit board done. Here’s a work in progress, only a couple more chips to fit. Then the inlay and case / lens will see it polished off. Can I keep up the momentum or will galloping apathy step in … hmm who knows! 😕

AlternatorCapo charging system  ….. a new page going up shortly with a fair bit of (new) info regarding alternator output, waveforms, voltage, current and how those are affected with the attachment of different technology regulators – plus how exactly those regulator-rectifiers do the job of producing rectified DC. Pitched at electrical newbies I’ll be running through each of the components and what they do electrically (hopefully) in a way that makes sense, including why some wires can be thin and work just fine and why some regulators get hot and others don’t.


One way of checking the brake lights work!

Aprilia Caponord ETV1000 Rally-Raid BMW Dynamic Brake Light SystemWell it’s time to test out the prototype of the BMW-clone Dynamic Brake Light System ……… but how to keep an eye on the tail-light and hazards when riding around? Dig out a bit of scrap metal, the old Shorai battery and the Tarot 2D gimbal/GoPro camera combination – that’s how! 😀

Pardon the pun … but the Shorai battery was a complete non-starter as far as getting the Capo to wheeze into life (below 12C anyway!), so it spent the next few years doing various duties. Replacing the battery in my computer UPS (uninterruptible Power Supply) for one, then running the dashboard test-rig for a while before being the power supply of choice to run the Tarot gimbal or any home-brew datalogging/test kit that needed 12V. To be fair it’s 4½ years old, stored in the barn for extended periods, recharged with a crude 6V/12V charger, run flat as a pancake and overcharged …. and it still keeps working!

Aprilia Caponord ETV1000 Rally-Raid BMW Dynamic Brake Light System GoPro Tarot 2D gimbalSo now we’re ready to rock the highways and byways with the gimbal/GoPro hopefully grabbing the footage I need. Once it’s done I’ll turn the gimbal around and grab some more quirky footage facing backwards! 😯

g this is fun!

Aprilia Caponord ETV1000 Rally-Raid Dynamic Brake Light SystemI’m not really enthusiastic about the constant onslaught of technology on motorcycles …. the cynic in me sees mostly a revenue-earning exercise whereby the benefits to you and me are far outweighed by the locked-out, take-it-to-the-dealer and be fleeced mentality of the manufacturers.

But occasionally I do spot something that tweaks the nose of my flagging interest …. this time it’s been the BMW Dynamic Brake Light system. Trying to get the myopic, half-asleep nit-wit to notice the difference between my normal braking and HARD BRAKING is sometimes a real issue. There’s nothing worse than gliding to a halt only to hear some plank with full ABS active about to kiss my back wheel! Hmmm so how hard can it be to make a box of tricks to do the same as the BMW system and fit it on the Capo …..

Well a tad more difficult than I first thought that’s for sure! The BMW system seems to work as follows:

  • At speeds over 50Kmh(31mph) when braking HARD the brake light pulses at 5Hz*
  • When the speed drops below 14Kmh(9mph) while still braking hard, the hazard lights are activated.
  • When the speed rises back above 20Kmh(12mph) the hazards are turned off.
  • At all other times the brake light functions as normal.

*EU rules quote a rate of 4Hz (±1Hz) for LED’s and 4Hz (-1Hz) for incandescent bulbs.

Aprilia Caponord ETV1000 Rally-Raid accelerometer dataSo how to replicate this on the Capo? Enter one test-box to get things started …… a microcontroller that measures acceleration in three axis and has inputs/outputs to the brake light, hazard lights and speedometer. The box of tricks is designed to allow normal brake/hazard light function in case of power or hardware failure … all in the name of safety don’t ya know.

Getting usable data from the accelerometer was harder than I thought ….. the thing is VERY sensitive and has needed a lot of filtering and data-smoothing to get usable info from it. But after a couple of days and quit a few emergency stops (all good practice!) the data is starting to look good.

Aprilia Caponord ETV1000 Rally Raid Dynamic Brake Light SystemNext up, I need to input the Capo’s speed to the microcontroller. For this I’ll use the speed output pin directly from the dashboard – I knew it would come in handy one day! All the inputs are buffered with opto-isolators to make sure the system is as well protected from the noisy fluctuating voltage in the Capo’s loom as is possible. Now with the prototype well under way, it just remains to find answers to some other  questions ….. such as what about braking on wet, loose, icy surfaces where deceleration will be significantly less, but the dynamic brake light might still be useful. My guess is the BMW system has some integration with the ABS system to shift the triggering point, but I don’t have ABS! This one I’ll have to ponder on a while longer.

One things for sure …. you learn a lot about braking forces, motorcycle dynamics and breaking code doing this malarkey! Oh and I’ve found out that a warm front tyre breaks grip at about 1.1g …… 😳