 On 4th February Jan came back home with a suitcase fair groaning with all manner of goodies. The most eagerly awaited though, was the pair of new inlays from Lockwood International Ltd. So first impressions?
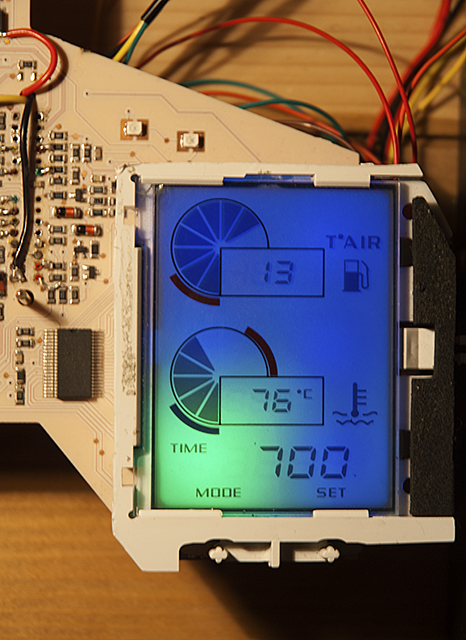
Excellent! From the textured material to the bleed-free printing, from the fit to the light-transmission …. everything was exactly as I’d hoped. The first thing I did was pop one onto a waiting chassis/board and turn on the lighting – did the text and colour match the light channels? Again, perfectly. Now I could relax, prepare the new chassis and get ready to fit one permanently to the dashboard. To fix it in place I decided to use a general-purpose spray adhesive and did a trial run on an old chassis/inlay to make sure it would be suitable. Everything seemed fine and it was certainly good experience to do a dummy run.
Making sure the chassis was grease and dust free was essential, then masking off the light-channels, mounting pegs and anywhere else I didn’t want spray glue to go! A couple of thin coats of adhesive were applied and the inlay fitted 10 minutes later to allow time for the solvents to evaporate. Perfect! It was now ready to be fitted to the circuit board, but first a couple of modifications to the board/processor circuits.


First the eeprom file needed to be updated for the Futura speedo/tacho, then the code in the microcontroller needed updating for the different (voltmeter) needle calibration. At the same time a couple of modifications were made to the circuits based on insights I’d picked up about Arduino boards from the Internet, also the auto-dimming circuit was finally added for the variable back-lighting, a bit of tweaking with the code – and it was all ready to be refitted to the Capo.
So there I was …. on a wind-swept but warm Sunday morning, dashboard in hand and about to see the fruits of a few months work finally come together on the bike. No doubt the code for the auto-dimming will need fine-tuning, but that can be done without removing the dashboard again – and that’s the line in the sand, right there. Once fitted, I shouldn’t have to remove them again anytime soon …. and that’s a great feeling!
I think that about now would be a great time to pause and say thanks to a few folks who have helped me keep the momentum in this little project. Firstly Jan for her patience and for lugging stuff across the continent for me, to Andy (beasthonda) for bouncing ideas around with me and his interest in the project, to Arvdee in the USA without who’s generous donation of a Futura inlay I wouldn’t have had a template. Last but not least, Clive from Lockwood International for putting the proverbial icing on the cake – thank you all!!!! 😀


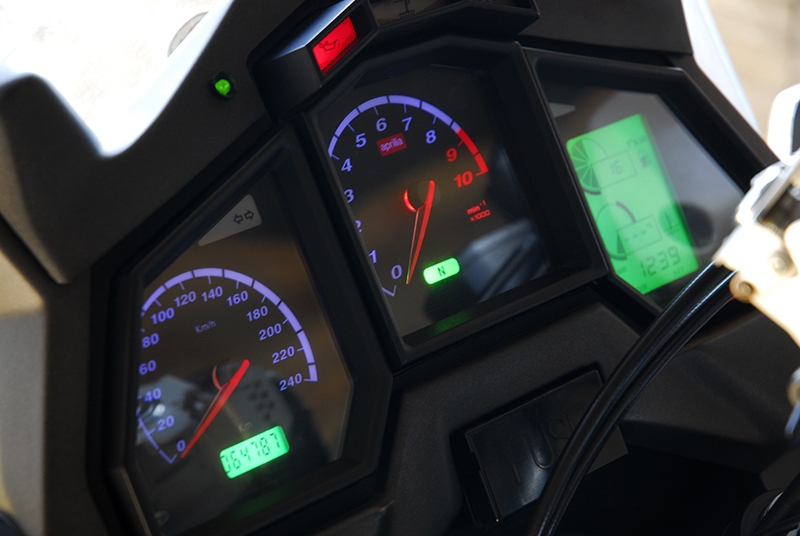
 As well as getting the inlay reprinted with the added voltmeter graphic, I’ve also decided on a little re-arrangement of the existing graphics and functions. For example, why oh why is a ‘side-stand’ light prime-center of the display when it already has a safety circuit to stop you riding away with the stand down? ….. Magneti Marelli over-egging the pudding I think.

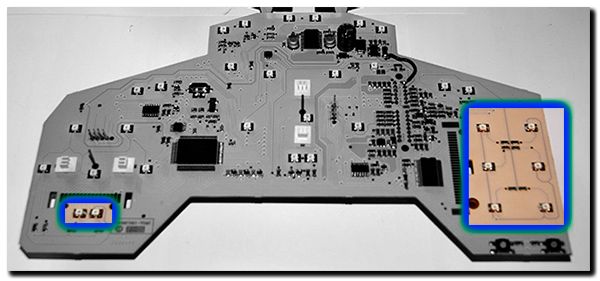 Next, the six diagnostic panel and two odometer blue LED’s were replaced with green versions, this isn’t difficult but you need to make sure they go on the right way round or they won’t work! The LED specification I used is:


 I’ve already got a voltmeter in the right hand fairing and although I wouldn’t be without it, I have to say it suffers from a couple of drawbacks.


