New ‘Lockwood’ inlay fitted at last

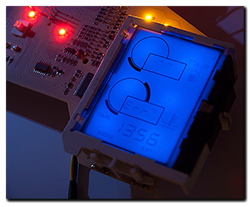
Right indicator repeaterOn 4th February Jan came back home with a suitcase fair groaning with all manner of goodies. The most eagerly awaited though, was the pair of new inlays from Lockwood International Ltd. So first impressions?

Excellent! From the textured material to the bleed-free printing, from the fit to the light-transmission …. everything was exactly as I’d hoped. The first thing I did was pop one onto a waiting chassis/board and turn on the lighting – did the text and colour match the light channels? Again, perfectly. Now I could relax, prepare the new chassis and get ready to fit one permanently to the dashboard. To fix it in place I decided to use a general-purpose spray adhesive and did a trial run on an old chassis/inlay to make sure it would be suitable. Everything seemed fine and it was certainly good experience to do a dummy run.

Making sure the chassis was grease and dust free was essential, then masking off the light-channels, mounting pegs and anywhere else I didn’t want spray glue to go! A couple of thin coats of adhesive were applied and the inlay fitted 10 minutes later to allow time for the solvents to evaporate. Perfect! It was now ready to be fitted to the circuit board, but first a couple of modifications to the board/processor circuits.

First the eeprom file needed to be updated for the Futura speedo/tacho, then the code in the microcontroller needed updating for the different (voltmeter) needle calibration. At the same time a couple of modifications were made to the circuits based on insights I’d picked up about Arduino boards from the Internet, also the auto-dimming circuit was finally added for the variable back-lighting, a bit of tweaking with the code – and it was all ready to be refitted to the Capo.

So there I was …. on a wind-swept but warm Sunday morning, dashboard in hand and about to see the fruits of a few months work finally come together on the bike. No doubt the code for the auto-dimming will need fine-tuning, but that can be done without removing the dashboard again – and that’s the line in the sand, right there. Once fitted, I shouldn’t have to remove them again anytime soon …. and that’s a great feeling!

I think that about now would be a great time to pause and say thanks to a few folks who have helped me keep the momentum in this little project. Firstly Jan for her patience and for lugging stuff across the continent for me, to Andy (beasthonda) for bouncing ideas around with me and his interest in the project, to Arvdee in the USA without who’s generous donation of a Futura inlay I wouldn’t have had a template.  Last but not least, Clive from Lockwood International for putting the proverbial icing on the cake – thank you all!!!! 😀
Dashboard upgrades

Evening folks, I thought I’d share this with you as the nights start to draw in and riding gives way to winter tinkering.

I mentioned over on the dashboard page about the upgrades hopefully working by spring next year. Well some of them have come along in leaps and bounds, so I took a snippet of video so you can see a dashboard work-in-progress strutting it’s stuff on the workbench. OK, I know that there’s no voltmeter markings on the inlay yet, just use your imagination for now! It’s actually showing 12.4v ……….

Now while I’m waiting for an oscilloscope to miraculously appear, I’ll leave the board bench testing for a while to see if the code or controller breaks, then fingers crossed, it’s on to the auto-dimming back lighting instead of the three fixed settings of useless, mostly useless and acceptable.

Dash it all Jeeves…..

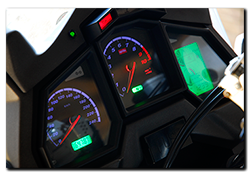
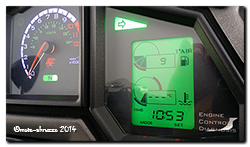
Aprilia Caponord ETV1000 Rally-Raid - Dashboard green LCD panelsWell here it is at last ….. the green LCD Caponord instrument panel. A hot brew and an early start on a cold wintery day, had the panel off the bike and in the warm workshop by 8am. While the soldering station warmed up, I separated the cases, eased the needles off and surprised myself that all this only took a couple of minutes – no hassle with the needles at all, which is unusual!

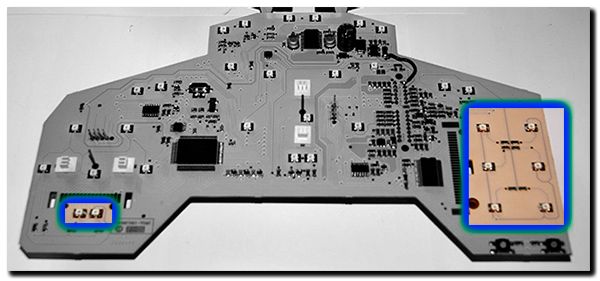
Aprilia Caponord ETV1000 Rally-Raid - Dashboard LED's to replaceNext, the six diagnostic panel  and two odometer blue LED’s were replaced with green versions, this isn’t difficult but you need to make sure they go on the right way round or they won’t work! The LED specification I used is:

3.2-3.8v 20ma 1000mcd green PLCC-2 SMD LED

Then I removed the old 24C02 chip and read off the data and saved it. I modified the file and wrote it to a new chip and soldered it in place. Back out in the cold I plugged the board into the bike and got ready to switch on. Would it, wouldn’t it ….. blingy lights or a puff of smoke? Hoorah – we have bling!!! The case was buttoned back together after giving the clear lens a clean and checking the rubber seal was OK. All in all, about an hours work, time for another brew then.

So is it just a bling-thing or is their anything worthwhile about changing the LED’s? Personally I prefer it in green, the contrast between digits and background is better making it easier to read the display on the move – sadly the photographs don’t reflect how good they really are. Also the green LED’s are brighter than the blue and that certainly helps. Keeping the blue LED’s behind the analogue gauges adds a nice touch, balancing out the green.

Chips with everything

And a Happy New Year to one and aAprilia Caponord ETV1000 Rally-Raid - Test gear switch boxll. Welcome to 2013 ….. and have I been a busy boy over the festive period.

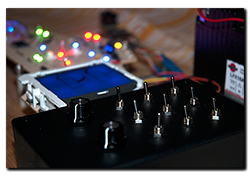
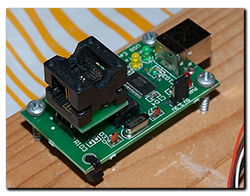
The Caponord/Futura instrument panel simulator-rig thing is built and working, allowing all the functions to be tested and it will plug directly into my main loom/ECU simulator when I get round to finishing it. I also piggy-backed a neat socket for the 24c chip onto the programmer and so now I can test a board and reprogram it all in one location.Aprilia Caponord ETV1000 Rally-Raid 24C02 EPROM Programmer

A nice new solder station (thanks Lucy!) with better heat control has made working on the boards a breeze and a ‘Chipquik’ SMD removal kit’ has made chip replacement so easy compared to a couple of weeks ago. Working on stuff this small is certainly challenging!

So what’s left to do with these boards? Nothing much, finish the circuit diagram and replace some of the back-light LED’s as an experiment and trial a built-in  Sparkbright battery monitor. Stay tuned!

A little light circuit training

Aprilia Caponord ETV1000 Rally-Raid - Dashboard large LCD panelOn a previous post I mentioned a visit by Mike081. During his stay I said that I’d like to get hold of another instrument panel at some point, so I could look into the circuit and programming in more detail. It just so happened Mike had a board lying around and he promised to sent it over. Well, true to his word, a Mk2 Caponord board was sat on the post-box when I got back home the other day. Cheers Mike!
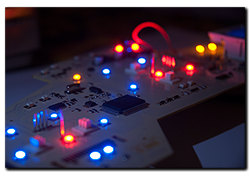
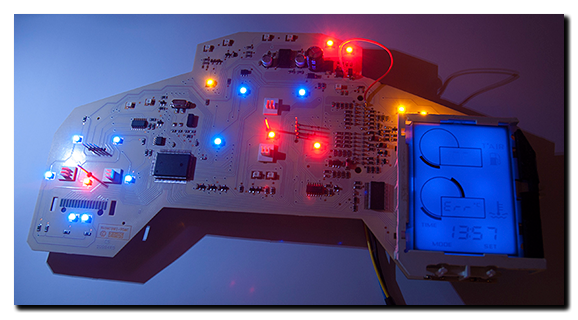
First, I made a stand to support the little beauty while I prodded and poked around withAprilia Caponord ETV1000 Rally-Raid - AutoCAD circuit layout my trusty multimeter. The next job was to try and fix it! The board had a couple of problems, a high resistance track and faulty regulator but nothing too taxing. Next up, I photographed the front (high resolution pic here) and back, then imported them into AutoCAD and started the tedious task of unravelling the tracks and components (click on pic).

Next up, the EEPROM. The little memory chip that contains settings and data relevant to the running of the board and recording of mileage and trip.

Aprilia Caponord ETV1000 Rally-Raid - dashboardTwo AF1 forum members – Michele (MCR) and Andy (Beasthonda) have been forefront in unravelling the data on the chip and how it alters the way the board works. The bottom line is that instrument panels from both the Caponord and Futura can now be reprogrammed in various ways and used on either bike. This also means that the ability to safely recover boards that have reset to factory default is now possible.

I’d like to thank both Andy and Michele for including me in the email exchange and for sending data and documents so I can better understand the particular settings for each bike – Cheers gents, you’re the best!

So this week I’ve experimented with the alternative settings and sure enough my little board has changed from Caponord to Futura and back and dabbled in metric and imperial measurements and even been a hybrid – Caponord with Futura LCD display and Speedo/Tacho calibration.

Aprilia Caponord ETV1000 Rally-Raid - dashboard