New lines, new seals, new fittings, will it ever end?

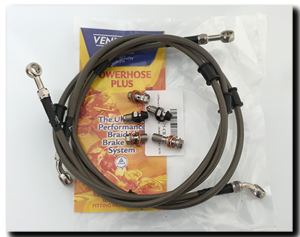
Aprilia Caponord ETV1000 Rally-Raid Venhill Power Plus brake lines and stainless steel banjo boltsWell this little job just got a whole lot more involved and costly! The idea of having lovely clean and refreshed  calipers made me think about the old banjo bolts (M10x1) and bleed screws (M8x1.25) … OK, so new stainless ones were ordered from Racebolt, that’s fine. Then it got me thinking about the old tarnished hydraulic hose ends … sigh … OK, so new hoses as well then! 

I went for the ‘Powerhose Plus’ range of hoses and fittings from Venhill down in Surry. I chose ‘carbon’ grey (smoked translucent sheath that shows the hose weave below) with all fittings in stainless steel. I really like these hoses because the end fittings can be rotated – thereby reducing twist in the hose and allowing the hose to sit naturally. This is something I hate with other swaged hoses. With that type, I have nearly always had to induce an amount of twist in the hose to get one banjo to fit the caliper or reservoir. Fair to say, I like neat hoses (and wires!) and I have a smattering of OCD about me when it comes to symmetry … both left and right hoses will HAVE to mirror each other!
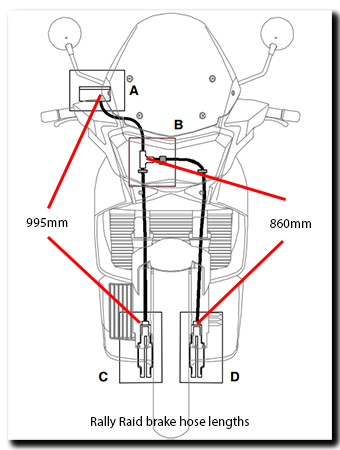
Aprilia Caponord ETV1000 Rally-Raid front brake hose lengthsThe standard hose assembly is  a single hose from the reservoir to a T-piece just below the lower fork clamp, from there a single hose down to each caliper. To replicate this was actually more expensive than using two individual lines from the brake master cylinder. So that’s what I went with – A double banjo bolt at the reservoir and two lines to the calipers using 2 x 45º banjos at the reservoir and 2 x straight banjos at the calipers. For the Rally-Raid the Venhill right hand line (as sat on the bike) is 950mm long and the left hand line is 1,100mm, these will need to be slightly shorter for the standard Caponord. The important point is that the lines plus fittings have to be long enough so that no part of the line, banjo-to-banjo is under tension when the forks are fully extended.

The lines came with three hose support grommets each, and I ended up removing one as it was not needed. Both lines use one grommet located within the existing support grommet that fits in the plastic tray below the headstock, the second is used within the P-clip bracket on the mudguard fixing screws, so two per line (see pics below). The third I used to help buffer the left hand line up at the handlebars … hopefully I’ll get around to designing and printing a 3D bracket to make this support look more ‘factory’ and finally the third support on the right hand line was removed.

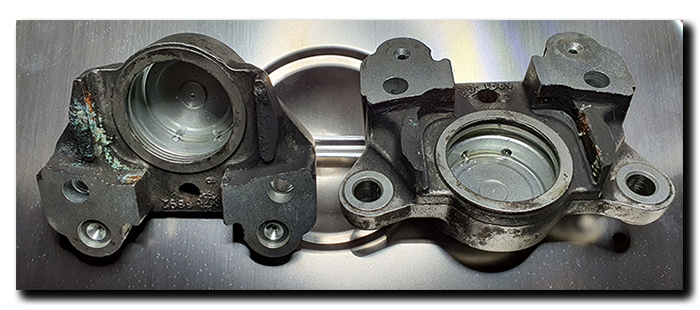
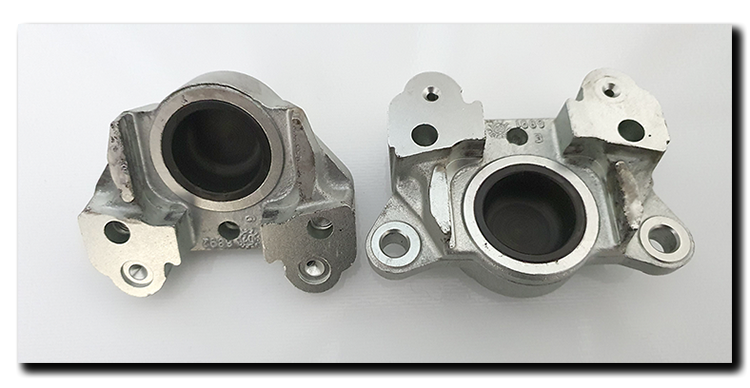
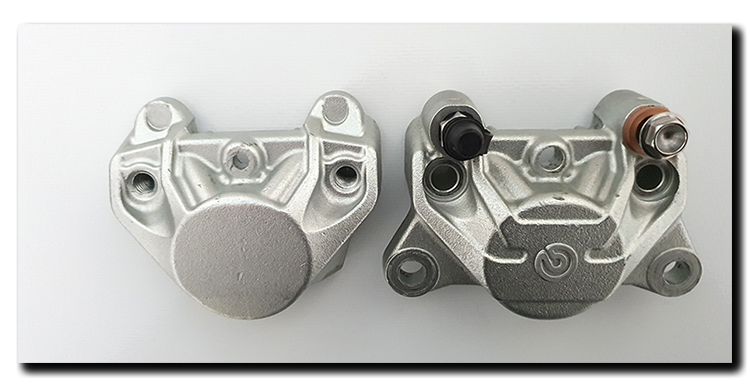
So with the lines sorted it was time for the calipers. The left one was removed, stripped and cleaned with Gtechniq W6 Iron and general fallout remover … a rather pungent and powerful liquid that does what it says – strips off 95% of the dirt in one go. Use in a well ventilated place with gloves and goggles, this is nasty stuff! After that, the pistons/seals were stripped out and everything zapped in the ultrasonic bath for a couple of 20 minute cycles until totally clean. Once dry, everything was put back together with new seals, O’ring and bolts (2x 40mm, 1x 35mm). Once everything was back together it was time to bolt the caliper back to the fork leg (50Nm) and have a nice warm brew before starting all over again with the right one.

Conclusion

In all fairness, I couldn’t get over how good the old seals were after 115K+ miles and almost 20 years. The pistons and springs cleaned up beautifully and looked almost new and the anodising inside the bores was hardly marked – totally amaze-balls when I think how badly some Japanese calipers fair after only a couple of winters. I honestly think it is all down to the coating on the pistons and the anodising of the casing that make the difference. As for the cleaning process … I got there in the end! Brake calipers are probably the worst thing to clean on any bike and unfortunately there is no getting away from good old elbow grease … well that and a really aggressive cleaner made for the job! The ultrasonic bath put the icing on the cake, but in all honesty wasn’t strictly necessary, but did remove a little more dirt and added  extra sparkle.

Below is a selection of pics showing hoses and before/after shots of the calipers along with a couple of shots that highlight the kind of crap the Capo put up with for 10 years on a certain Italian road …
Bath-time 2 – In at the deep end!

A bit of feedback on my first outing with the sparklingly shiny new 6 litre ultrasonic cleaning bath, the highlights and lowdown’s. First off, here’s my simple bullet point list to get things going:

  • Be patient!
  • Fill with pre-heated plain water or whatever your preferred cleaner pre-mix is
  • Be prepared to help the cleaning process along with a soft brush etc
  • Let it do its thing in peace – wear earplugs or get out!

That’s it in a nutshell! YouTube video’s make it look like you’ll clean a 50 year old gunked up prop-shaft in two minutes – wrong! Not in a domestic cleaner you won’t. I used a mix of (so called) ultrasonic bath solution diluted 10:1 as specified. I made the mistake of filling the tank from cold believing the in-built ‘heater’ would do the business … well it does after a fashion, but oh so slowly. It would have taken about 2-3 hours to go from 13ºC to 50ºC – so I boiled the kettle in the end and made up a solution that was almost at the required temperature, so no wasted time waiting around! The old rear caliper was dug out of the parts store and stripped down. It came off the Capo back in January 2013 with about 40K miles on it and had simply been boxed and hidden away, unfortunately since it’s return to the UK it looks like damp had got in and caused some corrosion. Luckily this was confined to where the pads sit and nowhere else, thankfully the pistons and seals came apart beautifully.

So time for a quick pic, then into the bath!

Aprilia Caponord ETV1000 Rally-Raid rear caliper ultrasonic clean

Initially I ran it for five minutes, unsure of how aggressive the solution/ultrasonic cleaning action would be. The solution was noticeably discoloured, but the calipers looked hardly touched. So in they went for another ten minutes. They looked much better this time … so in for another ten minutes. One half was now almost perfect, but the other needed two minutes of  TLC from a rotary brush, then they went back in for a final 10 minutes. Hence, be patient and be prepared to give the process a helping hand!

In the end, as the saying goes, all good things come to those who wait:

Aprilia Caponord ETV1000 Rally-Raid rear caliper ultrasonic clean

Aprilia Caponord ETV1000 Rally-Raid rear caliper ultrasonic clean

It only remains to mention my final bullet point. Initially I sat about 6ft(2m) away from the bath while it was running, the noise is not pleasant but bearable or so I thought. After about five minutes I started to feel a little nauseous. The lid was on and it was operating in a well ventilated area, so I didn’t think it was fumes from the cleaning solution, so figured it was exposure to sound I COULDN’T hear – it is an ultrasonic cleaner after all! In the end I left it to do its thing and sulked at the far end of the workshop and within a few minutes felt better again. The unit doesn’t come with any warnings beyond electrocution (lots of them!) … so be careful folks and don’t stay too close when it’s operating! 

Conclusion – I’m happy with the results bearing in mind that the caliper was well used and had suffered in storage. Now it is resplendent with new seals, a light wipe over with ACF50 and new home in a Zip bag and a better box. I’m really looking forward to using this cleaner on the triple bridge Brembo calipers and that may well be sooner rather than later, as Mr Postman has just this minute delivered the new brake lines and banjos from Venhill, wahoo!!!

Time for a bath …

Aprilia Caponord ETV1000 Rally-Raid Brembo P34 (4 pad) seal kitSeems like brakes have become one of the hot winter topics of late, both on the AF1 forum and in the Moto-A household. The Caponord’s Brembo P34 (4 pad) calipers are getting a little sluggish and starting to drag the pads on the front disks. I’ve cleaned and exercised the pistons but they still feel the same. To be fair the seals are probably somewhere around 20 years old and have every right to feel stiff these days!

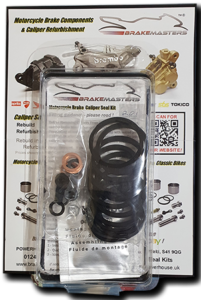
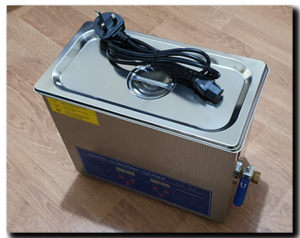
So I ordered a seal set from Powerhouse in the UK for £66 (both calipers). They seem to get excellent reviews and I have to say the kit is comprehensive – even containing a little bag of Brembo grease! Of course one thing led to another and thoughts of how best to clean up the calipers resulted in another fine purchase – a 6l ultrasonic cleaning bath! Now that just leaves me watching YouTube videos and experimenting with various cleaning solutions to find the one most suitable for the brakes, luckily I have a stash of old ones kicking around that are perfect for experimentation. 

Aprilia Caponord ETV1000 Rally-Raid Digital Ultrasonic cleaning bathWhen health, weather and motivation are all in alignment over the festive period I’ll make sure the camera battery is charged and do my best to document the little adventure for posterity on the website. It will also be a great opportunity to try out the new torque wrench that I don’t know I’m getting for Christmas ….. 😀 

Introducing the ‘Capogiro’ unit ….

Aprilia Caponord ETV1000 Rally-Raid & Capogiro dynamic brake light unitFirstly may I say that we here at moto-abruzzo wish each and every one of you a very Merry Christmas and hope that 2018 brings good roads and big smiles on those shiny Caponords of yours!

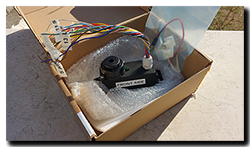
Secondly, fellow Capo owner and electronics whizz Michele from Italy (MCR on AF1 forum) got in touch about his Mk3 ‘Capogiro’ unit. Based on the BMW Dynamic Brake Light system, it uses a microcontroller and a 3-axis gyro/accelerometer unit to control the brake light and hazard warning lights, as well as having other useful outputs. In a nutshell the DBL function is:

    • Normal brake light function under all light/medium braking conditions
    • Brake light pulsed at 5Hz when braking hard (>0.35g) from between 14Kmh (9mph) and 60Kmh (37mph)
    • Below 5Kmh (3mph) normal brake light function is restored
    • If still braking hard at below 5Kmh (3mph), the hazard lights are turned on automatically
  • They will then remain on for 60 seconds OR until the speed is greater than 20Kmh (12mph) for xx seconds

This then is the primary function of the unit. But Michele didn’t stop there, he’s added a raft of other useful functions as well, including:

    • Add a handlebar switch and you have rider switchable hazard warning lights
    • Drop the bike on its side and the opposite (high side) pair of indicators will operate in a kind of half-hazard mode to alert others of an obstruction on the road
    • Leave the indicators on too long and the system will give you an audible alarm to remind you to turn them off …. who hasn’t done that!
    • A basic but useful alarm function. Add a hidden switch and intercept a relay and the unit will use the gyros and accelerometers to know if it’s being moved and set off the horn/hazards as well as immobilise the engine.
    • It also has the ability to do what Aprilia never did – keep the headlights switched off until the engine is running, then turn them on, vastly reducing battery drain on starting.
  • And last but not least the ability to interface with an eCall device that alerts others that you may need assistance.

Each of these functions is well thought out with outputs all protected and battery status being analysed so as to not activate certain functions which could possibly prevent the bike from starting due to low voltage. All in all, a well thought out and professionally built unit. All this fits into a neat 122mm * 39mm * 31mm package that is designed to locate on top of the headlight behind the windscreen. Granted, if you use all the functions then there are a fair few wires to be connected, but if you don’t want to use a particularly function(s) then just don’t hook up those particular wires, easy! And the cost for this little box of wizardry …… currently €120, not cheap granted, but for the safety features and added additional functions thrown in, I think it’s well worth the money. You can download a copy of the installation instructions in English HERE or in Italian HERE.

OK, sounds great but is it legal to use? Well BMW have added a similar system because it conforms to EU legislation and they sell bikes fitted with it in the UK. But the fact is they DO appear to fall foul of the Highway Code rule 116 (watch their own videos):


“….. You MUST NOT use hazard warning lights while driving or being towed unless you are on a motorway or unrestricted dual carriageway and you need to warn drivers behind you of a hazard or obstruction ahead. …… “


In other words, if the hazard lights activate while moving on any other road than motorways/unrestricted dual carriageways then that’s a legal no-no …. even if it is helping to save your pride and joy (and skin) from some inattentive muppet driving too close behind!

So the bottom line seems to be that a big manufacturer can bend the rules but we, no doubt cannot. Fitting it then may be legally questionable, on the other hand if it increases safety, makes no visible changes to your bike in day-to-day use AND will most likely never be noticed during an MOT test or roadside inspection ……….. well then that’s up to you, I cannot condone anything that would possibly break local or international law in any way shape or form, no siree Bob. Me? I’m only testing it off-road of course. 😉

If you’re interested in more information or would like to buy on, please drop me a line with your details and I’ll forward them to michele for you.

And that just leaves me to express my own gratitude to Michele for not only sending me a Capogiro to try, but also sharing ‘under the bonnet’ details so that I can get a better understanding of how the functions work. I owe you one Michele! 😀

Growing old is inevitable, growing up is optional!

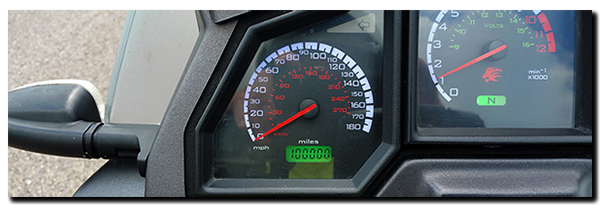
It seemed like the remaining miles were clocking up painfully slowly although the cruise control was locked at a solid 80mph (130Kmh). Here we are then, the Capo and I heading back to the UK and currently passing through Verdun, a section of motorway with bends and hills – certainly a touch more interesting than the bland featureless flat-lands of Northern France that’s for sure. Finally the odometer clicks over one more mile and we’ve done it – 100,000 miles!

Aprilia Caponord ETV1000 Rally-Raid 100000 milesI pop the hazards on and roll to a halt on the hard-shoulder. The traffic is light and I’m only stopping long enough for a quick photo, I know I shouldn’t, but this one’s a biggie!
Aprilia Caponord ETV1000 Rally-Raid 100,000 milesWe’re not the first by a long chalk …. Capo’s around the world have hit 100K miles since the late 2000’s. One in Italy did 125K+ and one in the USA 135k+ and there are others most definitely. But the number is low and I’m proud that my Capo and I have joined this small band of owners that have proved the reliability and longevity of our wonderful bikes. As I write this, the Capo now shows 102,698 miles and is all set for a bit of TLC after the ceaseless battering of rain it endured over the last three weeks. Along the way it gained a new MOT, a set of Anakee Wild tyres and a fresh pair of Brembo 07BB2035 brake pads for the rear caliper. In return it ran faultlessly, even in the face of rain the like of which I’ve not come across in many a  year.

One way of checking the brake lights work!

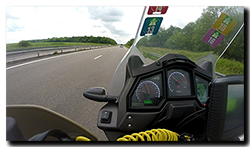
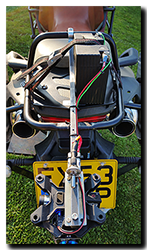
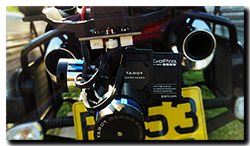
Aprilia Caponord ETV1000 Rally-Raid BMW Dynamic Brake Light SystemWell it’s time to test out the prototype of the BMW-clone Dynamic Brake Light System ……… but how to keep an eye on the tail-light and hazards when riding around? Dig out a bit of scrap metal, the old Shorai battery and the Tarot 2D gimbal/GoPro camera combination – that’s how! 😀

Pardon the pun … but the Shorai battery was a complete non-starter as far as getting the Capo to wheeze into life (below 12C anyway!), so it spent the next few years doing various duties. Replacing the battery in my computer UPS (uninterruptible Power Supply) for one, then running the dashboard test-rig for a while before being the power supply of choice to run the Tarot gimbal or any home-brew datalogging/test kit that needed 12V. To be fair it’s 4½ years old, stored in the barn for extended periods, recharged with a crude 6V/12V charger, run flat as a pancake and overcharged …. and it still keeps working!

Aprilia Caponord ETV1000 Rally-Raid BMW Dynamic Brake Light System GoPro Tarot 2D gimbalSo now we’re ready to rock the highways and byways with the gimbal/GoPro hopefully grabbing the footage I need. Once it’s done I’ll turn the gimbal around and grab some more quirky footage facing backwards! 😯

g this is fun!

Aprilia Caponord ETV1000 Rally-Raid Dynamic Brake Light SystemI’m not really enthusiastic about the constant onslaught of technology on motorcycles …. the cynic in me sees mostly a revenue-earning exercise whereby the benefits to you and me are far outweighed by the locked-out, take-it-to-the-dealer and be fleeced mentality of the manufacturers.

But occasionally I do spot something that tweaks the nose of my flagging interest …. this time it’s been the BMW Dynamic Brake Light system. Trying to get the myopic, half-asleep nit-wit to notice the difference between my normal braking and HARD BRAKING is sometimes a real issue. There’s nothing worse than gliding to a halt only to hear some plank with full ABS active about to kiss my back wheel! Hmmm so how hard can it be to make a box of tricks to do the same as the BMW system and fit it on the Capo …..

Well a tad more difficult than I first thought that’s for sure! The BMW system seems to work as follows:

  • At speeds over 50Kmh(31mph) when braking HARD the brake light pulses at 5Hz*
  • When the speed drops below 14Kmh(9mph) while still braking hard, the hazard lights are activated.
  • When the speed rises back above 20Kmh(12mph) the hazards are turned off.
  • At all other times the brake light functions as normal.

*EU rules quote a rate of 4Hz (±1Hz) for LED’s and 4Hz (-1Hz) for incandescent bulbs.

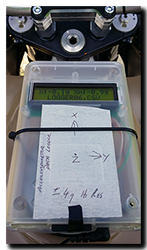
Aprilia Caponord ETV1000 Rally-Raid accelerometer dataSo how to replicate this on the Capo? Enter one test-box to get things started …… a microcontroller that measures acceleration in three axis and has inputs/outputs to the brake light, hazard lights and speedometer. The box of tricks is designed to allow normal brake/hazard light function in case of power or hardware failure … all in the name of safety don’t ya know.
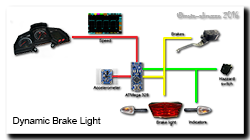
Getting usable data from the accelerometer was harder than I thought ….. the thing is VERY sensitive and has needed a lot of filtering and data-smoothing to get usable info from it. But after a couple of days and quit a few emergency stops (all good practice!) the data is starting to look good.

Aprilia Caponord ETV1000 Rally Raid Dynamic Brake Light SystemNext up, I need to input the Capo’s speed to the microcontroller. For this I’ll use the speed output pin directly from the dashboard – I knew it would come in handy one day! All the inputs are buffered with opto-isolators to make sure the system is as well protected from the noisy fluctuating voltage in the Capo’s loom as is possible. Now with the prototype well under way, it just remains to find answers to some other  questions ….. such as what about braking on wet, loose, icy surfaces where deceleration will be significantly less, but the dynamic brake light might still be useful. My guess is the BMW system has some integration with the ABS system to shift the triggering point, but I don’t have ABS! This one I’ll have to ponder on a while longer.

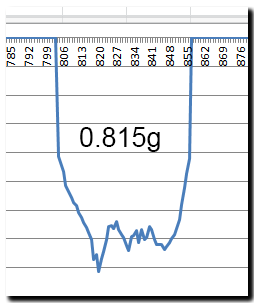
One things for sure …. you learn a lot about braking forces, motorcycle dynamics and breaking code doing this malarkey! Oh and I’ve found out that a warm front tyre breaks grip at about 1.1g …… 😳


Clutching at straws …..

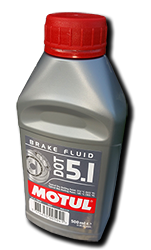
Aprilia Caponord ETV1000 Rally-Raid DOT5.1 clutch & brake fluidClutch slave cylinders/seals and brake fluid can be almost as emotive as good old engine oil, everyone has an opinion. Well I’ve just changed brake/clutch fluid after about 15 months, usually I’d do it every 6 months or so, but somehow I’ve ended up getting a bit lax and let it slide. So for what it’s worth, here’s how things have worked out on my own Capo over the years.
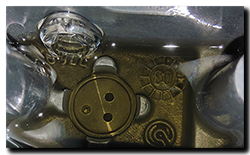
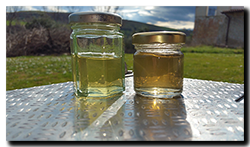
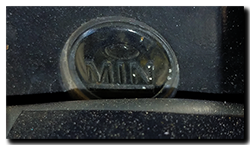
Aprilia Caponord ETV1000 Rally-Raid clutch master cylinder DOT5.1 fluidI think everyone will agree that it’s the clutch fluid that takes the most punishment, followed by the rear brake. So here’s a couple of photographs of the inside of the master cylinder straight after opening it and a comparison of the fluid drawn off, with straw colour of new fresh oil from a sealed container. No black residue in the master cylinder and only a slight colour change in the oil with almost no cloudiness. The fluid drained from both front and rear brakes was almost like new, but it’s nice to keep the fluid fresh anyway.

Aprilia Caponord ETV1000 Rally-Raid DOT5.1 brake & clutch fluid In comparison the oil I used to drain at 6-12 month intervals from the clutch was cloudy with black residue in the master cylinder and the rear brake was frequently amber in colour, only the front brakes seemed to show little degradation – all this was while using DOT4!

Todays oil is DOT 5.1 and has done 27,143 miles over 15 months

I’ve been using DOT5.1 now for the past five years and the first (10 year 44K miles) clutch slave seal was replaced in late 2013, not because it failed, but because it seemed to be letting a little air back into the system after long (24Hr+) runs – enough to give an extra 4-5mm or so of free play at the ball end of the lever otherwise it seemed fine in normal day-to-day use. Seal replacement was purely precautionary. The replacement seal has been used with DOT5.1 its entire life (2½ years 45K miles) and is showing no sign of leakage or air ingress. So to date it’s cost me one seal (€17) versus going out and buying a €90 aftermarket cylinder … I know which mast I’m nailing my colours to!

Aprilia Caponord ETV1000 Rally-Raid clutch master cylinder window bubbleAnd finally ….. always ALWAYS make sure the level of fluid in the reservoir is right. It is so damn easy to overfill this one. My prefered method is to drain off most of the reservoir fluid once the system is bled (don’t expose the ports) then refit the rubber bellows and use a syringe to inject fluid back in while watching the bubble. Leave quite a big bubble showing, because when you screw down the cap the volume (and bubble) shrink a little.
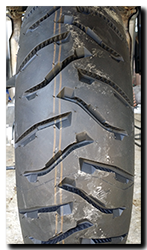
Bye bye Karoo 3 …. hellooooo Anakee 3!

Aprilia Caponord ETV1000 Rally-Raid with Michelin Anakee 3 tyreWell yesterdays arrival of a spanking pair of Michelin Anakee 3’s makes the total number of tyre types fitted to the Capo a head spinning …… 5. The OEM fit Tourance, oodles of TKC80’s and Karoo 3’s and one fantastic set of Anakee 2’s. They were by far the best with excellent grip and long life – so the Anakee 3’s have a hard act to follow, I wonder how they’ll compare.
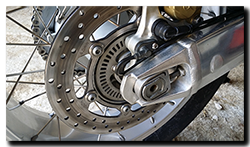
With the back wheel dropped out, I decided to give everything a once over and quick scrub-up – nice and shiny like. The vernier showed the rear disk had finally met the minimum thickness (4.5mm), so off it came and on went a nice almost-new one from an Aprilia Caponord ETV1000 Rally-Raid rear wheel and disk with Michelin Anakee 3 tyre07 bike …. a floater instead of fixed. Now I must admit to being more than a little perplexed at what the hell Aprilia were thinking about when making the rear a floater – front yes, but rear! What for, where’s the benefit? With 74,710 miles on it, I can’t ever remember riding around thinking ‘damn this bike’s just screaming out for a floating rear disk’ But in the end, it’s what I had in my sack of goodies, so it’s what went on. With the rear done, the fronts looked a little sorry for themselves, so I pulled them off and gave them a once-over and spring re-tension …… I must say they do look rather nice again!

Rear wheel bearings, seals and cush rubbers are original and all in perfect condition, so the spares can stay in the cupboard for a while longer yet. The front bearings and seals that I replaced back in 2009 (@11,700 miles) are also fine – packing the void between the bearings and seals to prevent water getting trapped seems to work wonders! So now she’s all buttoned up and a final wipe with a soft cloth and ACF50 to fend off the corrosion gremlin should do the trick nicely.

A pivotal moment

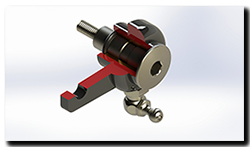
Aprilia Caponord ETV1000 & Rally-Raid rear brake lever pivot and grease nipple CAD graphicSometime last year I decided that 2015 was going to be the year that a whole bunch of parts were going to get cleaned up and recoated – engine/sump protection bars (especially the mounting brackets), headlamp guard and passenger foot peg hangers for a start.

The accessory parts seem to be made substantially cheaper than the bike parts themselves – stamped, pressed, bent and welded with a flash of cheap paint to top it off. All well and good for a couple of years, but the elements soon work their magic and the stuff begins to look jaded and rusty. No, if you want it to look good and last, you’ve got to pick up where the Aprilia contractor left off ….. Debur, remove weld spatter and radius any and all sharp edges you can find, THEN get a quality finish applied. That’s the plan anyway!

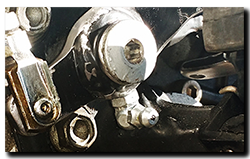
Aprilia Caponord ETV1000 & Rally-Raid rear brake pedal and grease nippleSo to kick off I took the spare rear brake lever and began to radius the sharp edges and smooth the lumpy stamped (or laser cut) edge … I have to say it was looking (and feeling) rather nice when I downed tools and wandered indoors for a brew.

It was while standing there aimlessly waiting for the kettle to boil that I thought about adding a grease nipple to the pivot – Aprilia have done a good job in making the bolt grooved to hold a reservoir of grease AND fitting two ‘O’-rings (OR114 – 1.78mm section / 11.11mm ID) to keep the grease in …… but a grease nipple would make packing the grease in and replacing it soooooo much easier!

In the end it only took 30 minutes ….. grinding a flat on the underside, drilling and tapping a 6mm hole and screwing in a 90° fitting. What do you think?