Fuel Injectors & RST Throttle body

Aprilia Caponord ETV1000 Rally-Raid RST Futura throttle body rebuild
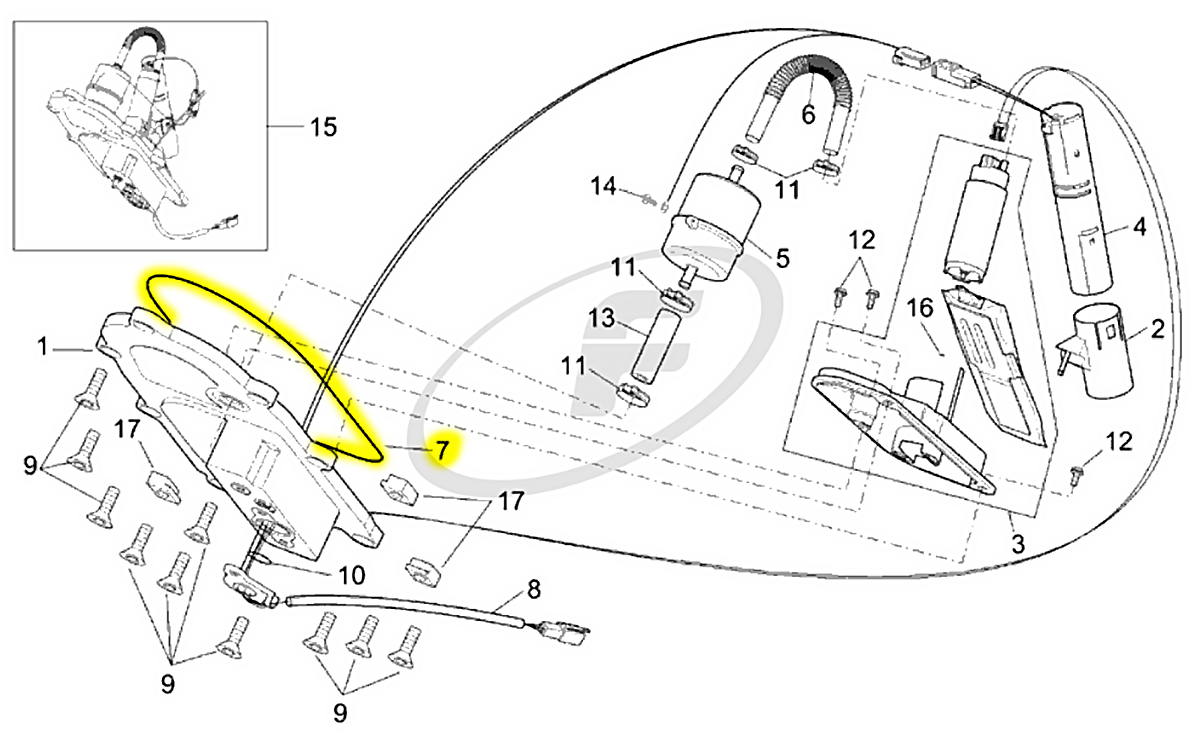
Sometime way-back-when, I bought a used set of throttle bodies off an RTS Futura (51mm v Caponord 47mm) with the view of doing some tuning/comparison work on the Raid with the 3D printed hybrid velocity stacks (51mm diameter but Caponord height). What really happened though was far less glamourous and only involved a sturdy box and a shelf! But about a month ago I dug them out again and realised that I pretty much had all the ingredients required to do a full clean and rebuild. I had stainless steel 4x10mm and 5x12mm Torx screws on the shelf as well as all necessary seals. The ultrasonic cleaning bath would do the brunt of the work and I could send the injectors away for professional cleaning at a reasonable cost.Aprilia Caponord ETV1000 Rally-Raid RST Futura throttle body rebuild

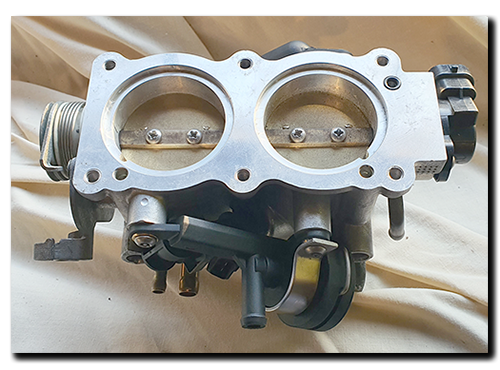
And so, with a plan to hand, apart it came. First the injectors were sent away for cleaning. The turn-around was quick and the total cost was about £30 including P&P. Thankfully both injectors got a clean bill of health. Next, the throttle body and associated parts went into the ultrasonic cleaning bath. I had bought the 6L version …. but when you take into account the smaller basket inside, the usable capacity is probably something more like 4 – 5L … just enough luckily, for the throttle bodies. If I was in the market for another one, I’d definitely opt for the 10L or maybe even try to stretch to the 15L for good measure.Aprilia Caponord ETV1000 Rally-Raid RST Futura throttle body rebuild

It was amazing the amount of debris that came out of them … in the end they looked almost brand new again! The rebuild was very straight forward with all new ‘O’-rings and screws used. Pleased? Yes I think so. They are refurbished and ready for action which is the important thing. The only downside is that some of the mild-steel components are still showing a patina of rust. It would have been nice to re-plate them to give them that as-new look as well. For now I’ve cleaned off what I can and coated the parts for protection, but one day I’d like to have a crack at home plating … zinc, nickel or passivate of some sort might be interesting.
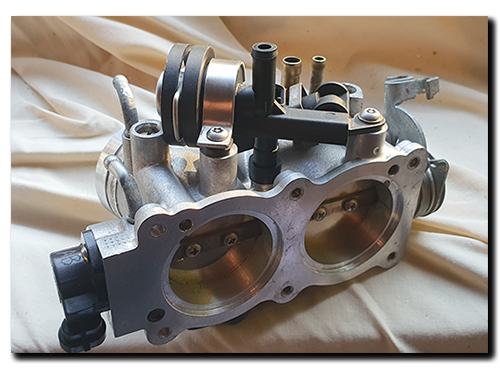
  Aprilia Caponord ETV1000 Rally-Raid RST Futura throttle body rebuild

Parts used:

2x   4x10mm Stainless Steel Torx screws

4x  5x12mm Stainless Steel Torx screws

4x  10mm OD 2mm section Viton O-rings

2x  14.1mm OD 2.4mm section Viton O-rings

2x  BS203 O-rings

1x  BS008 O-ring

Just throwing it out there ……. If I were to offer these out as a bagged kit, would anyone be interested?

Seal of disapproval

Aprilia Caponord ETV1000 Rally-Raid AP8144478 O-ring fuel pump plateFair to say, things have REALLY dragged on this year. The fuel tank overhaul I mentioned in May and planned to do in July is still firmly on the to-do list -why?

I had 90% of the parts on the shelf in June and only had a couple of ‘O’-rings to order. The parts lists don’t give a size for these particular seals, so I needed new ones from Aprilia to measure for future reference – no problem really, they’ll only take a week or so to arrive I thought. Yeah right.

So I put together a list of parts and punched them into the Fowlers online ordering form. All items were available – except one. The dreaded ‘back order’ item. The deal was, wait for the back-order part and we’ll ship them all together, or we’ll send the in-stock items and charge you £3.95 to post the one remaining tiny back-order item. I decided to wait. 

And wait they made me do alright ….. almost two months in fact!

In the end the parts arrived of course, but by then the warm and dry summer weather had given way to almost daily rain and nights drawing in earlier and earlier. But on a positive note, I have now measured the main O-ring I was interested in and can finally post up the size and alternative (UK) that you can have delivered within a day or two, not months! Far quicker and quite a saving on the £30.30 plus delivery for the genuine part.

AP8144478 Equivalent:     142.88mm ID  5.33mm cross section – Viton

£13.91 plus VAT (for two) from Simply Bearings Ltd (October 2019) – Thanks to Beasthonda for measuring for me!


Feeling a little bunged up

The Capo now has 3D printed bungs in the swing arm pivot and the ends of the crash-bar mounts. They’re held in by 43-39-2, 14-10-2 and BS011 ‘O’-rings. And yes, the BS011 rings are the very same as those used on the fuel lines. So one day if the old girl springs a leak and needs a new fuel line ‘O’-ring by the roadside – no problem, whip out a crash-bar bung and pinch the ring!  Next ….. front and rear axles then the engine mounts above the swing-arm pivot .

A pivotal moment

Aprilia Caponord ETV1000 & Rally-Raid rear brake lever pivot and grease nipple CAD graphicSometime last year I decided that 2015 was going to be the year that a whole bunch of parts were going to get cleaned up and recoated – engine/sump protection bars (especially the mounting brackets), headlamp guard and passenger foot peg hangers for a start.

The accessory parts seem to be made substantially cheaper than the bike parts themselves – stamped, pressed, bent and welded with a flash of cheap paint to top it off. All well and good for a couple of years, but the elements soon work their magic and the stuff begins to look jaded and rusty. No, if you want it to look good and last, you’ve got to pick up where the Aprilia contractor left off ….. Debur, remove weld spatter and radius any and all sharp edges you can find, THEN get a quality finish applied. That’s the plan anyway!

Aprilia Caponord ETV1000 & Rally-Raid rear brake pedal and grease nippleSo to kick off I took the spare rear brake lever and began to radius the sharp edges and smooth the lumpy stamped (or laser cut) edge … I have to say it was looking (and feeling) rather nice when I downed tools and wandered indoors for a brew.

It was while standing there aimlessly waiting for the kettle to boil that I thought about adding a grease nipple to the pivot – Aprilia have done a good job in making the bolt grooved to hold a reservoir of grease AND fitting two ‘O’-rings (OR114 – 1.78mm section / 11.11mm ID) to keep the grease in …… but a grease nipple would make packing the grease in and replacing it soooooo much easier!

In the end it only took 30 minutes ….. grinding a flat on the underside, drilling and tapping a 6mm hole and screwing in a 90° fitting. What do you think?